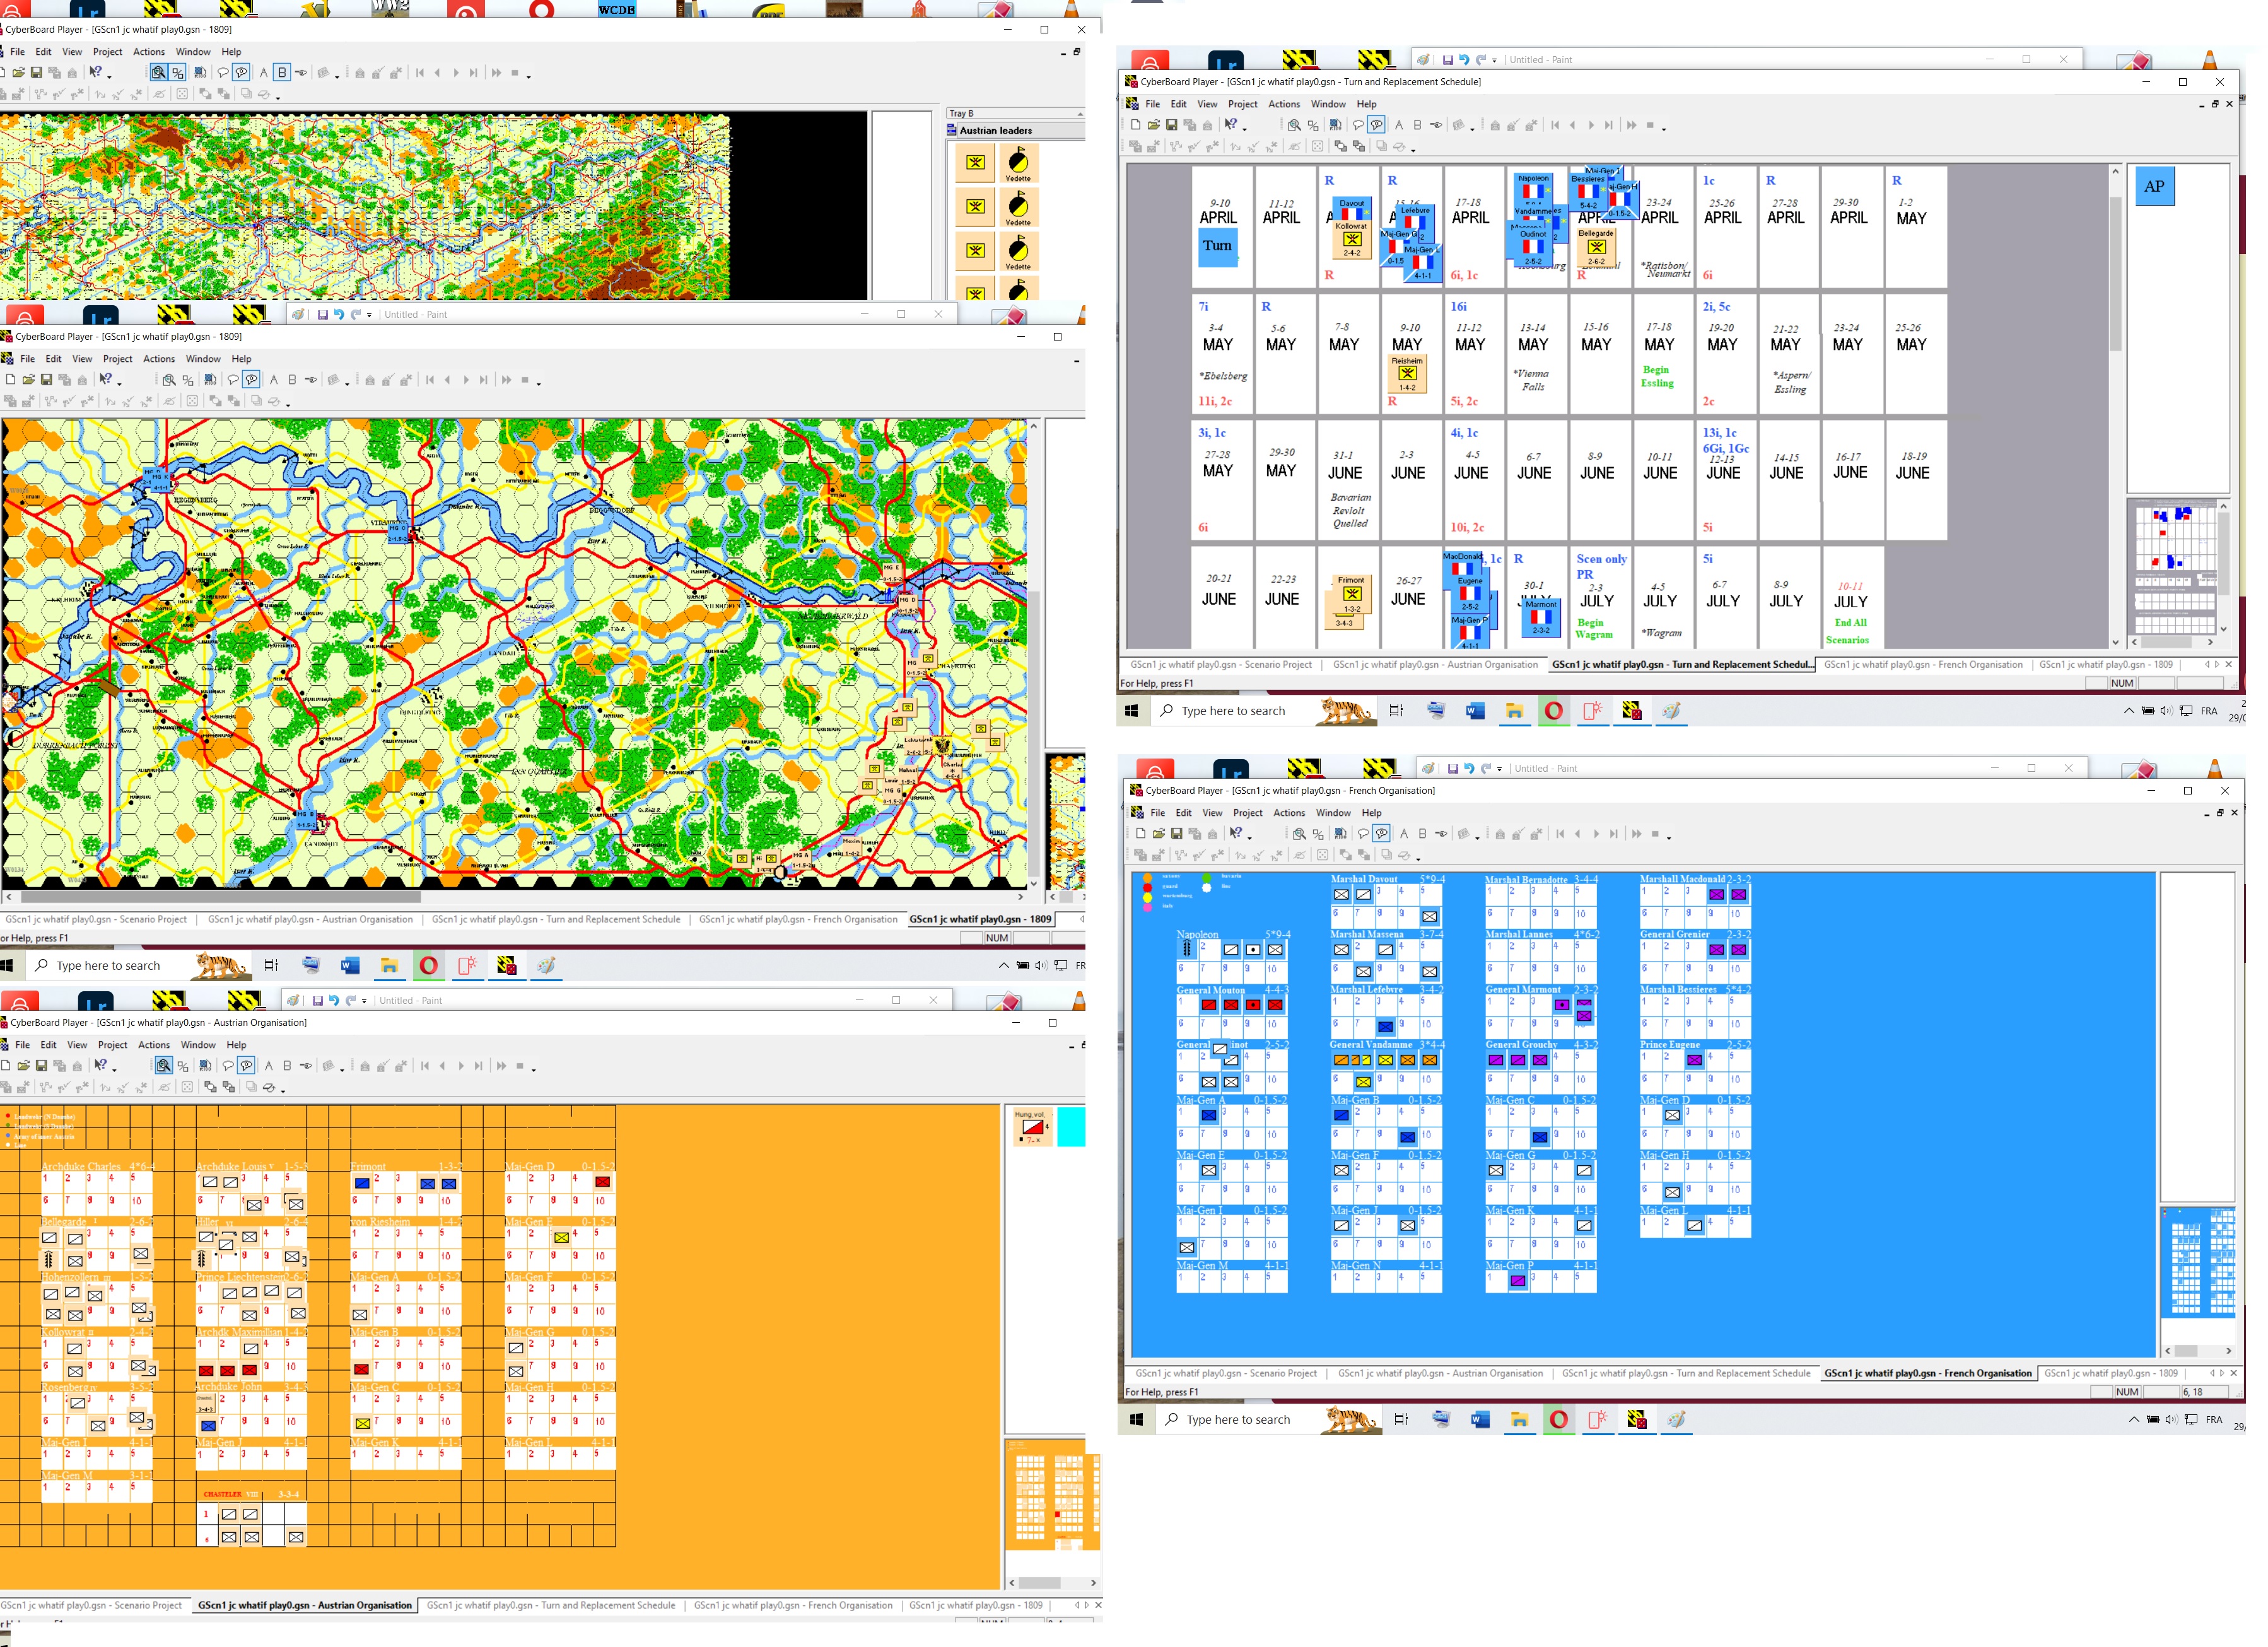
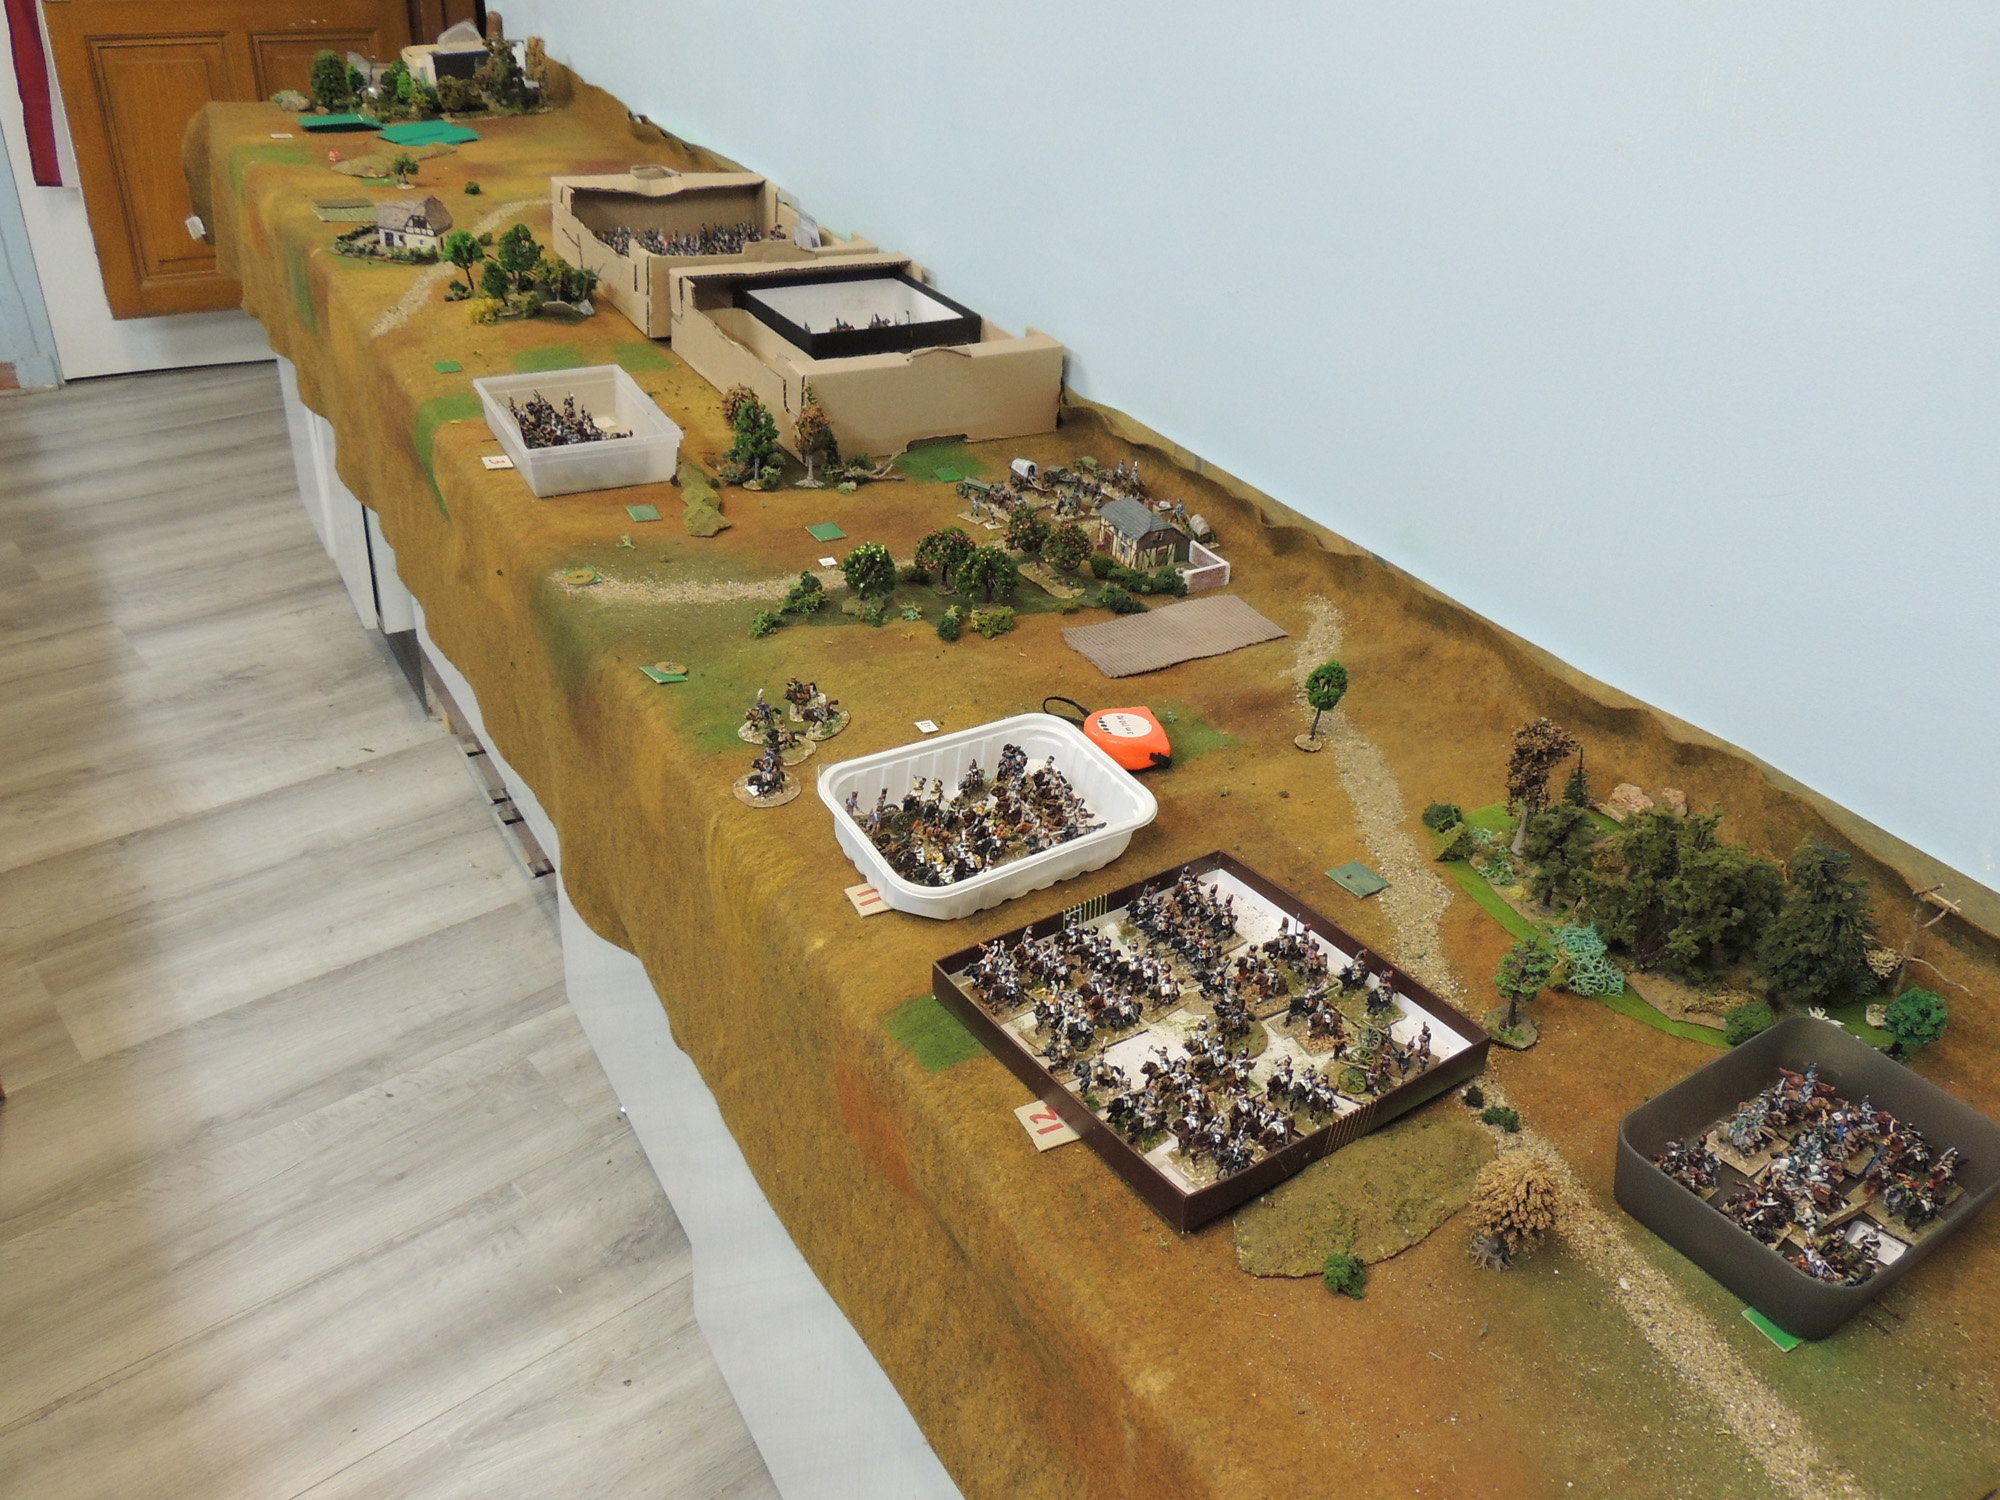
Cyberboard screens
I do have the board game with counters et all, but for ease of play (for cat patrols too) for use here on the site too and as I created units, I will use the Cyberboard module on the computer. A sort of what-if campaign too as I can't stand Bernadotte so exit the rat. Vandamme will have a Saxon and a Westphalian division, the only ones I have without borrowing. A sort of north German addition to his Württembergers.
More important the Austrians, I think, historically hardly stand a chance, weaker in command flexibility, barely adequate in numbers and weaker in cavalry. So I helped them a bit in a plausible way. The Hungarians got enthusiastic and they have a division of Insurectio cavalry, more Landwehr and bits taken from the silly attempt at Warsaw.. Not so much but well, I am not to go fantasy after all! I might even play the Italian battles to see if Eugène does manage to come. This is also an ambitious test to see how to manage the combo map and table battles. Might be trying to have someone to at least play the strategic part on line one day. Then 1807, 1812, 1813 are waiting for the same treatment, 1815 maybe ..
Cyberboard screens
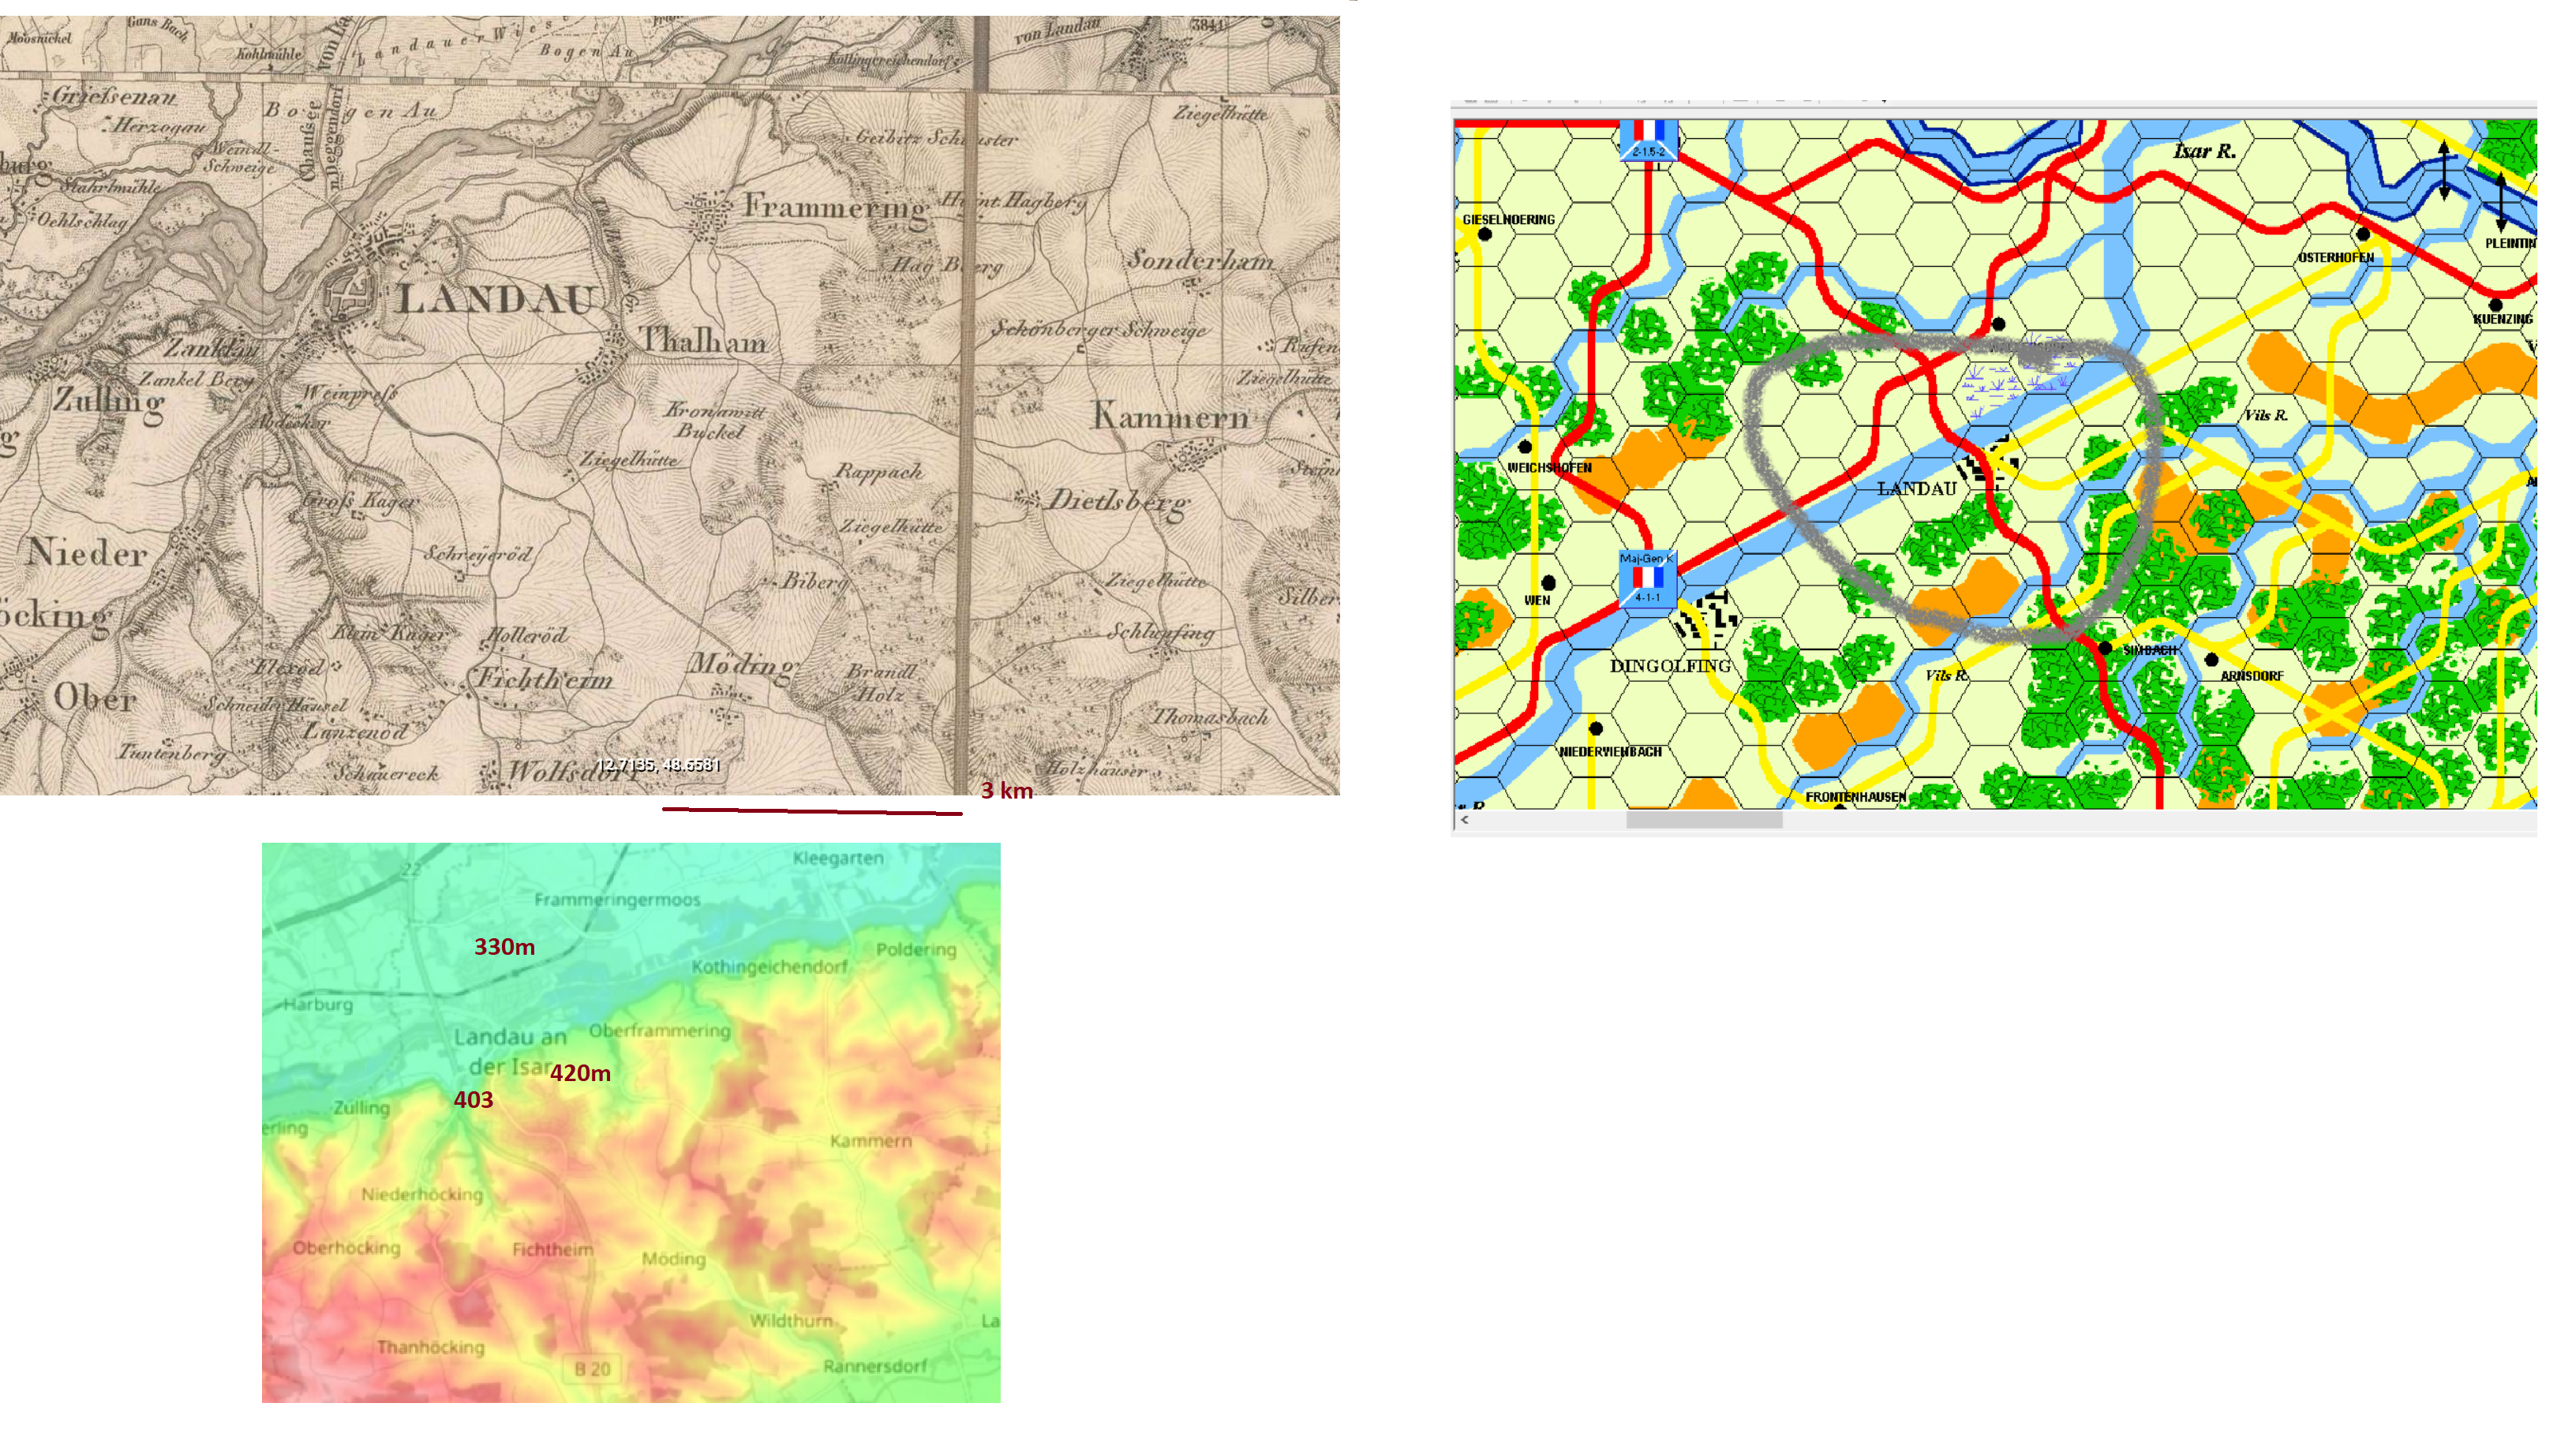
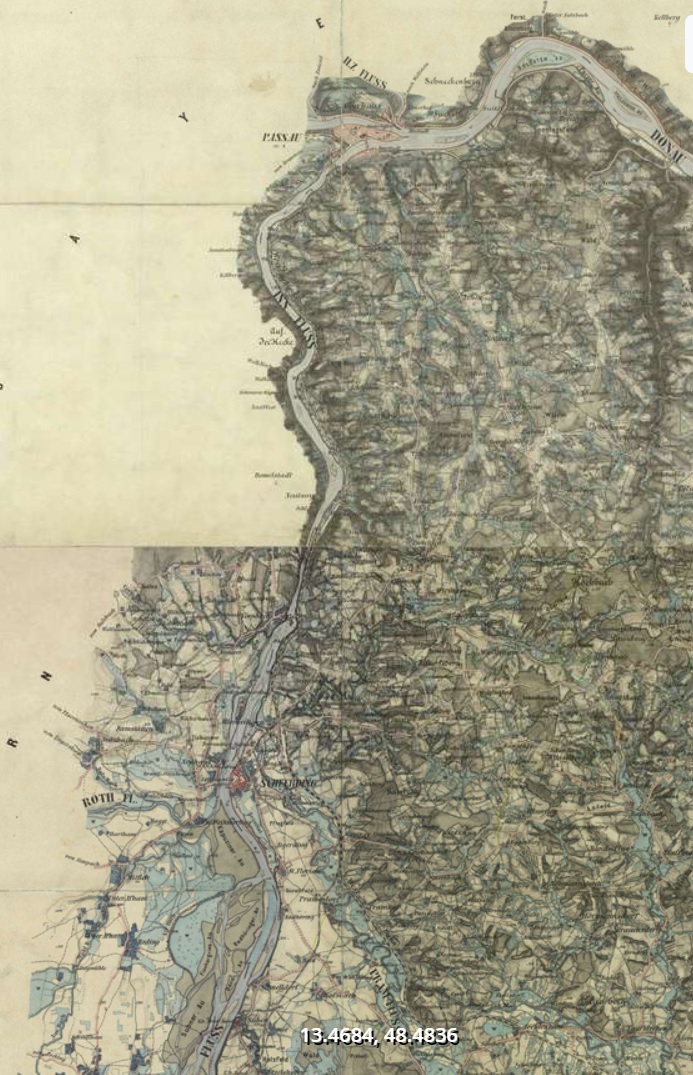
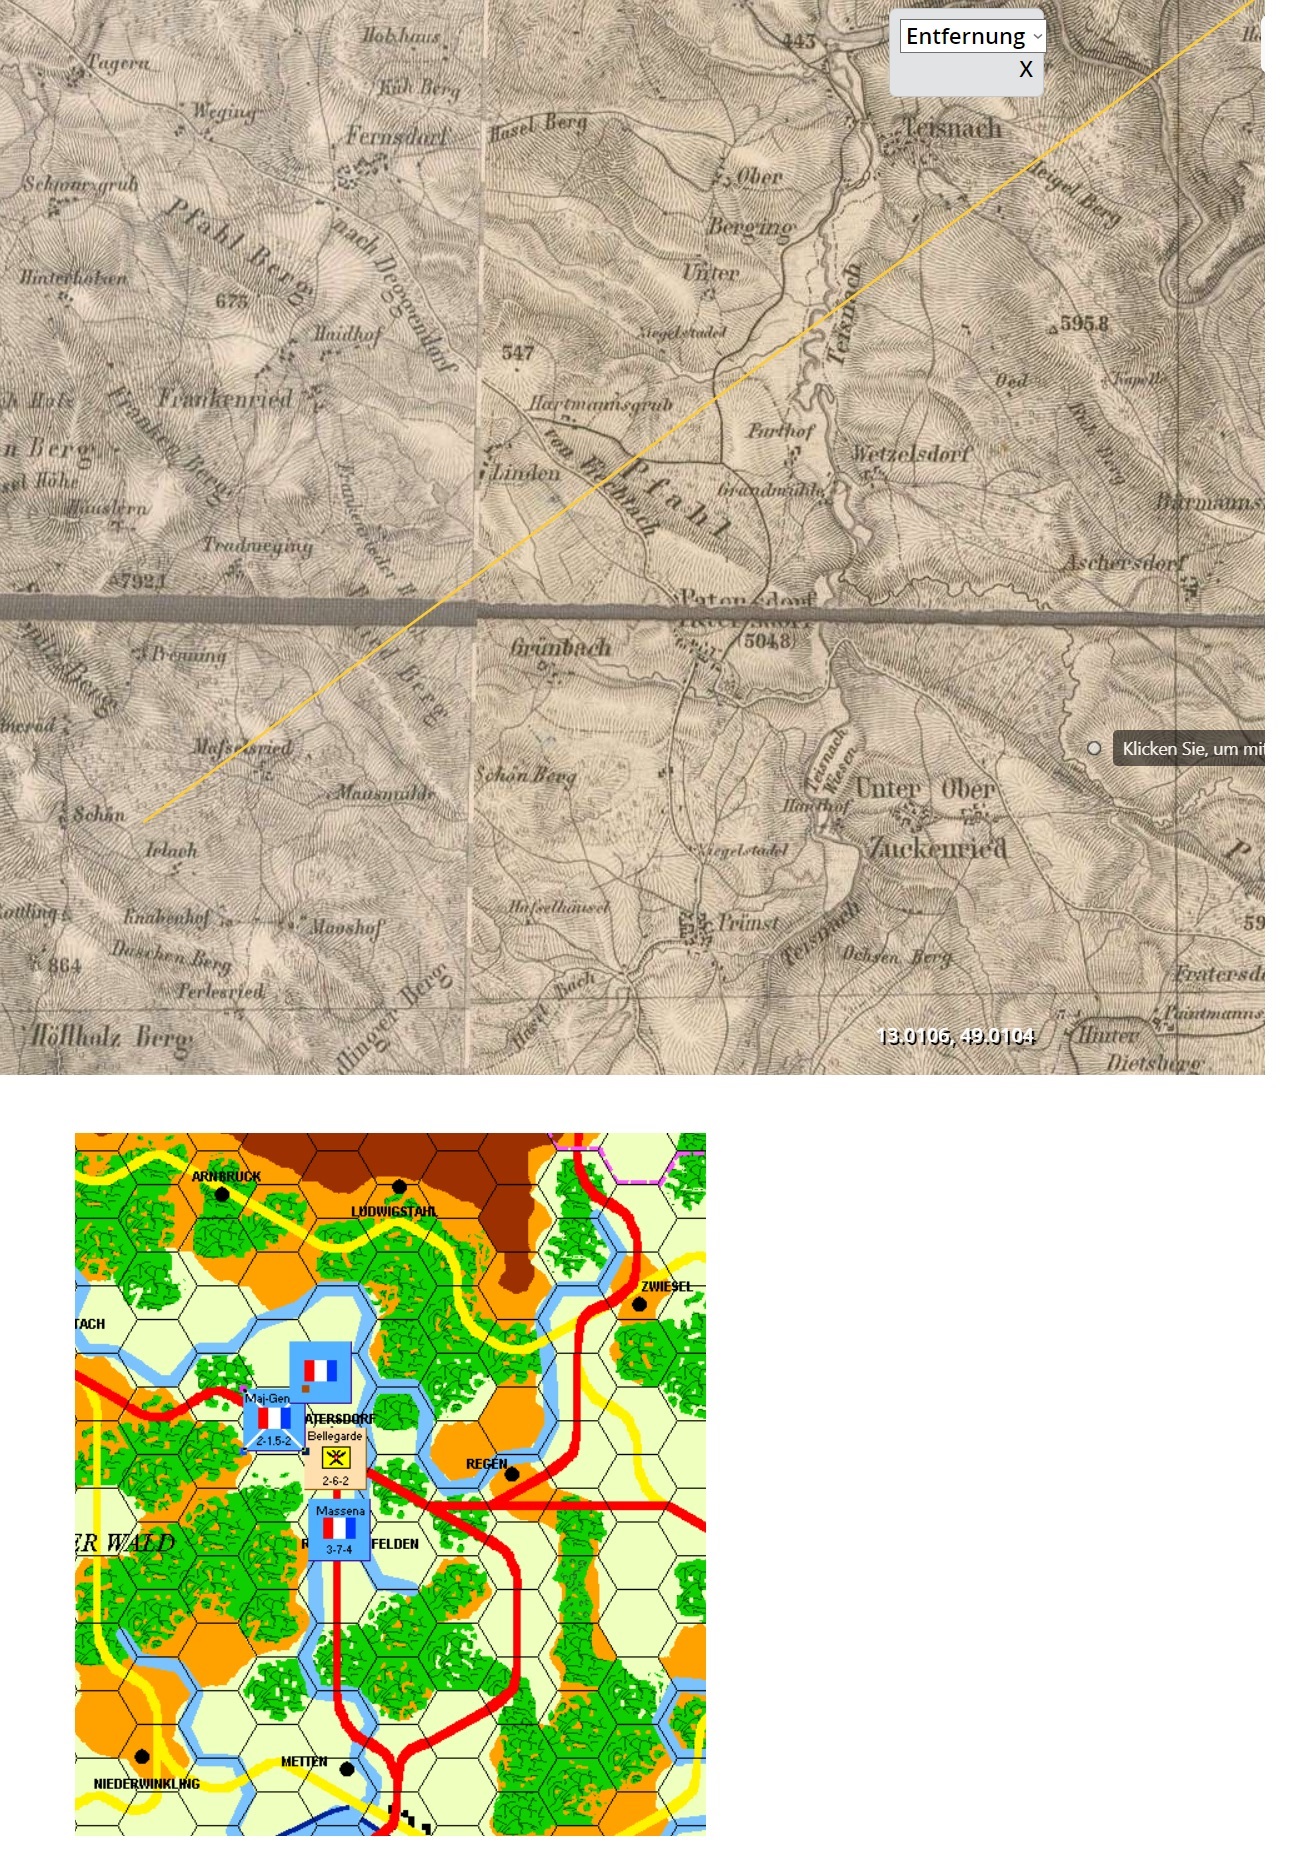
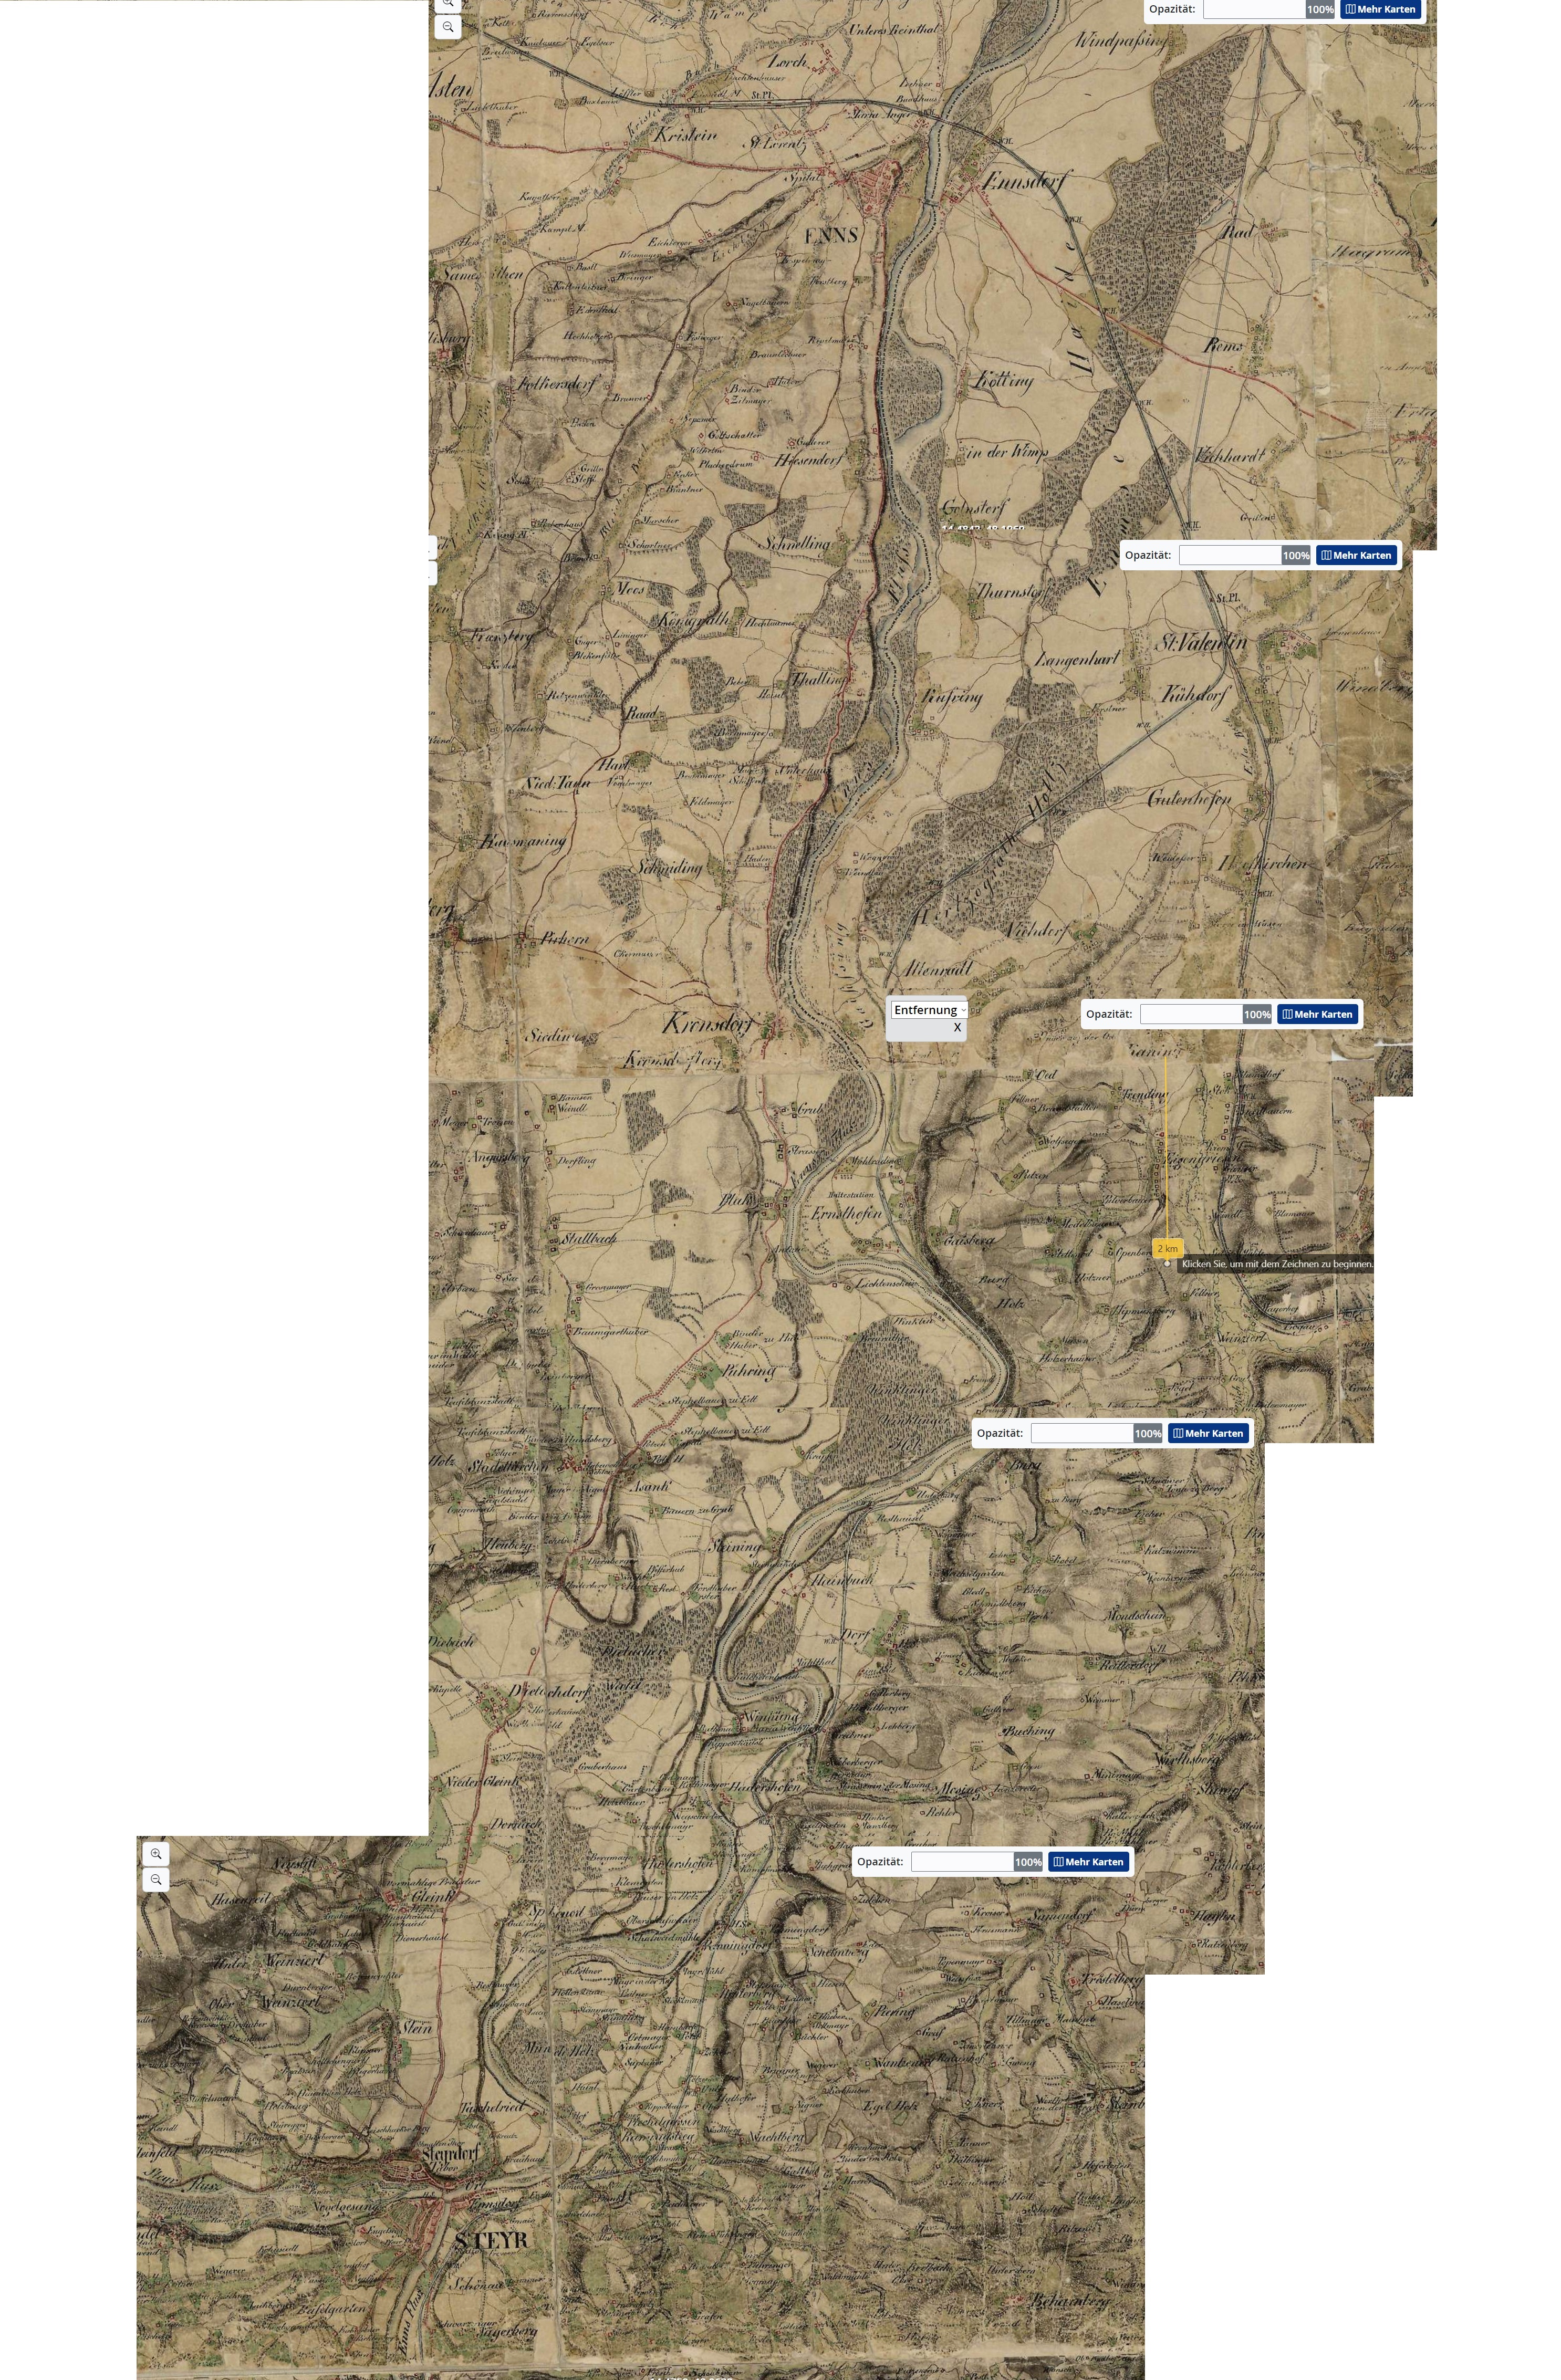
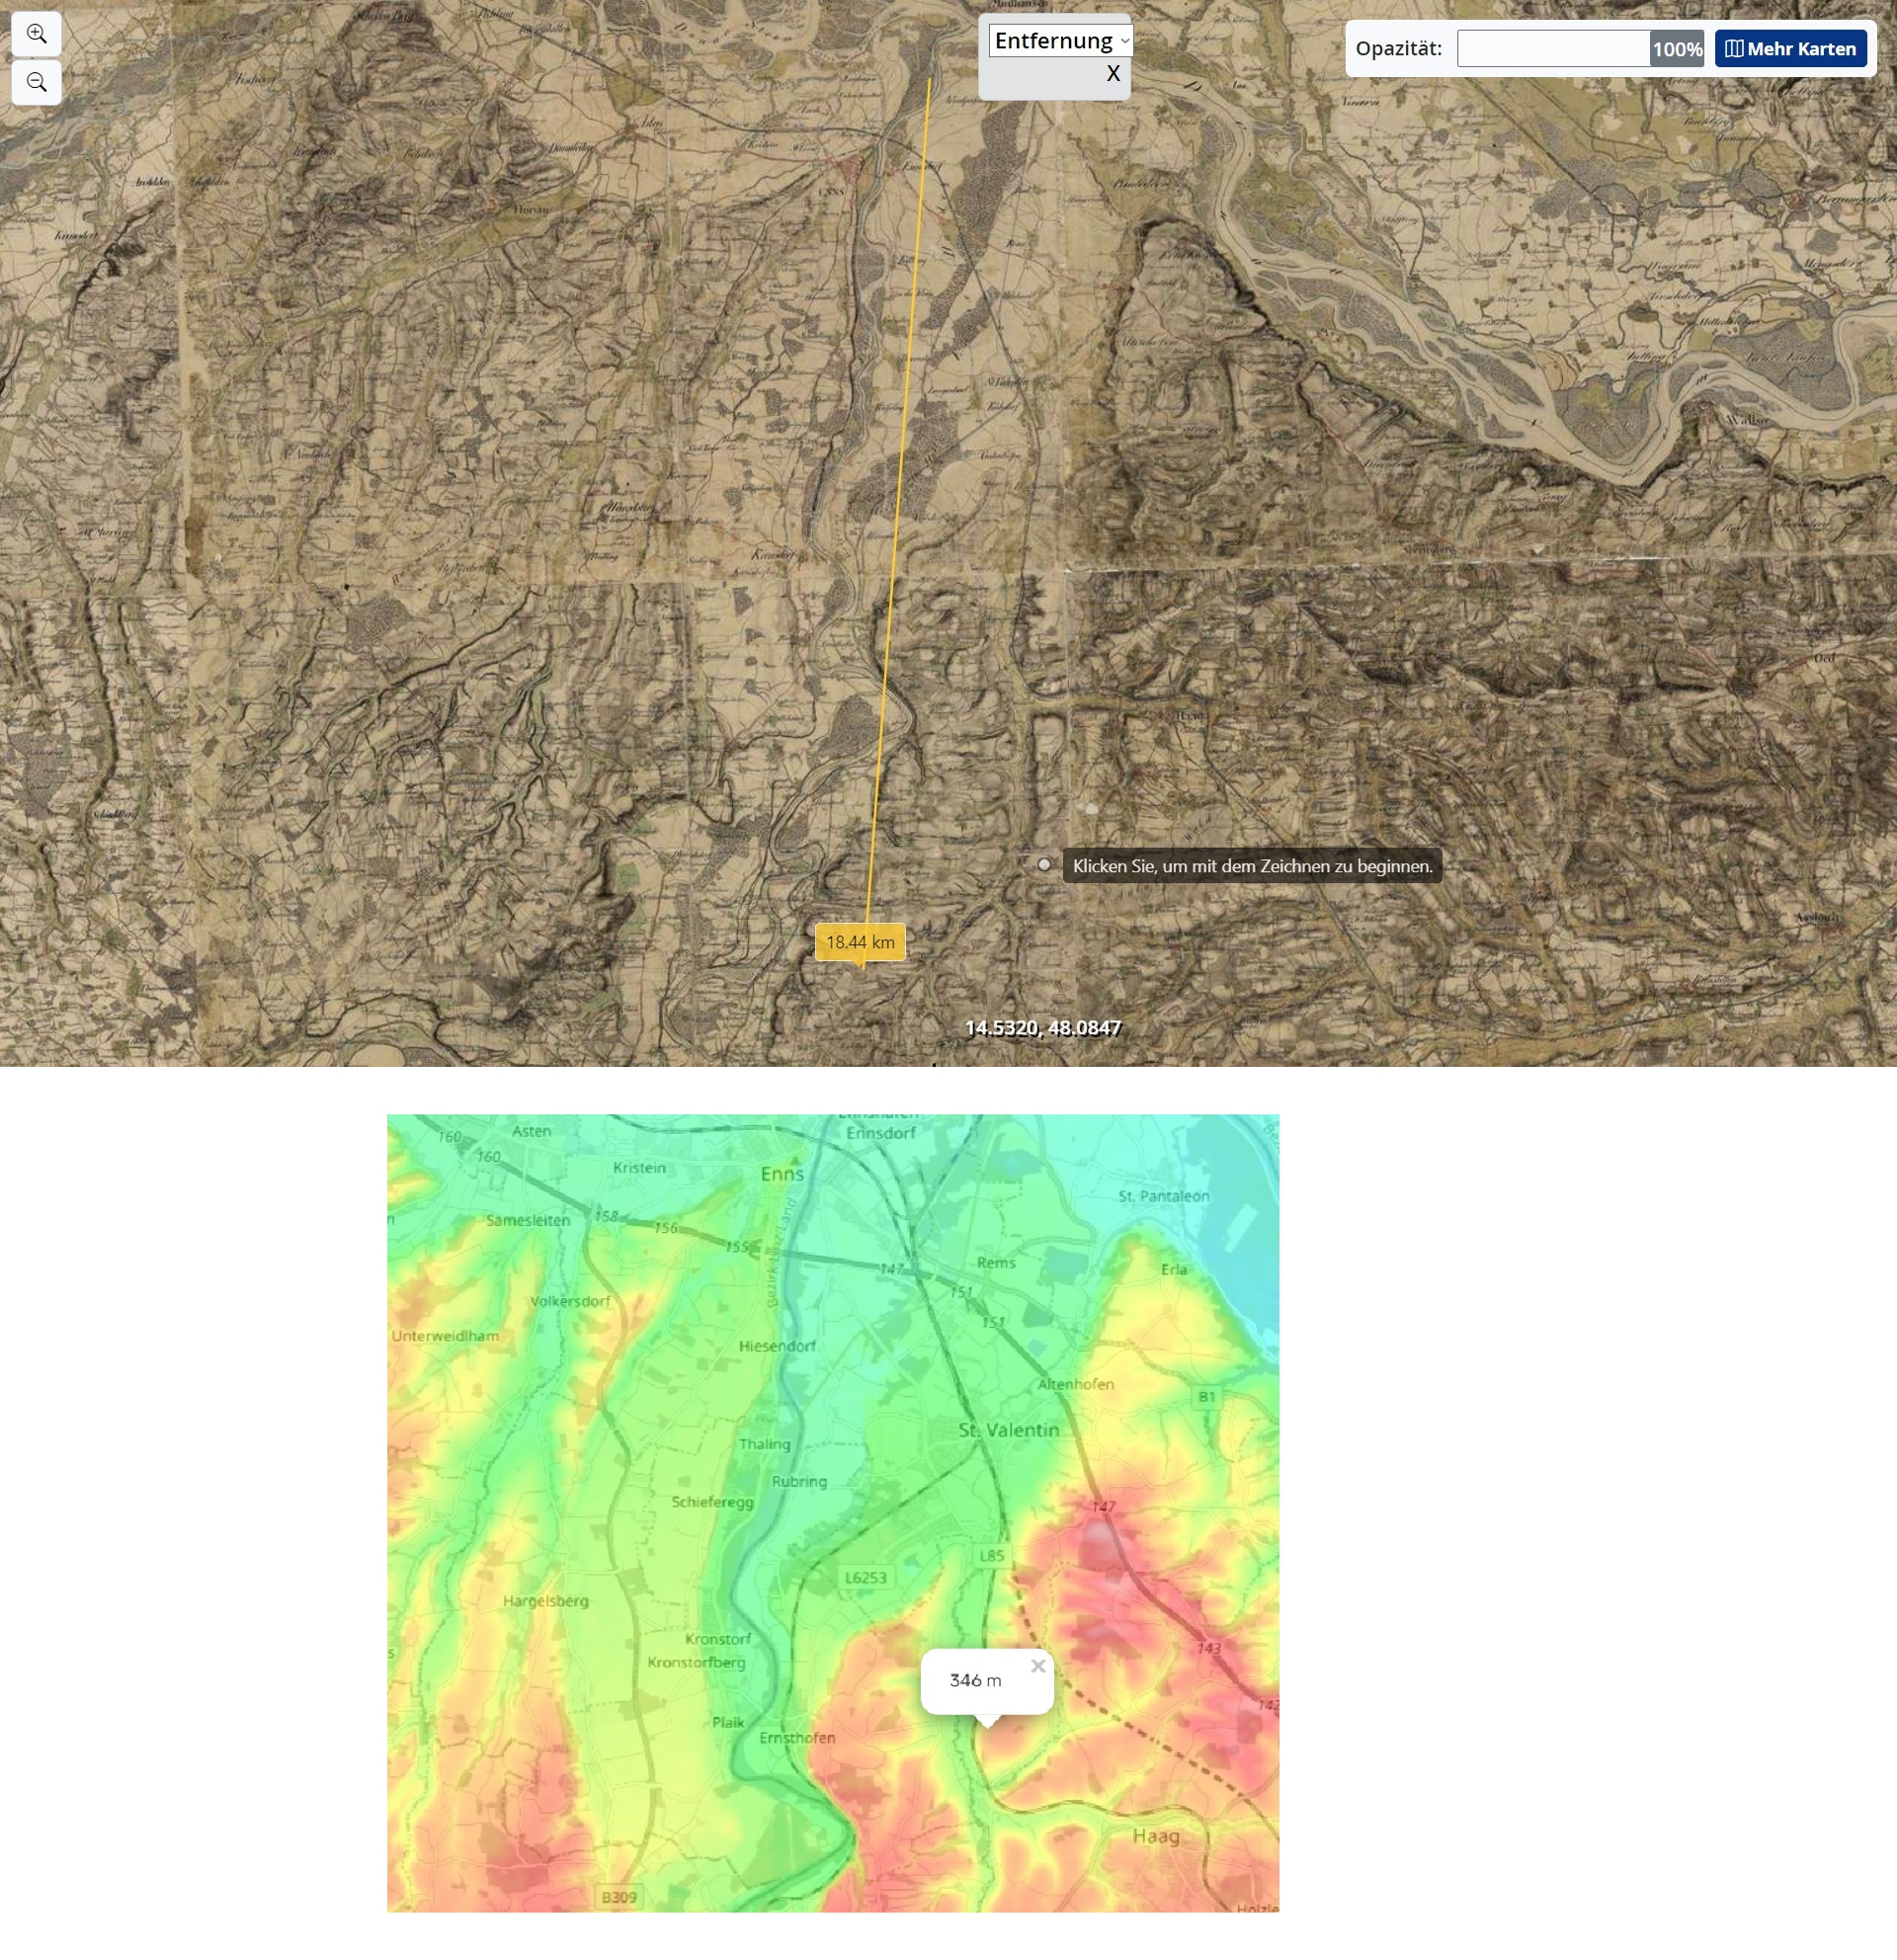
Now when you have a battle, what about the terrain? You do have an idea from the map, hexagons of 3.2km. Then one can use another of Zucker game the 3days of 1809 concentrated on the Abensberg-Eckmühl part with more details, then his battle games. The thing is, there is a high possibility that battles won't happen where they did. So I searched and found a way. Three sites do the job. One is the world in a very clever interactive topographic map that gives you heights in a vivid way. Mostly these would not have changed much in the countryside, whatever was constructed on top. Then another gives Maps of Germany around 1848. So take away the first trains, shrink a bit cities in case of need, and off you go. Detailed maps, that can be crossed with the preceding ones. Once one gets in the depth of Austria towards Vienna, unless Charles performed miracles, the third site gives you a stunning view of the place in absolute details at about the right time. Another one can be useful too. relatively accurate terrain can now be done for each engagement. Do think deeply about use of terrain by both sides and what can likely happen. Nothing different from usual scenarios though, not to spoil the game by having for example most defensive positions too close to the end of the world, wasting table space and generally making the game silly. (that absurd secure flank?).
Then don't be carried away with thinking that what you see on the strategic map is so close to reality! In the first trials, I optimistically thought my Bavarians would do a delaying action around this Landau an der Isar. Looked possible. then I looked for the real terrain. Well it would work nicely if... the sides were reversed. Heights and obstacles are all on the south bank of the river, on the Austrian side! and the town itself was not much to defend. A bit of work but worth it..
Do it before you waste time on it!
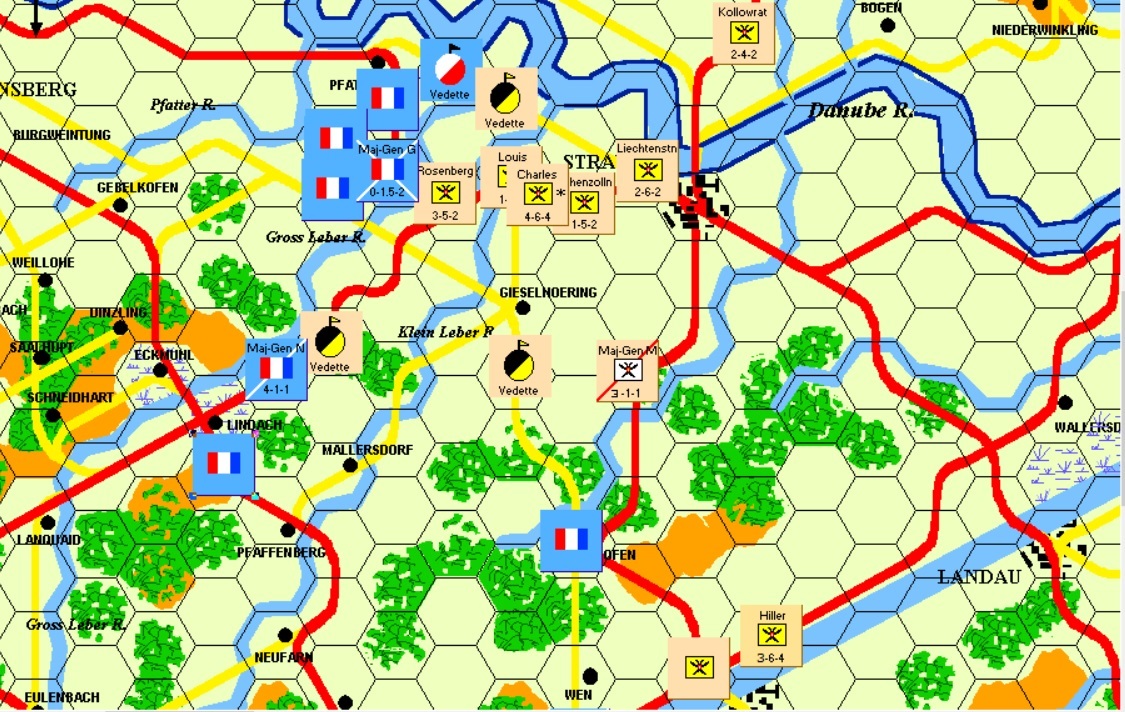
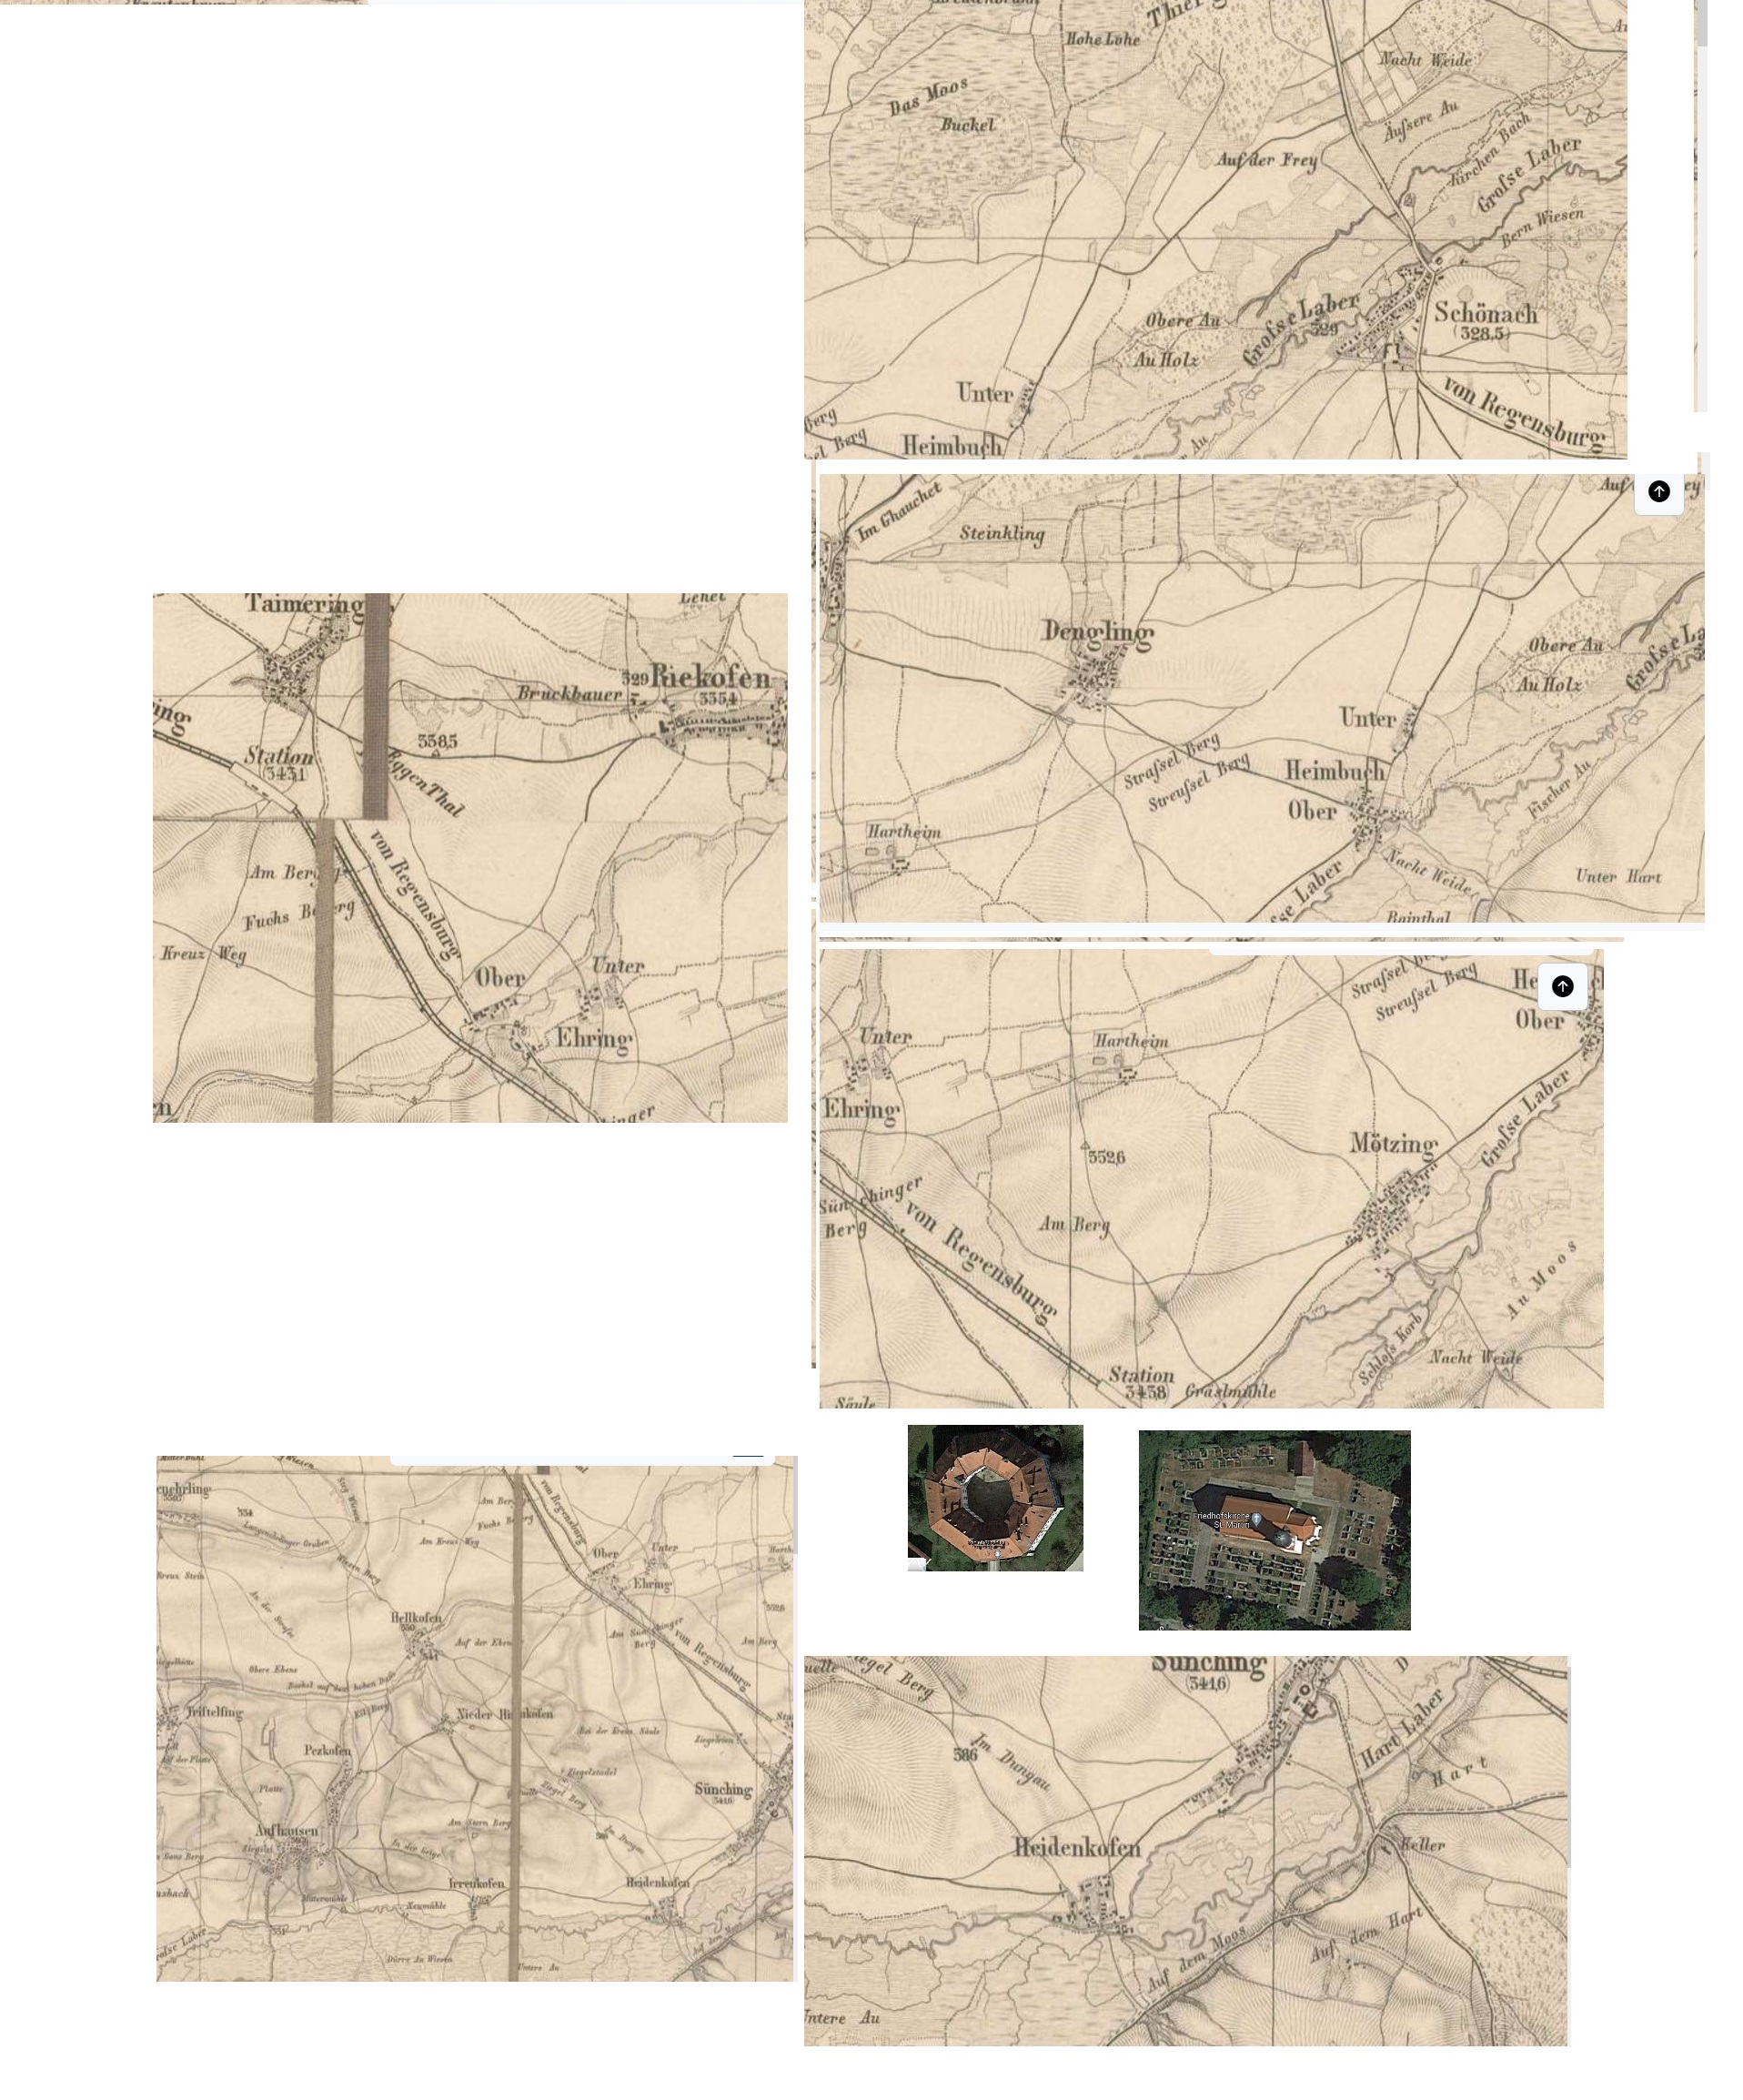
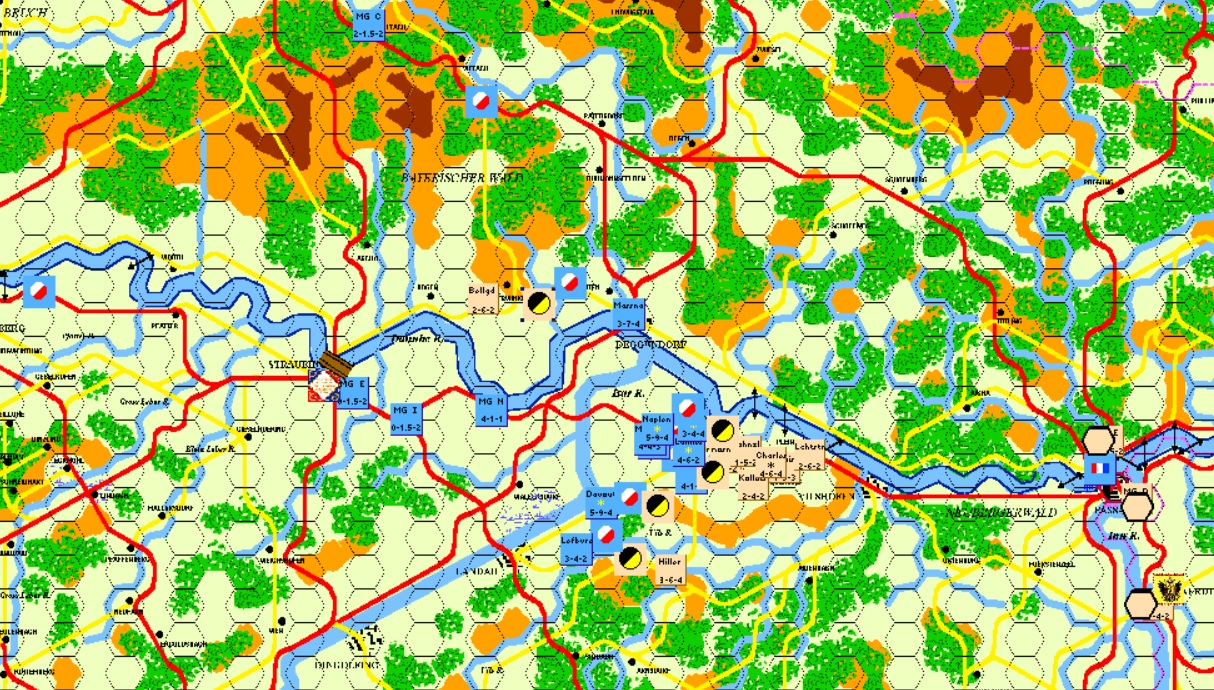
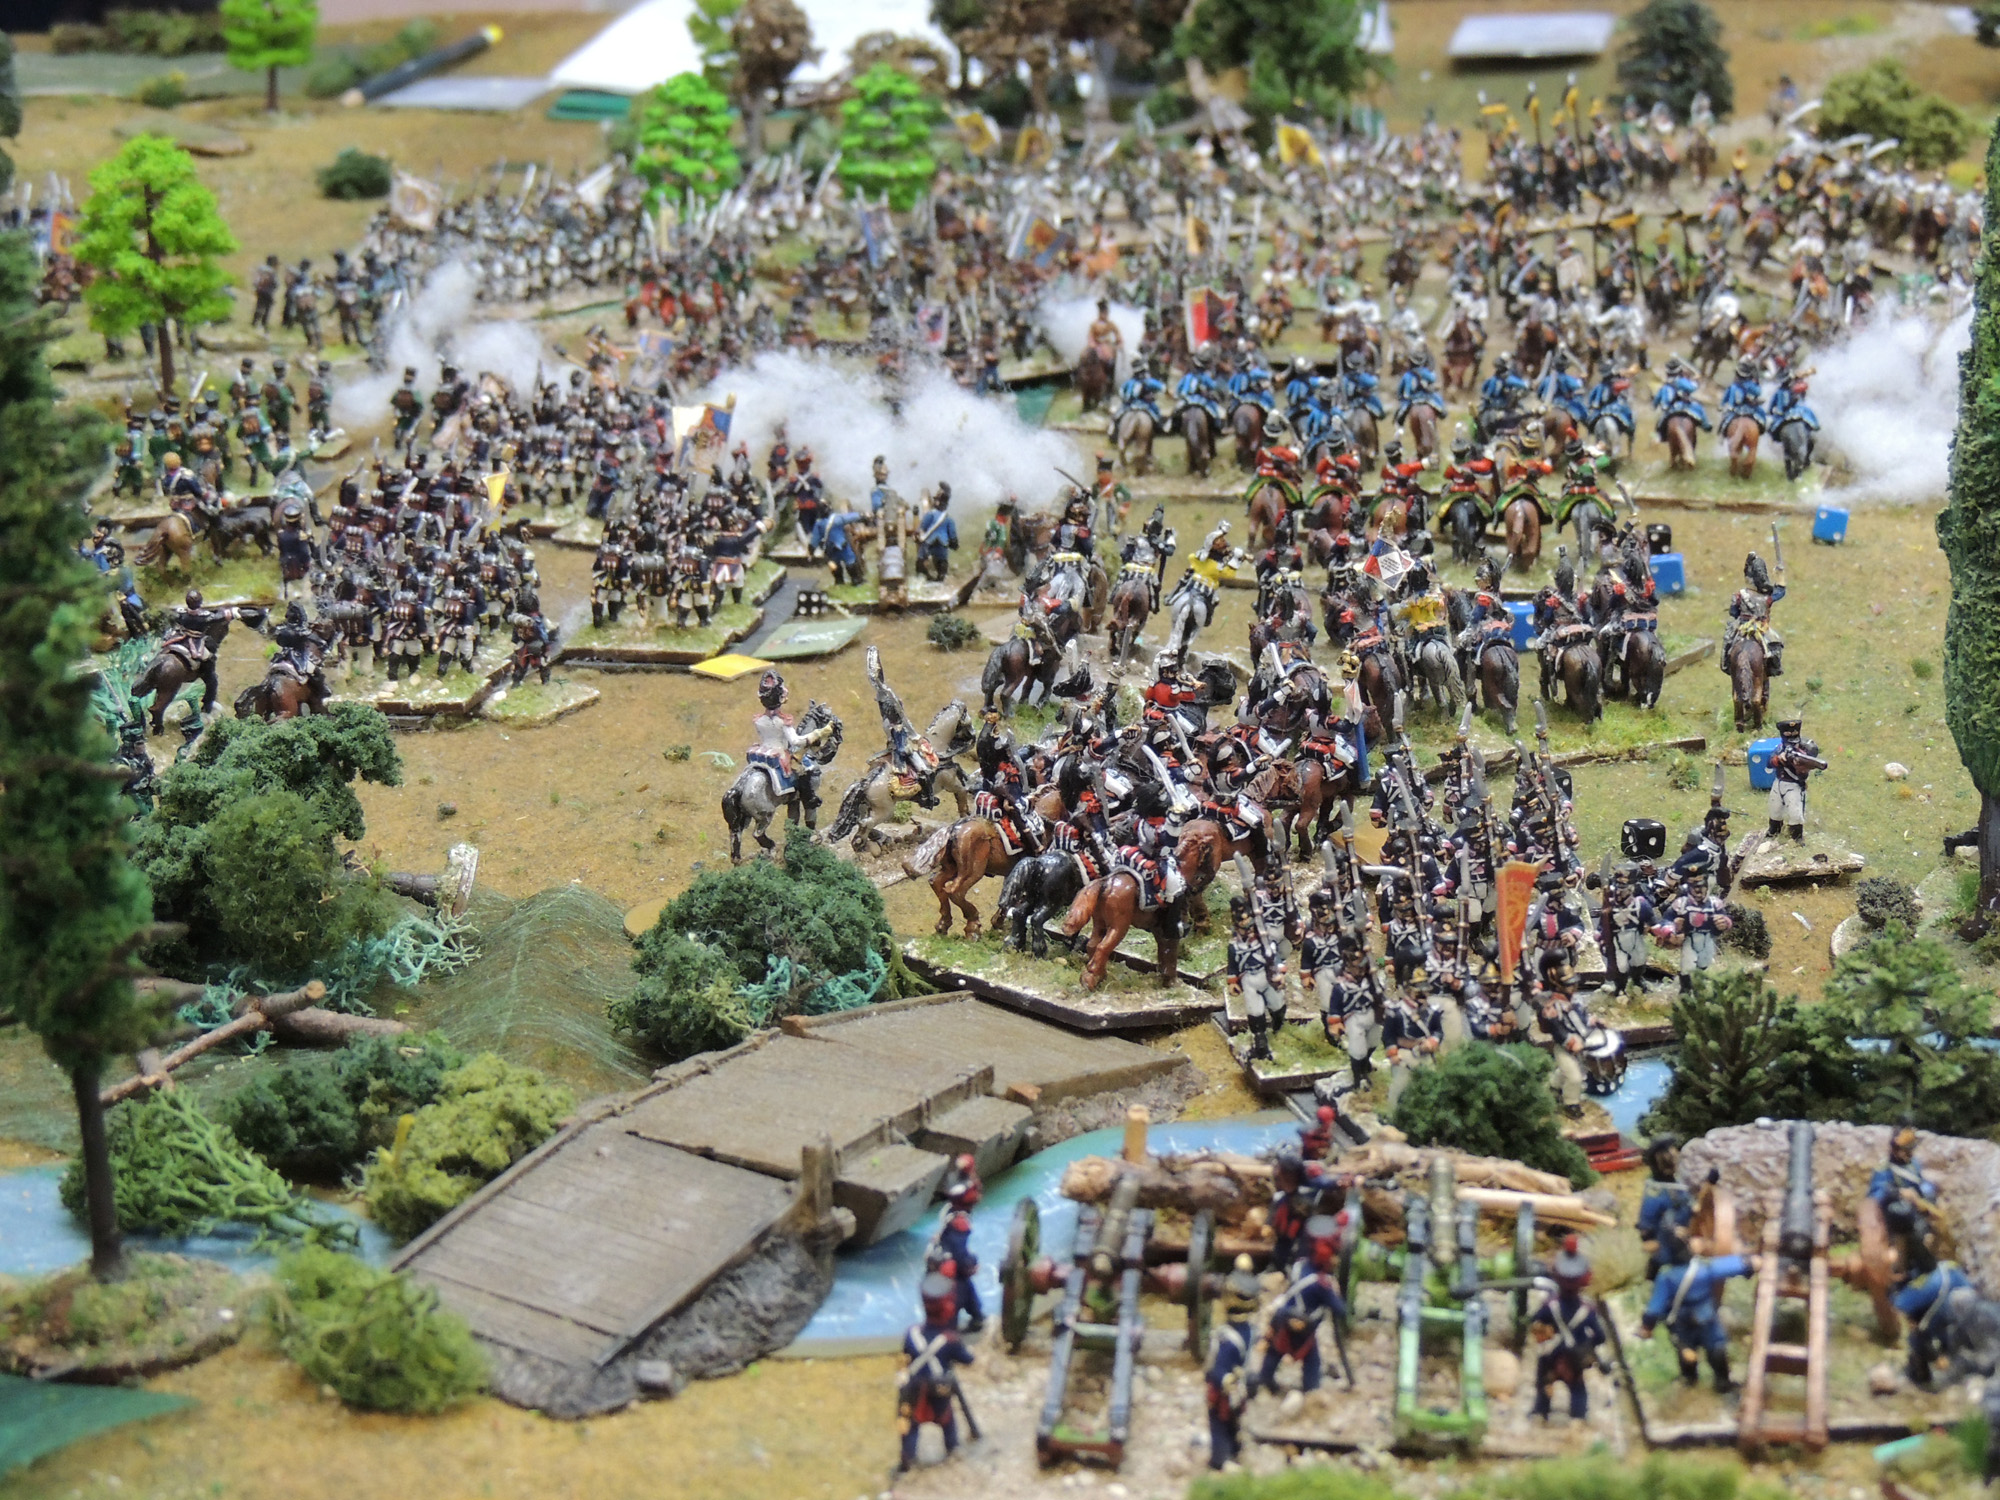
The first major encounter of the campaign, completely different from the historical narrative, probably because I started before Berthier could mess up everything... So here we go with a fight between Davout and the Austrian masses coming on the Danube side. I tried to have them go in a more linear, dispersed way through the center of the map, but it ended up being so slow that I re started with them using the good red road instead. Here you go the battle of Rickhofen (pdf with the battle AAR). The event so far told in a completely non partisan, accurate, fact checked way:
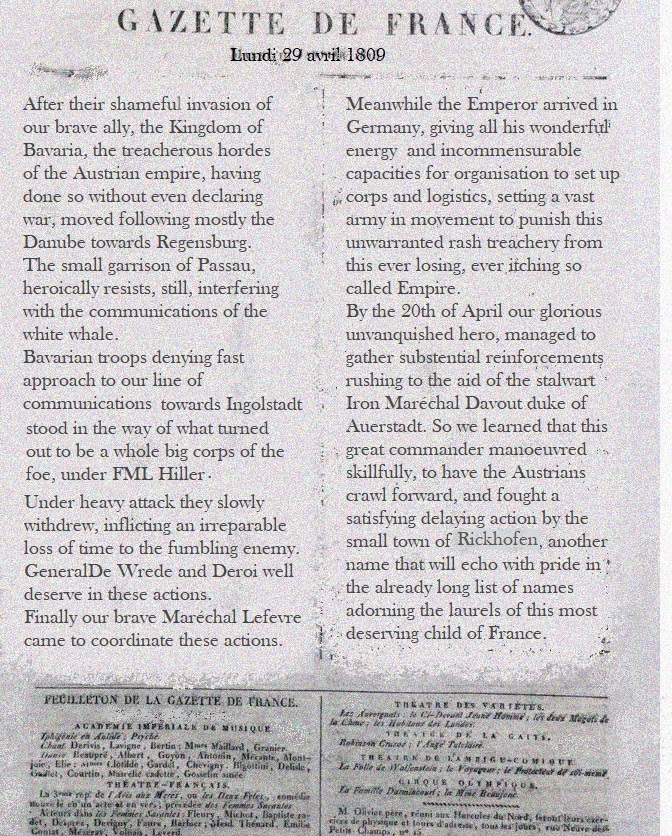
Already at that time the official news were spot on true.
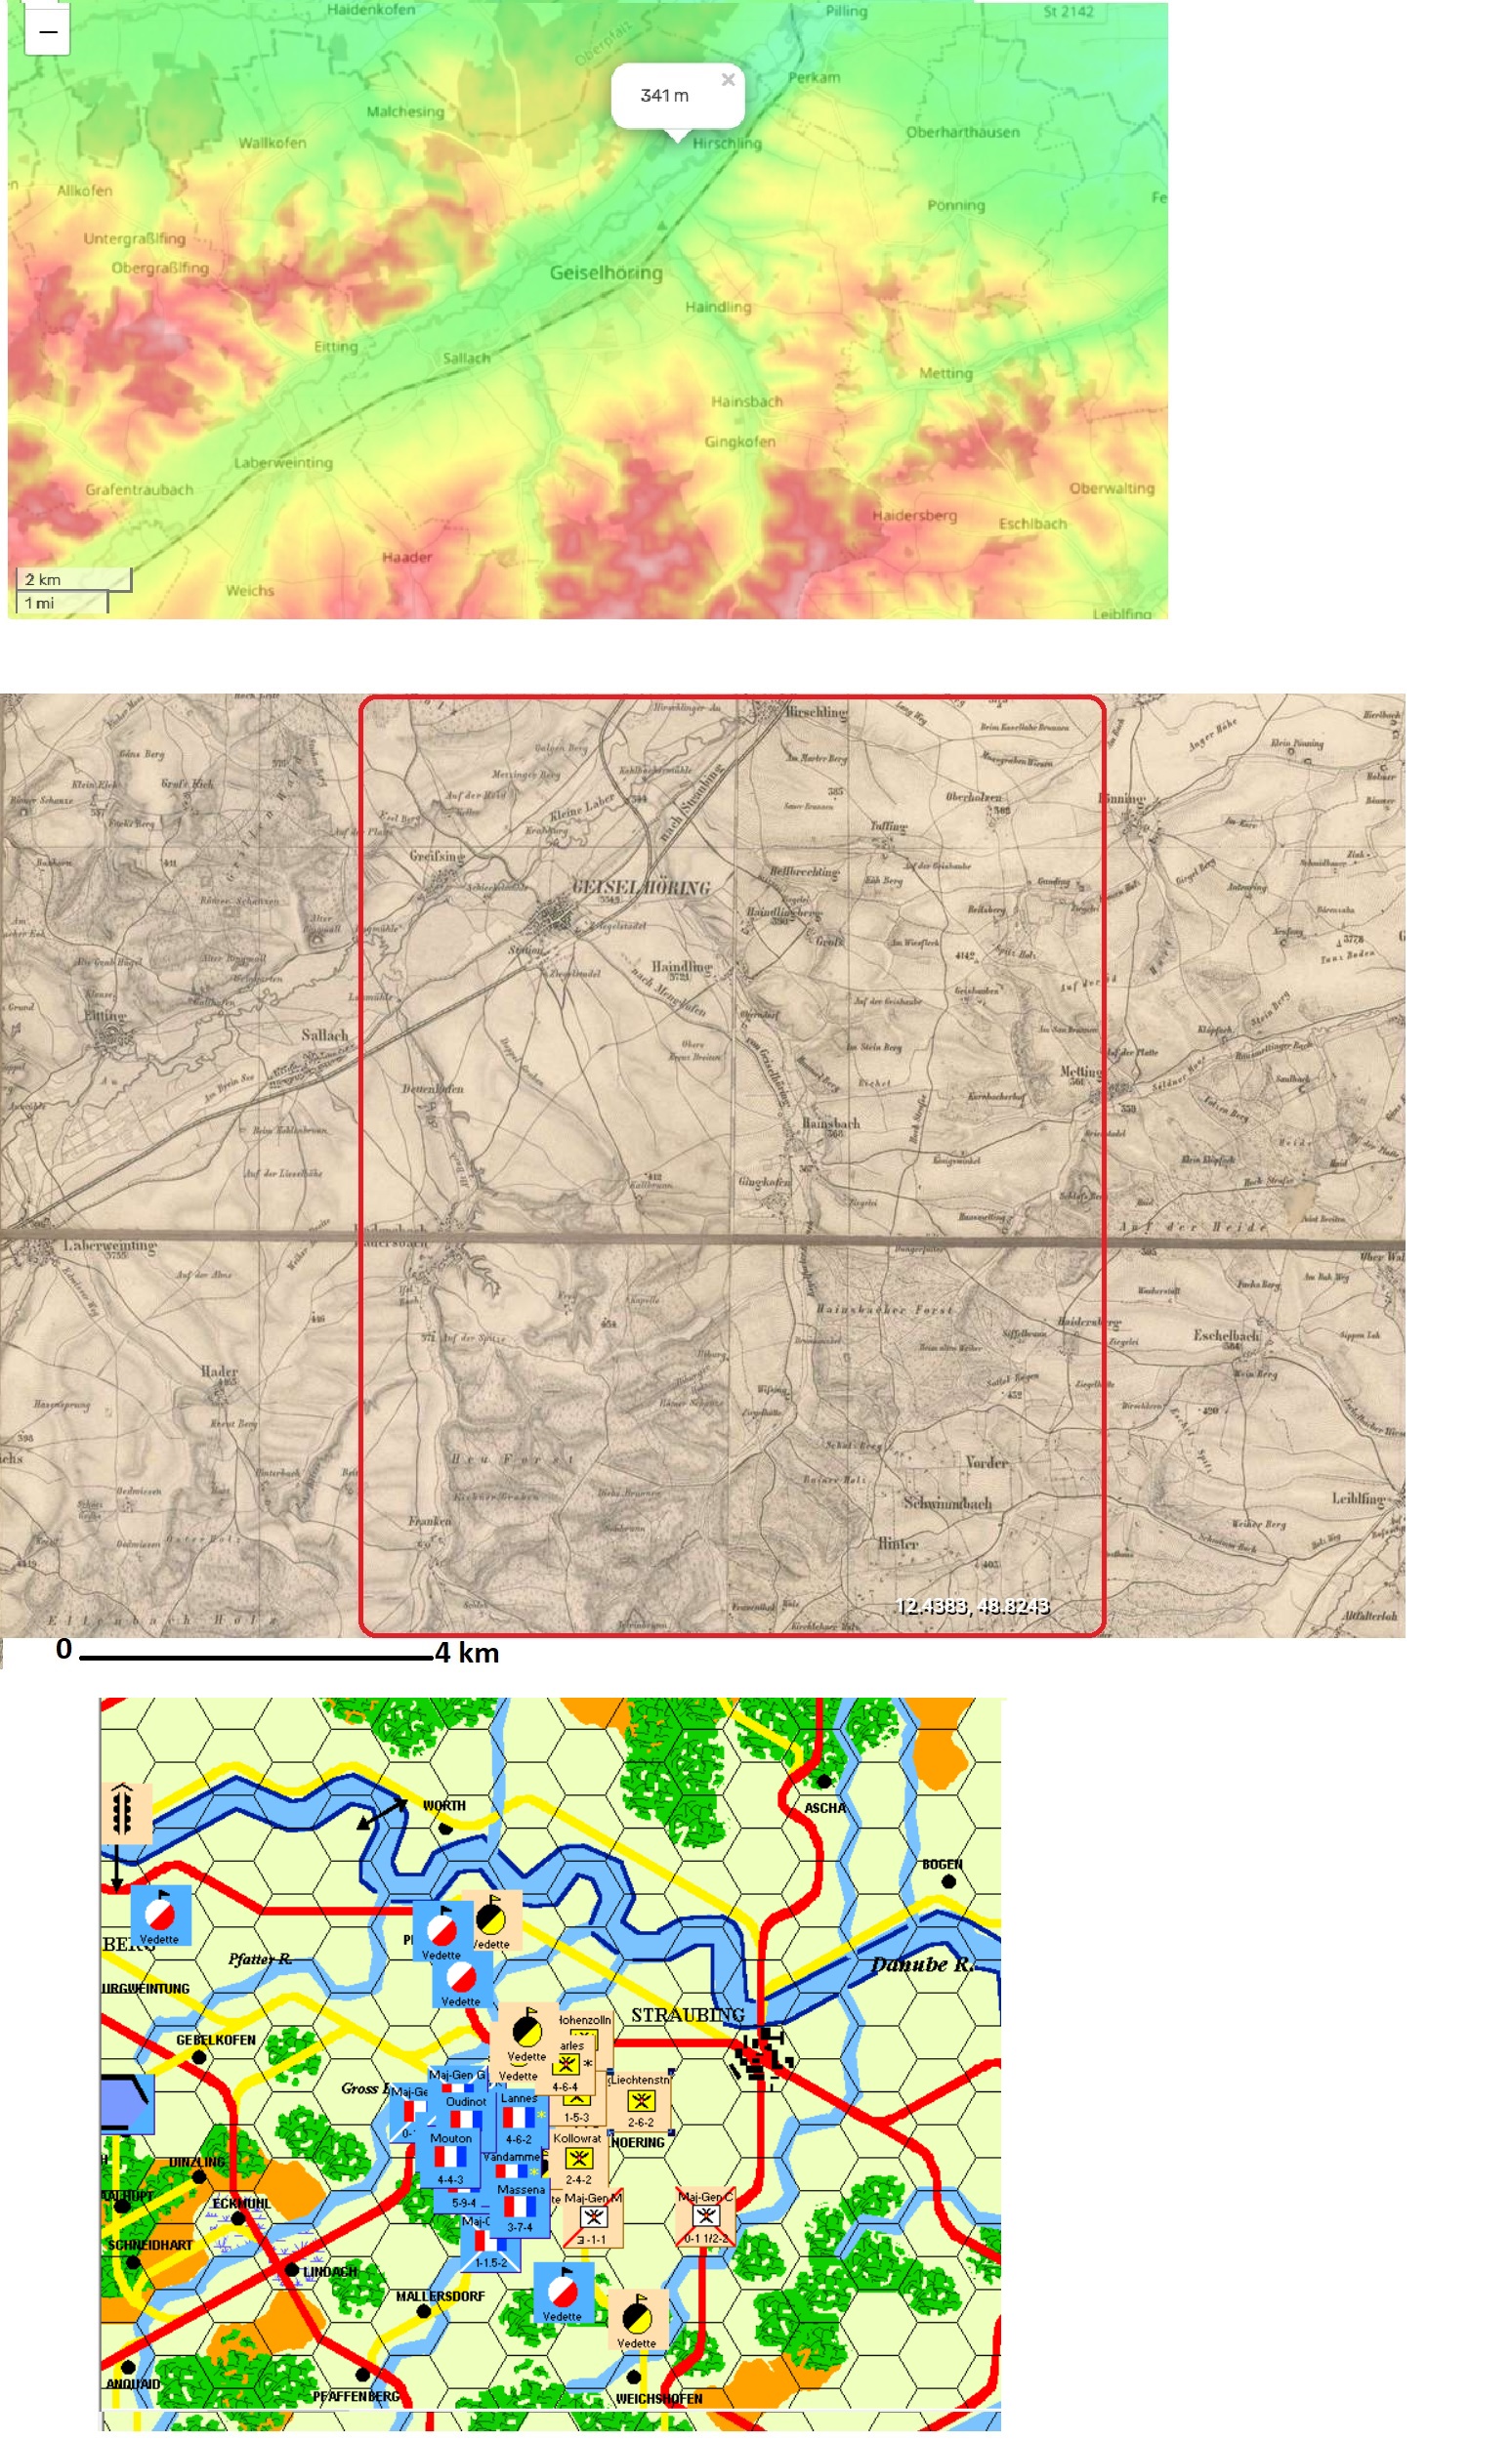
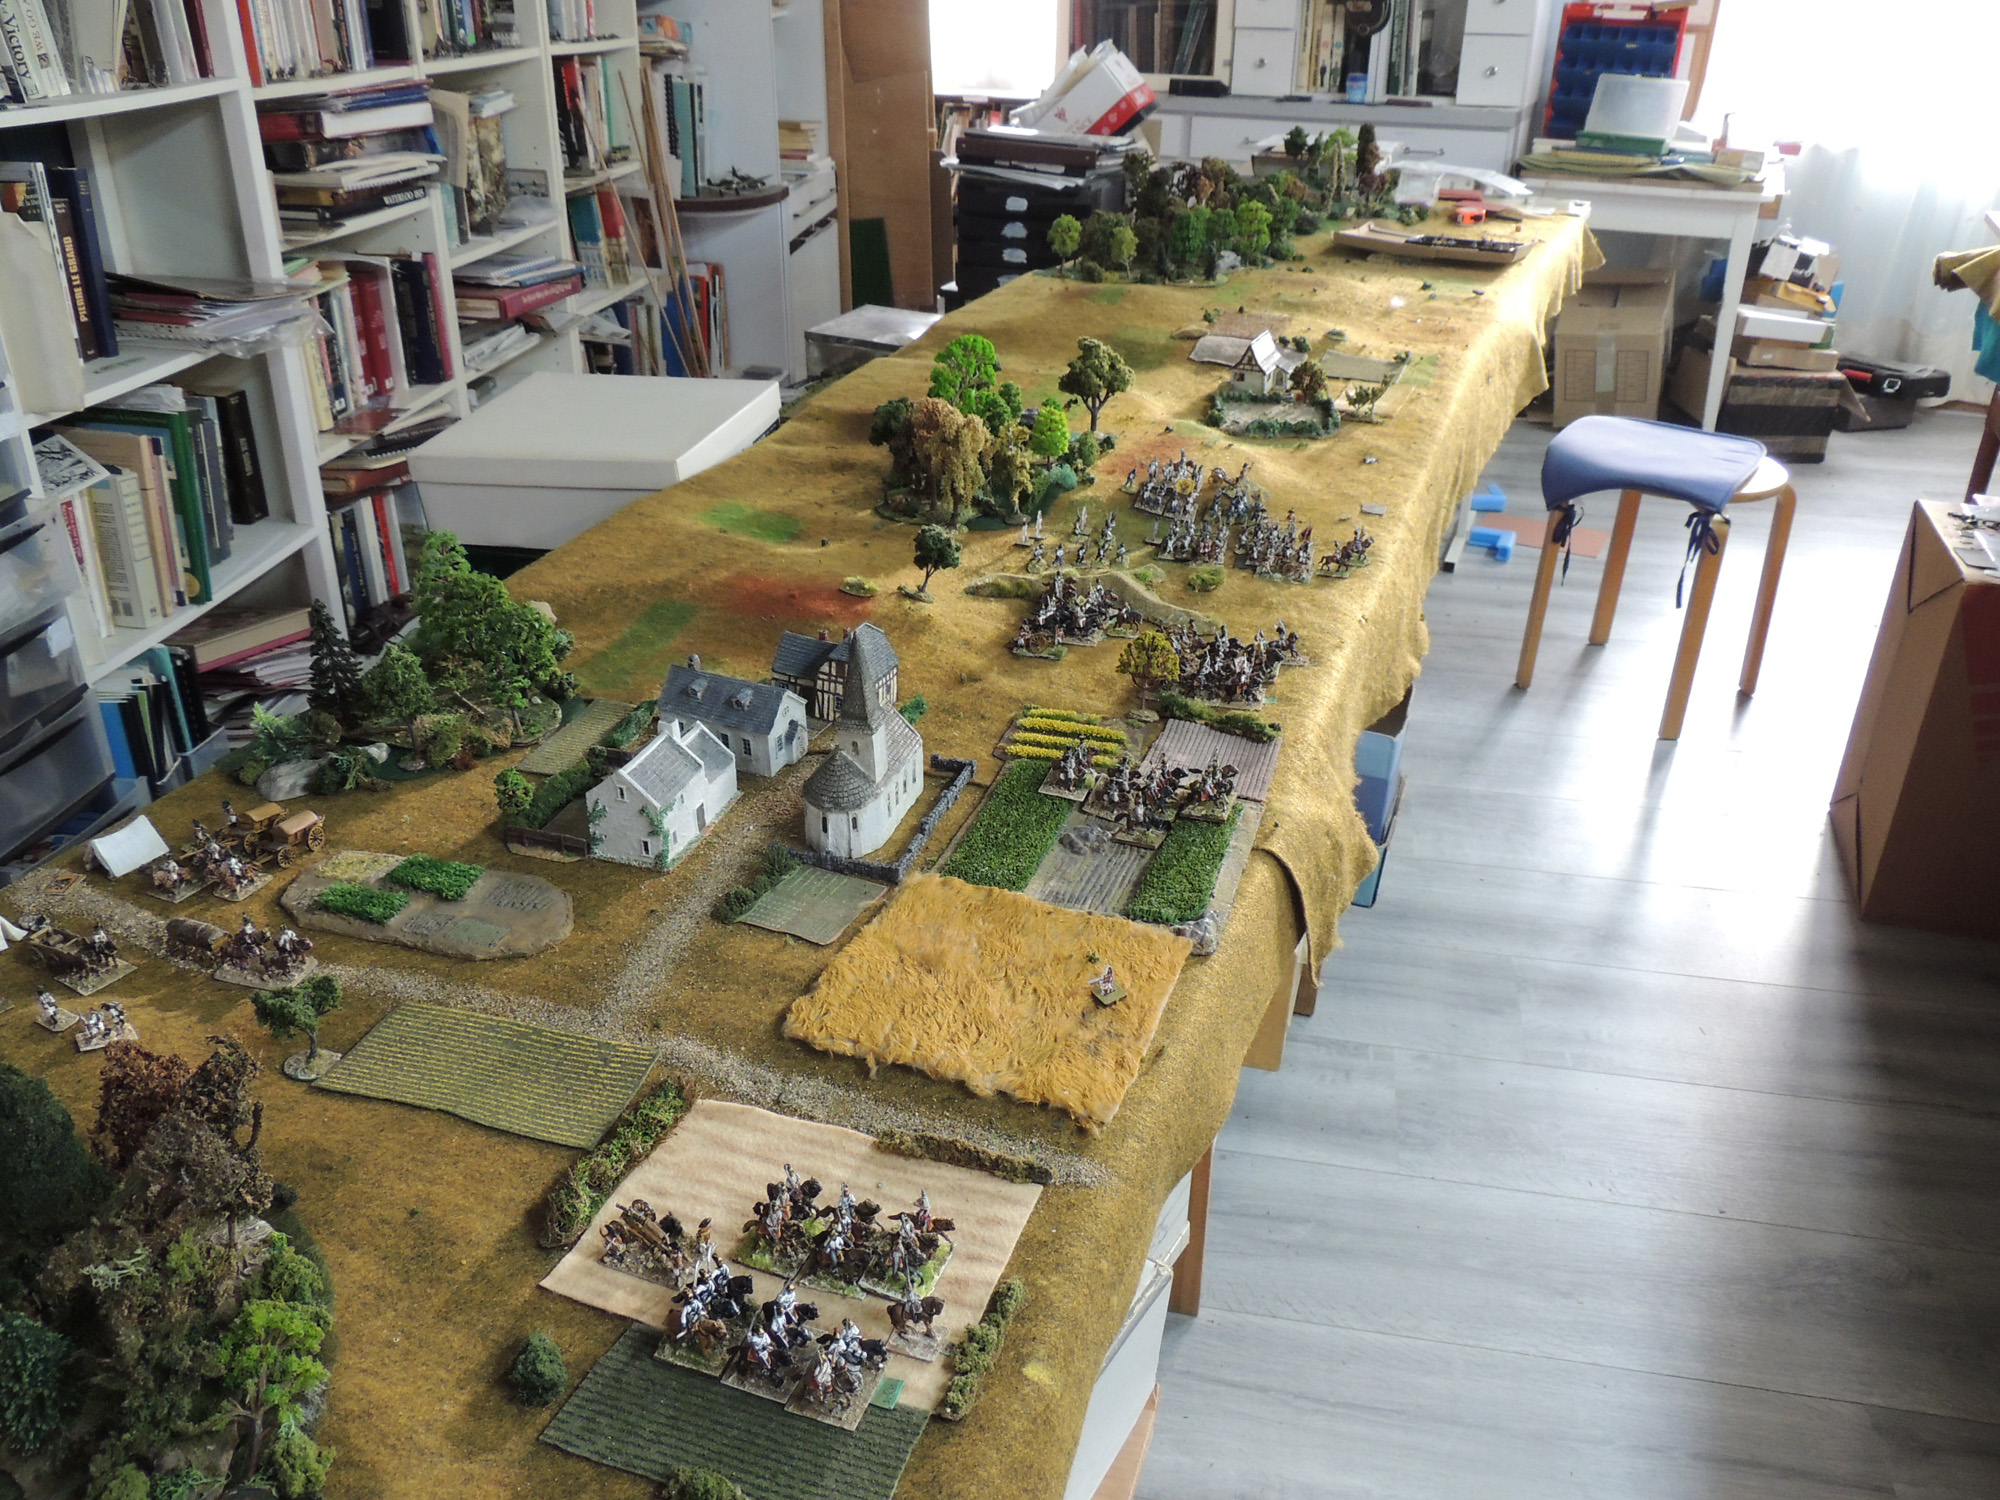
From campaign map to tabletop map.
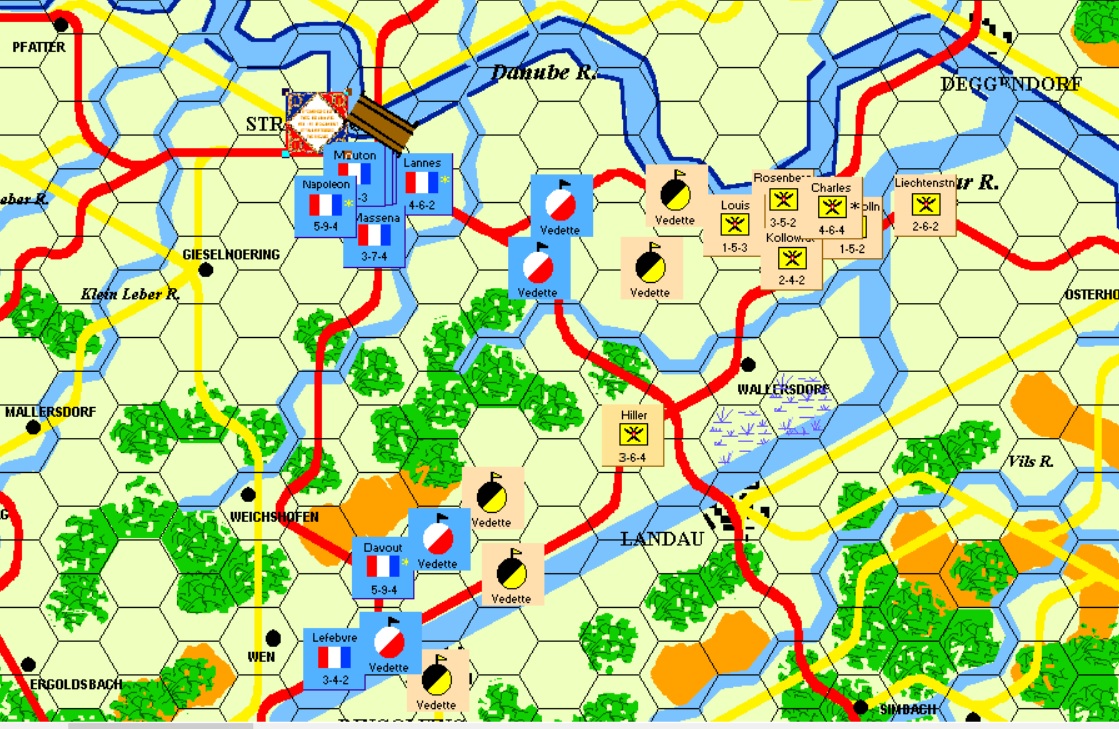
After the defeat Charles tries to regroup south east, getting back his two isolated corps. He succeeds to escape, at the cost of some troops attrition on the march. Using some dummies he stole a march. then Napoleon chose to wait one day to get his center of operations closer to the action. Davout and Lefèvre were sent to trap Hiller and nearly got him but he slipped away. Here get (24/10-23) the next possible fights and terrain analysis for them.
Charles would be motivated to escape but to have a stop if he can find a good "Austrian" position. A cordon defense with a river and nice villages/ towns etc. I studied the positions of the Inn then Traun rivers. The last one with the infamous Ebelsberg. None fitted.
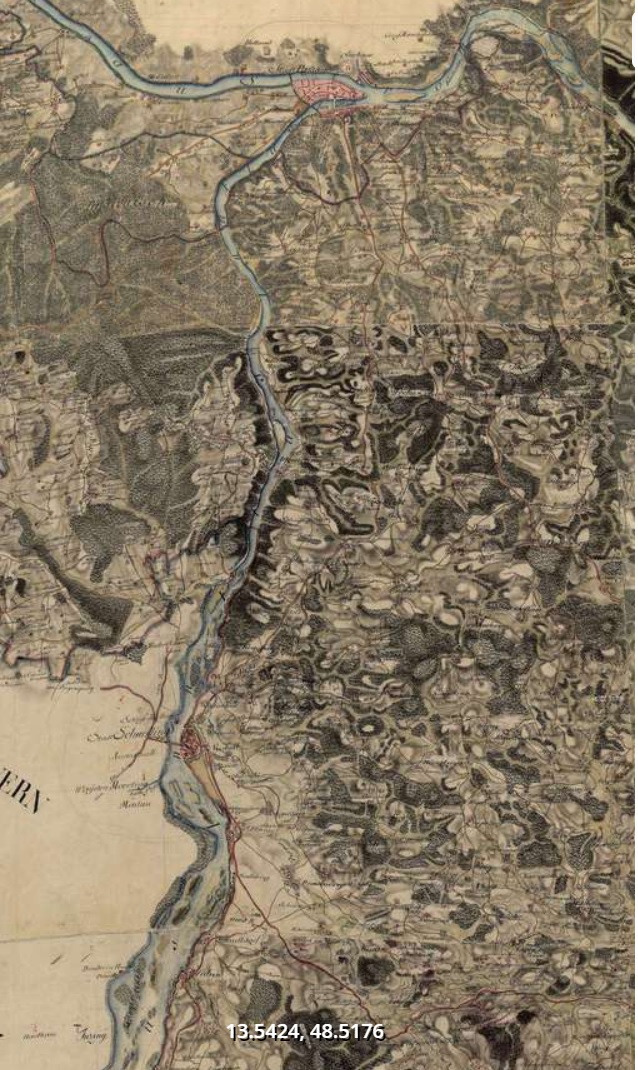
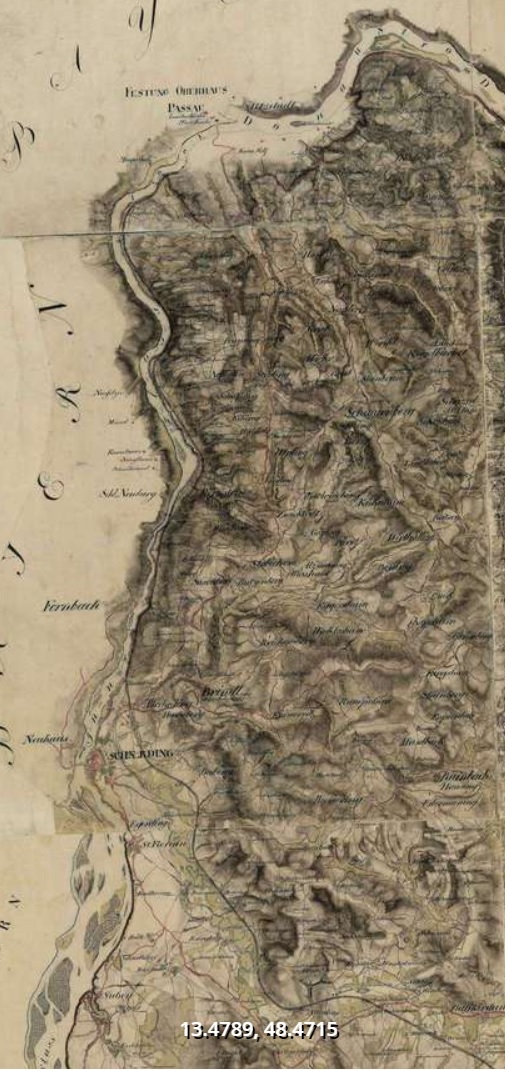
Passau on the Inn was in French/Bavarian hands which provides for a dent in the deployment (I discovered this fortress, on the other side of the Donau!).
Left Passau area 1775; right around 1809-1818. Down in 1870.
Lots of woods, on both sides; far too many patches on the "Austrian" side for easy manoeuver and control. That big one on the Bavarian side can hide the whole French army.
It is still there today. Actually, it all shows it is not a defensible position for an Austrian army. It would end up with disconnected fights in wooden areas with little warning for multiple crossings. Napoleon could also march fast south without them knowing so and turn the whole thing.
It looks the Austrians should not make a stand here after all.
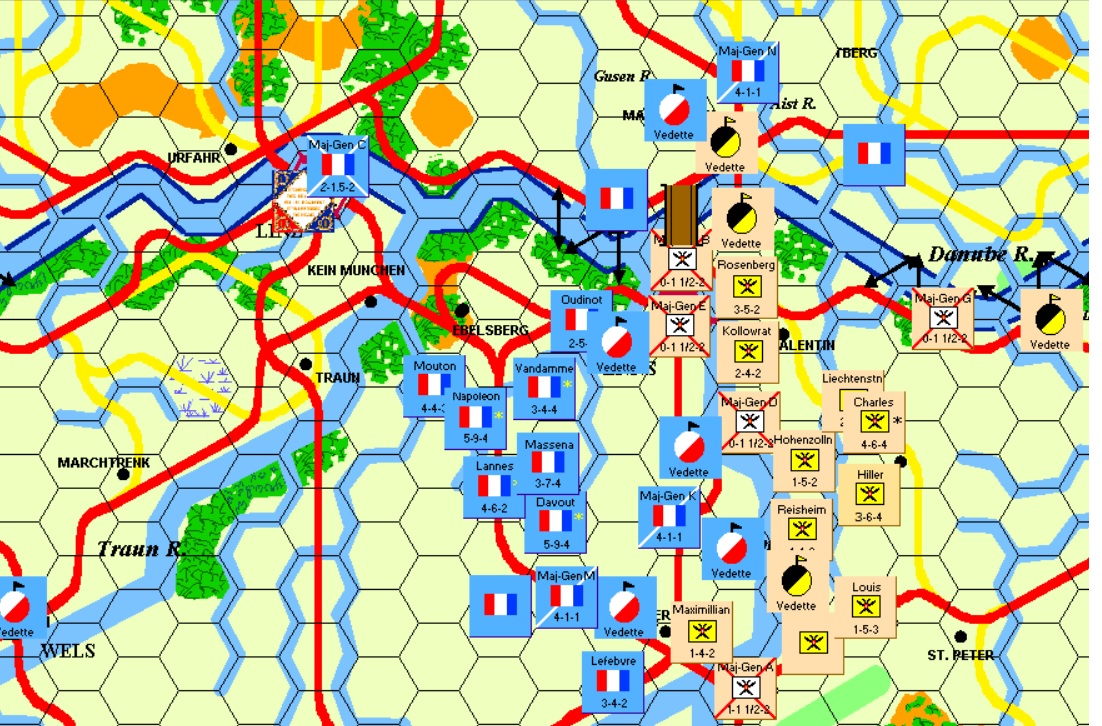
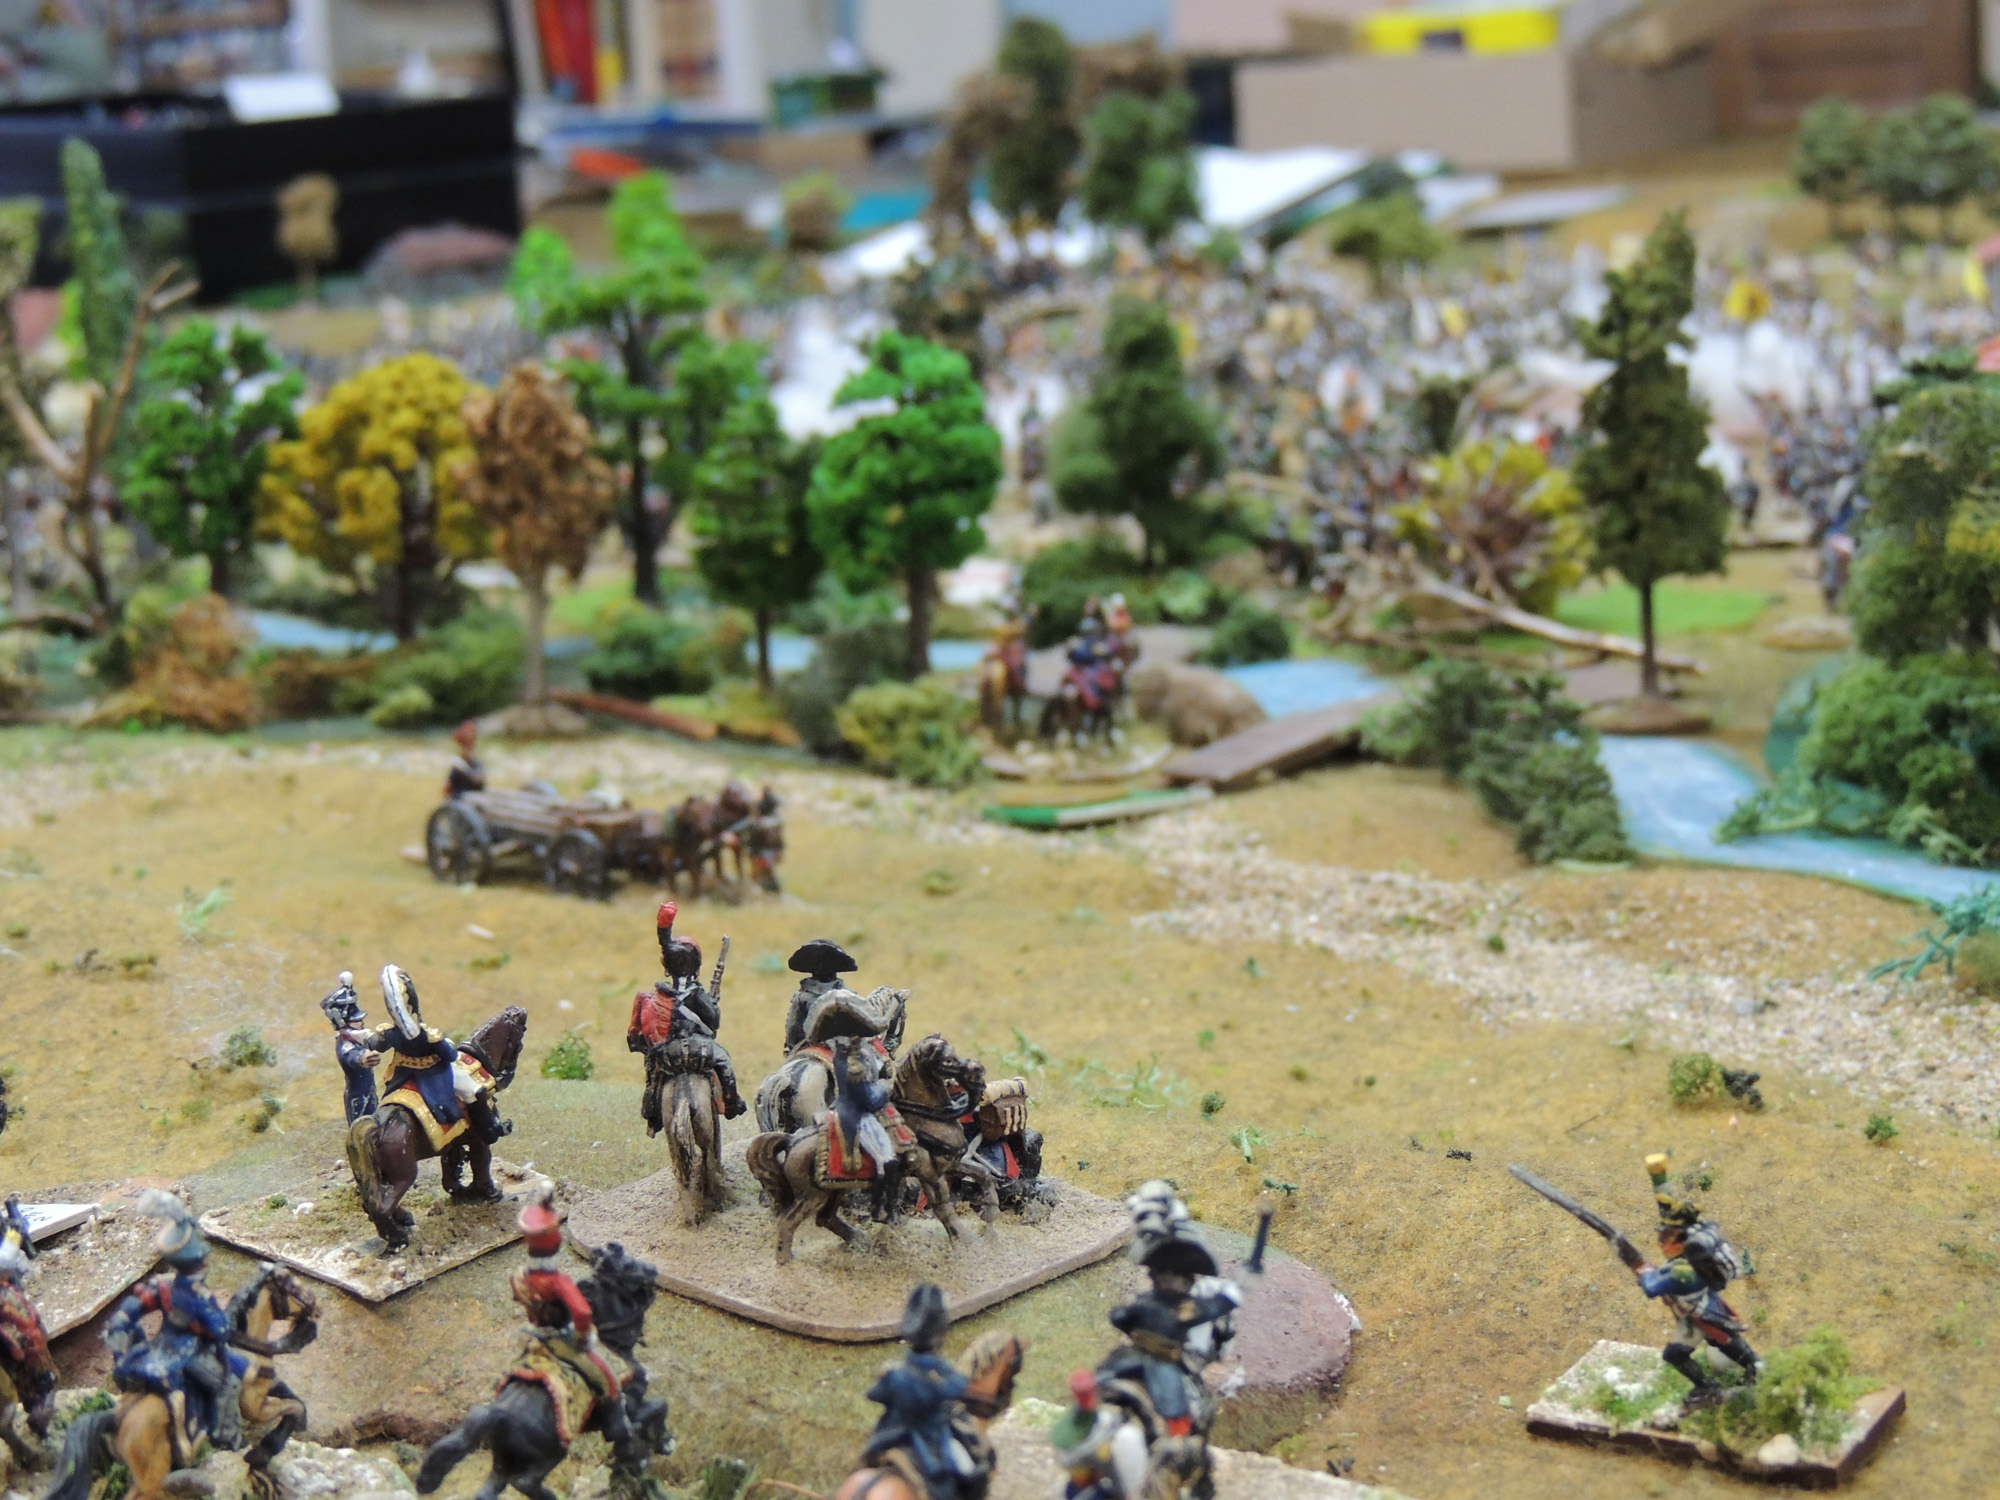
On the other side of the Danube I. Korps under FML Bellegarde is trying to come to join the main army. He got in trouble with Massena sent to destroy him, and then The Westphalian and Saxon divisions arriving from the North.
He tried to escape North, worked once as moved first but then got trapped. I considered deeply this battle to play it, as usual with maps, pictures et all. In the end I "played it with dice" as it looked this was not going to be so interesting. At least not so much to play with my guy who could come, oh miracle, for two afternoons. Better keep this chance for a big fight. The first turns are where a real opponent beat all solo systems, playing with orders and hidden troops. Orders, don't be afraid are just counters for attitude and an arrow. So I scrambled for the next major confrontation.
Situation May the 16th
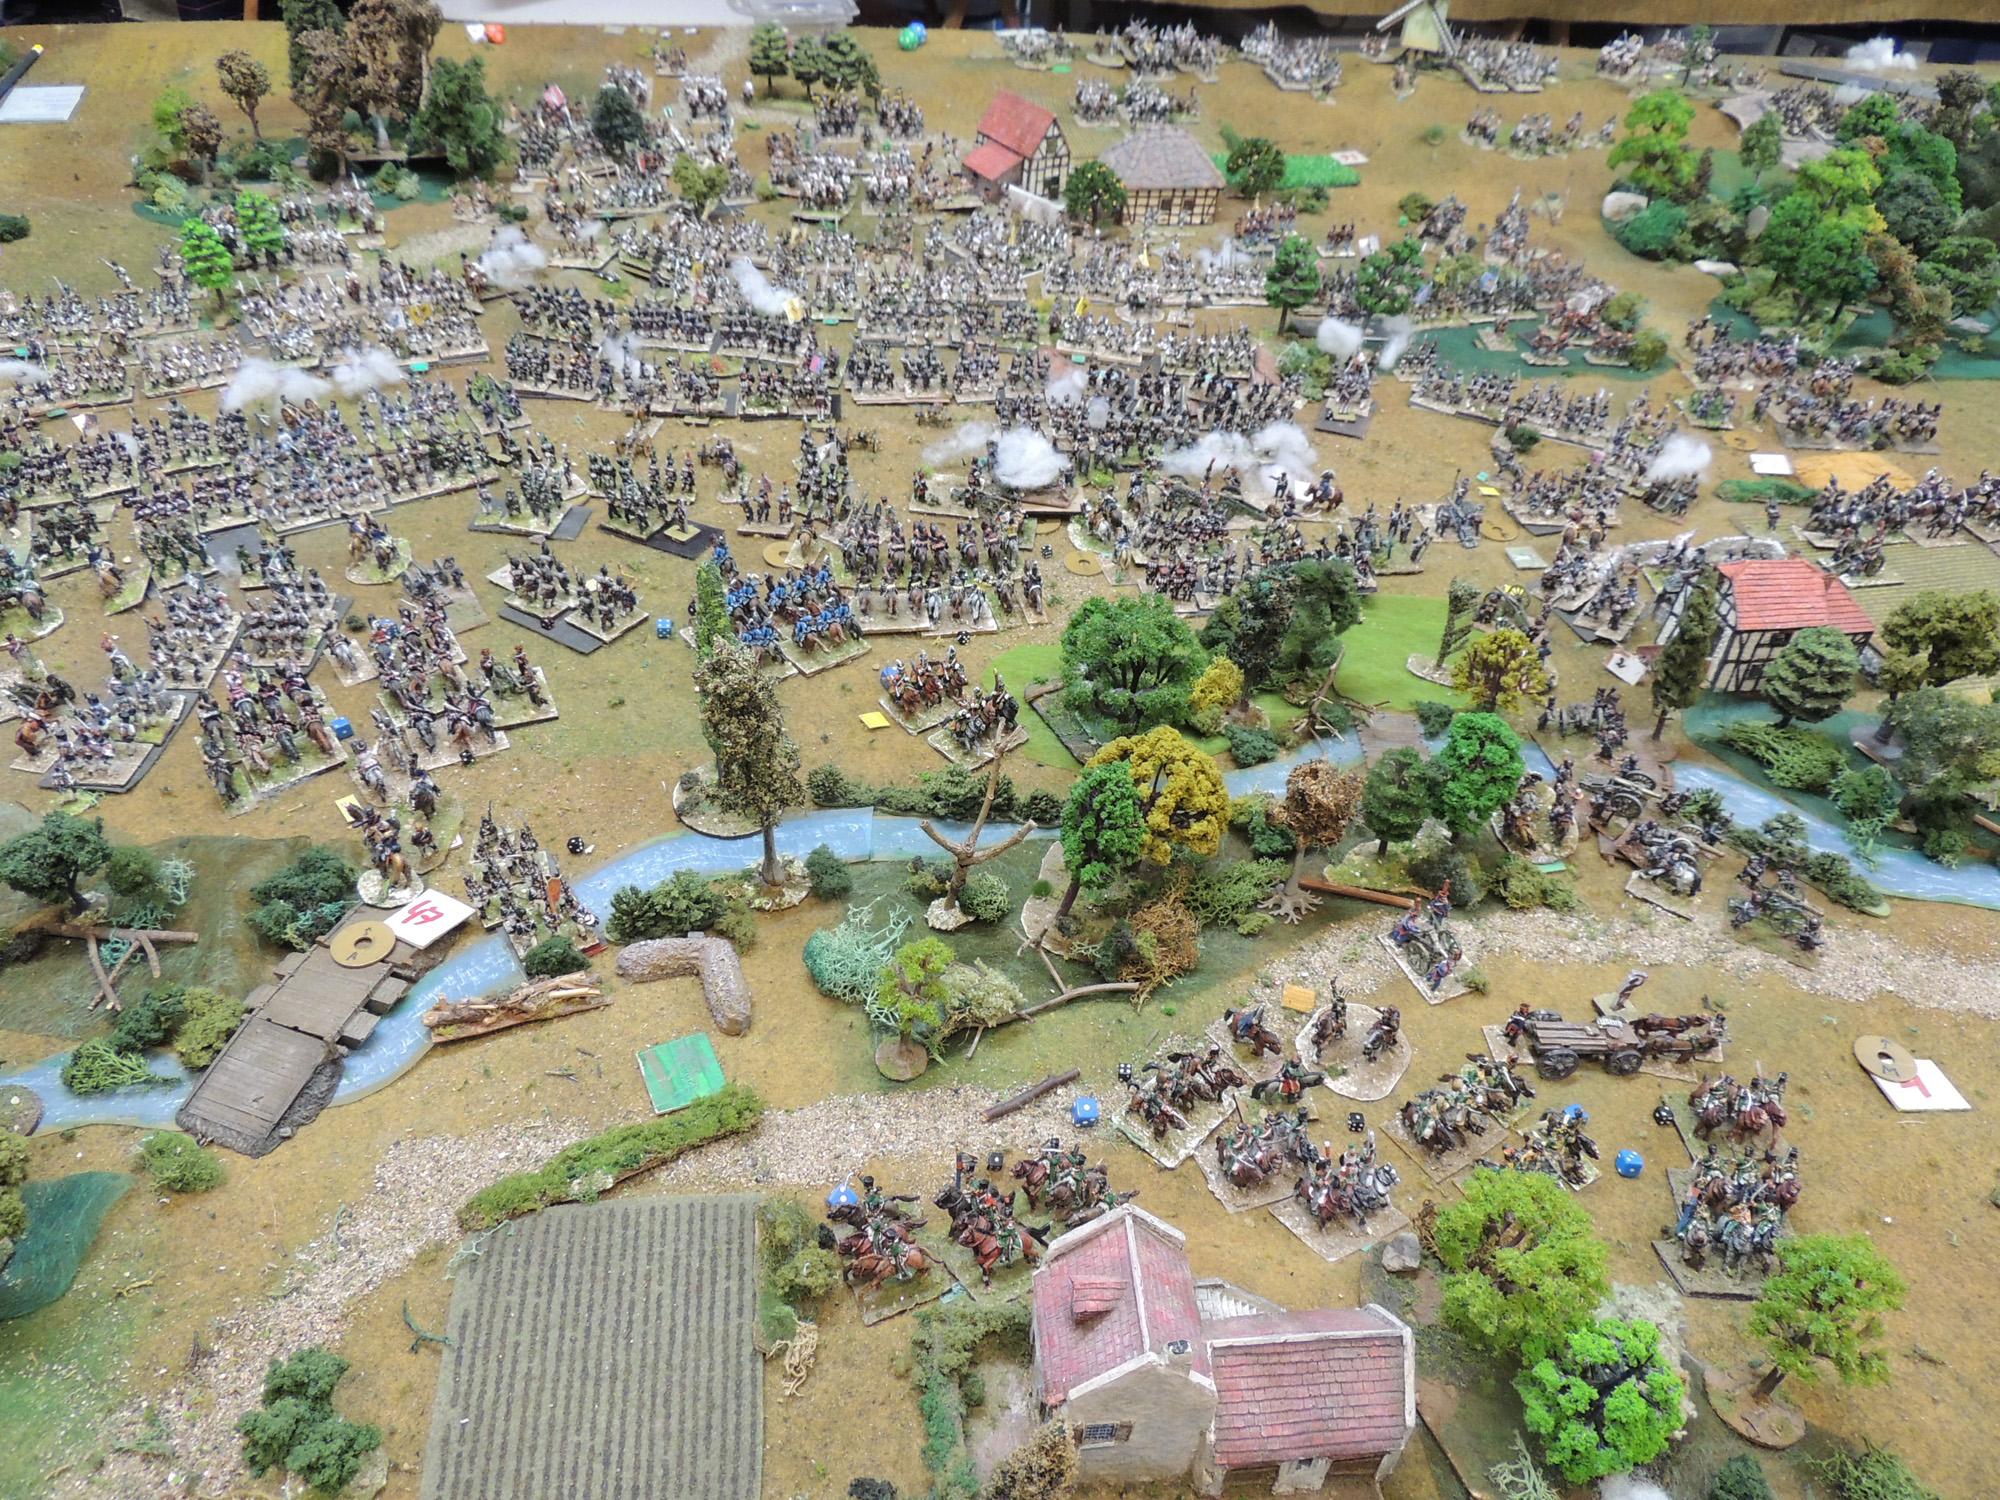
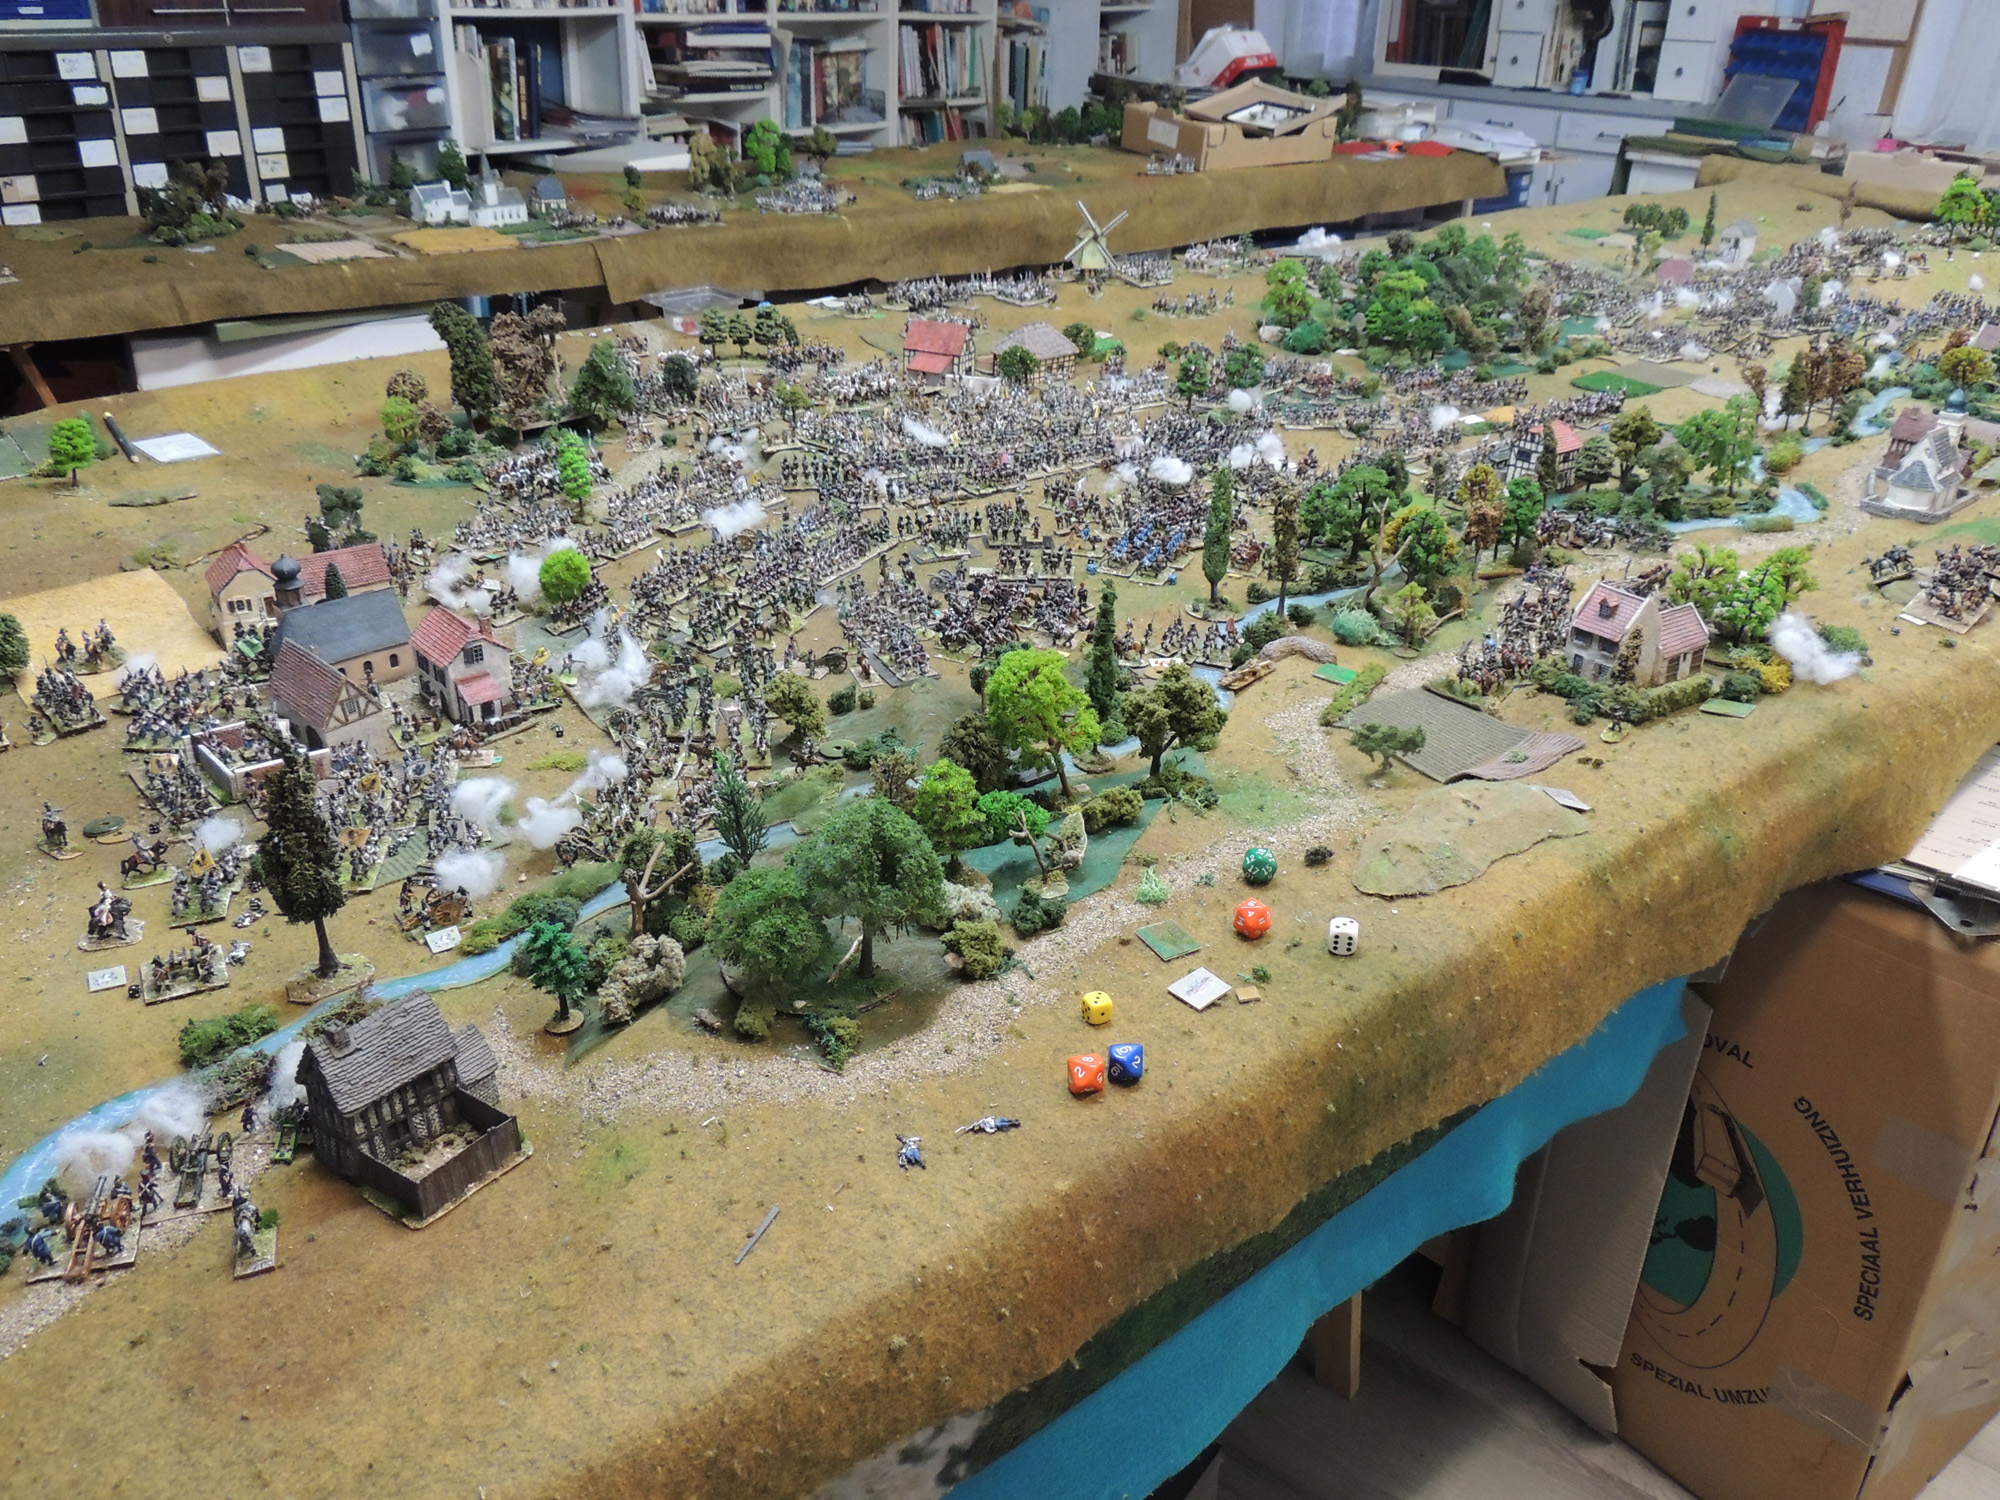
It ended up the next (and last befor Wien) position would be the Enns river. The Austrians arrived a couple of days ahead (Napoleon moved the center of operation much closer) so can have a bit of lousy earthworks.
report 14-12-2023
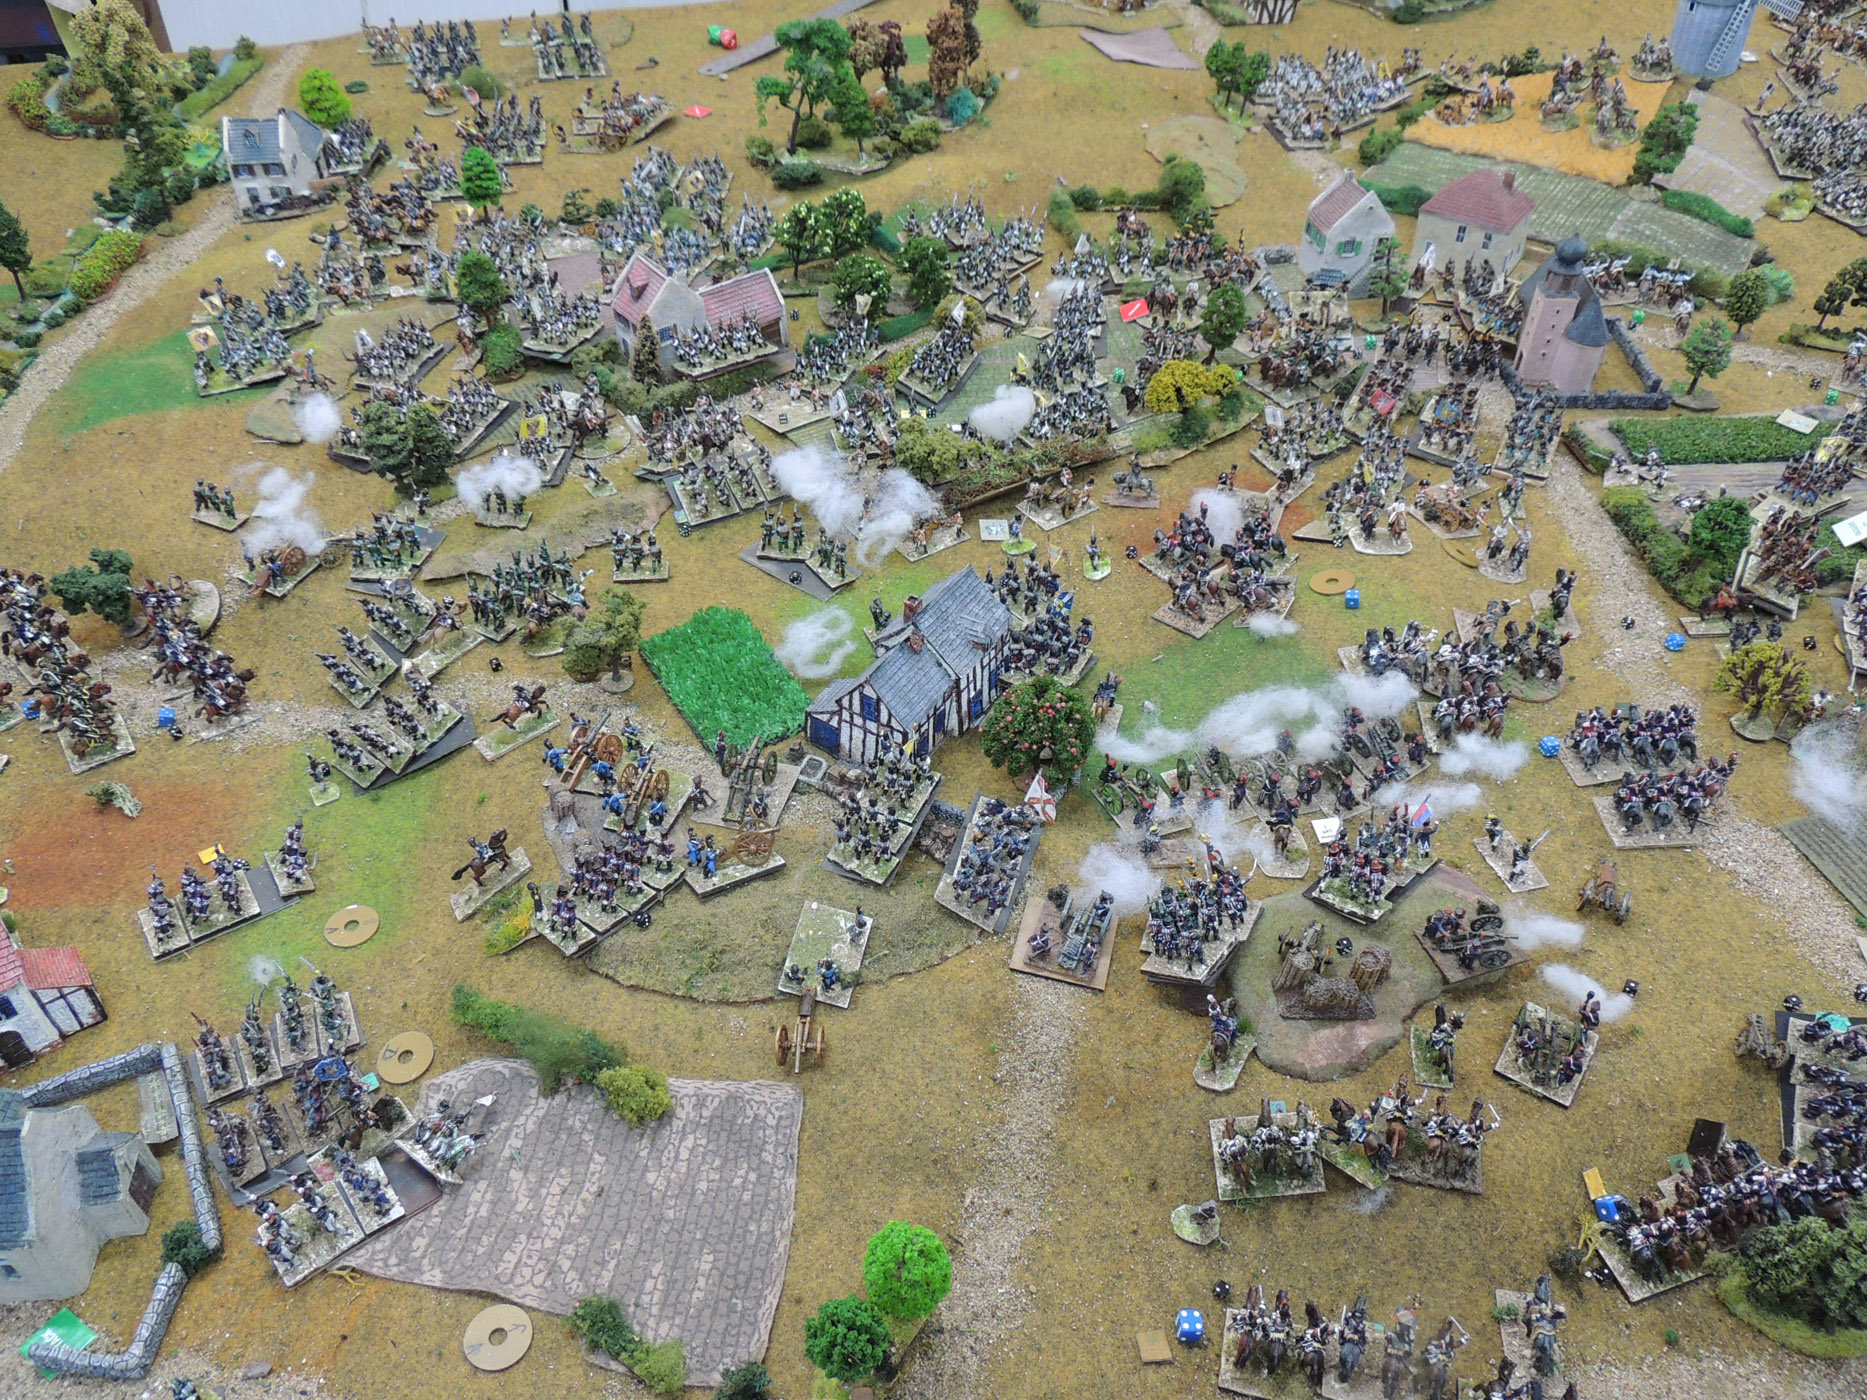
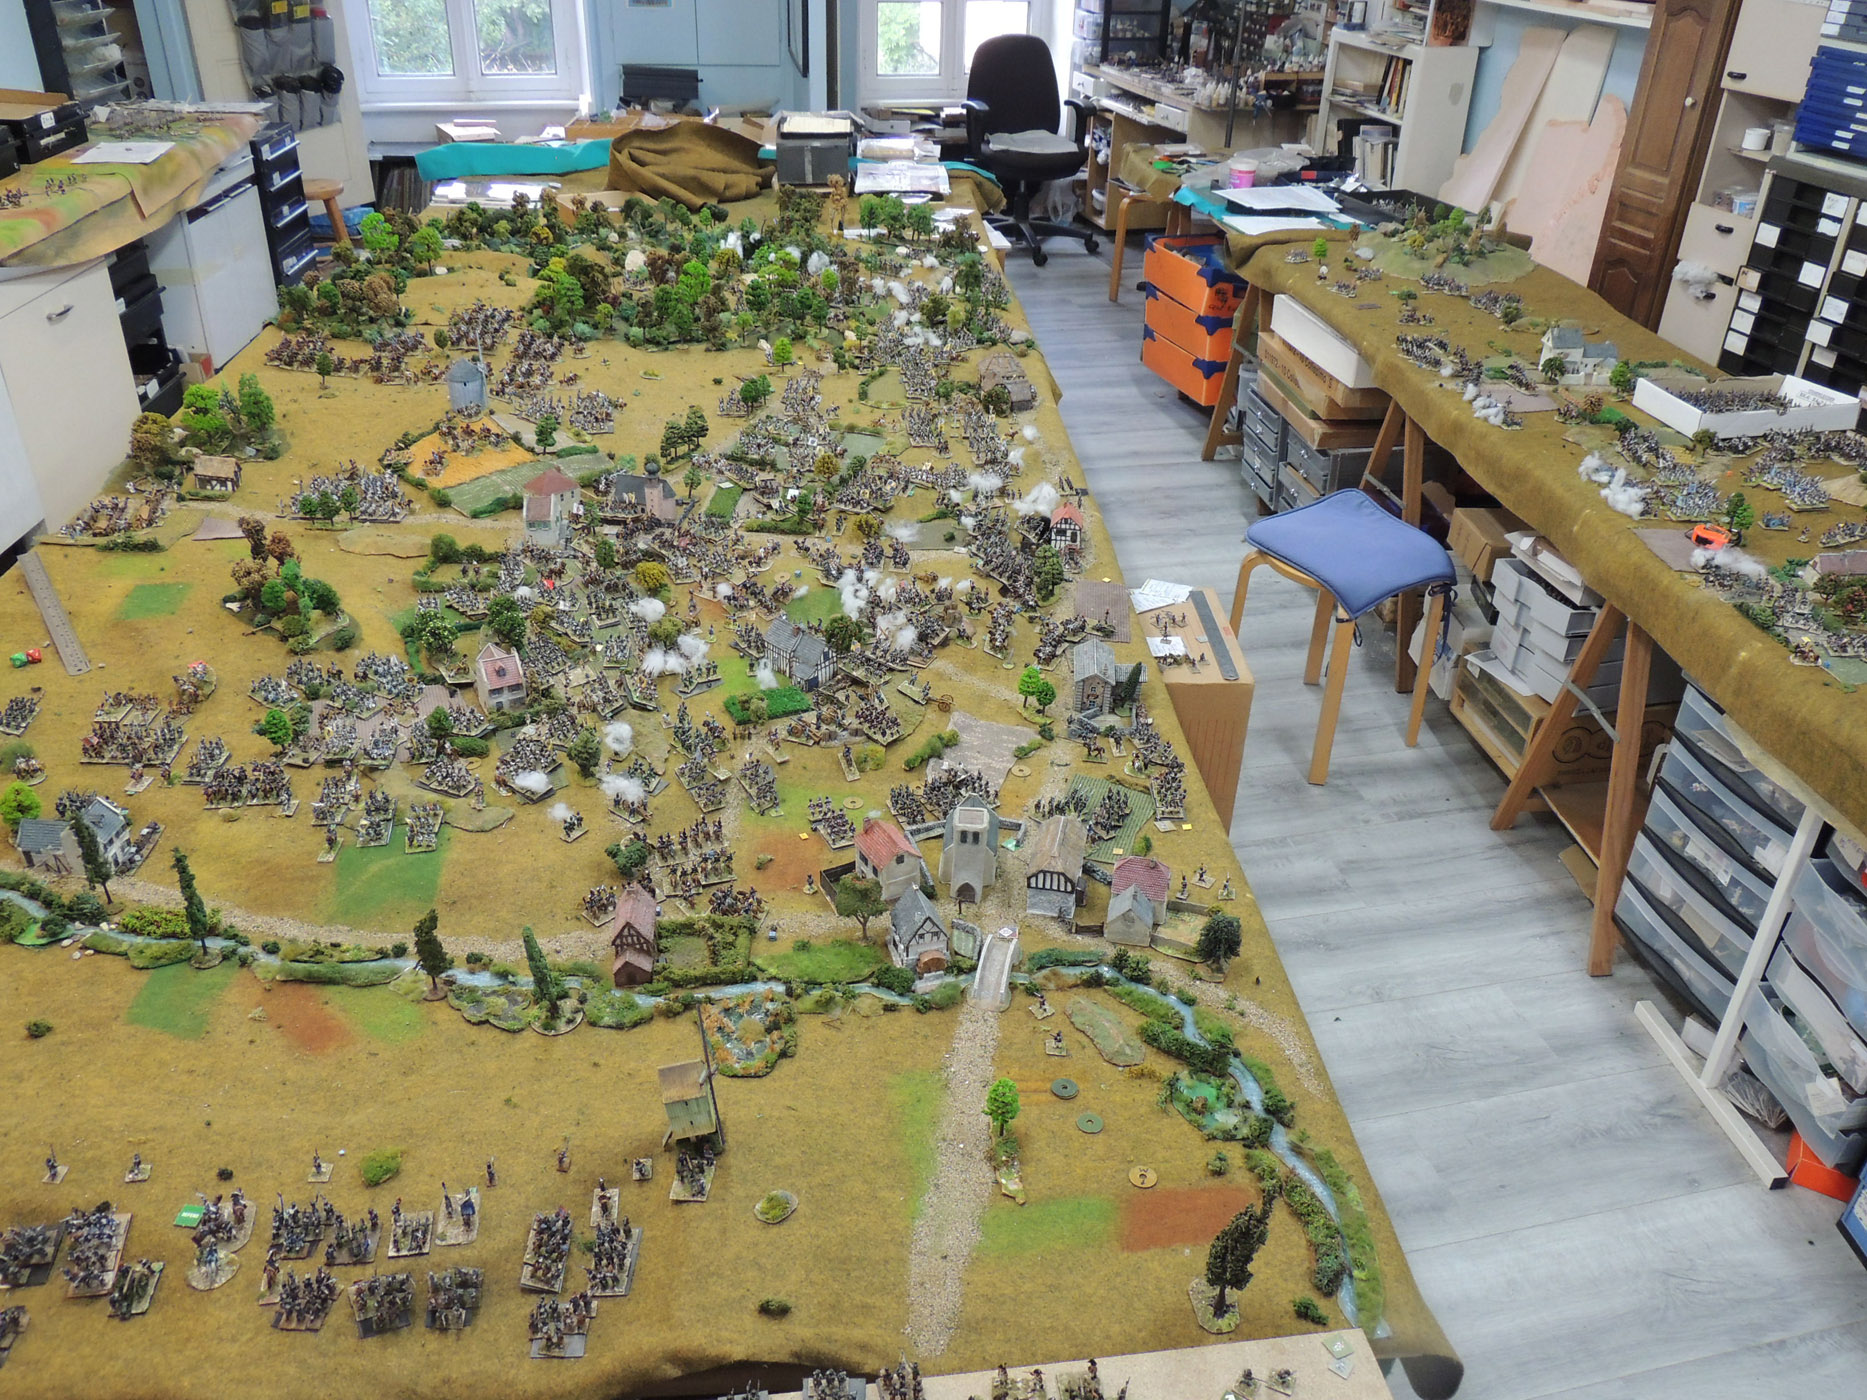
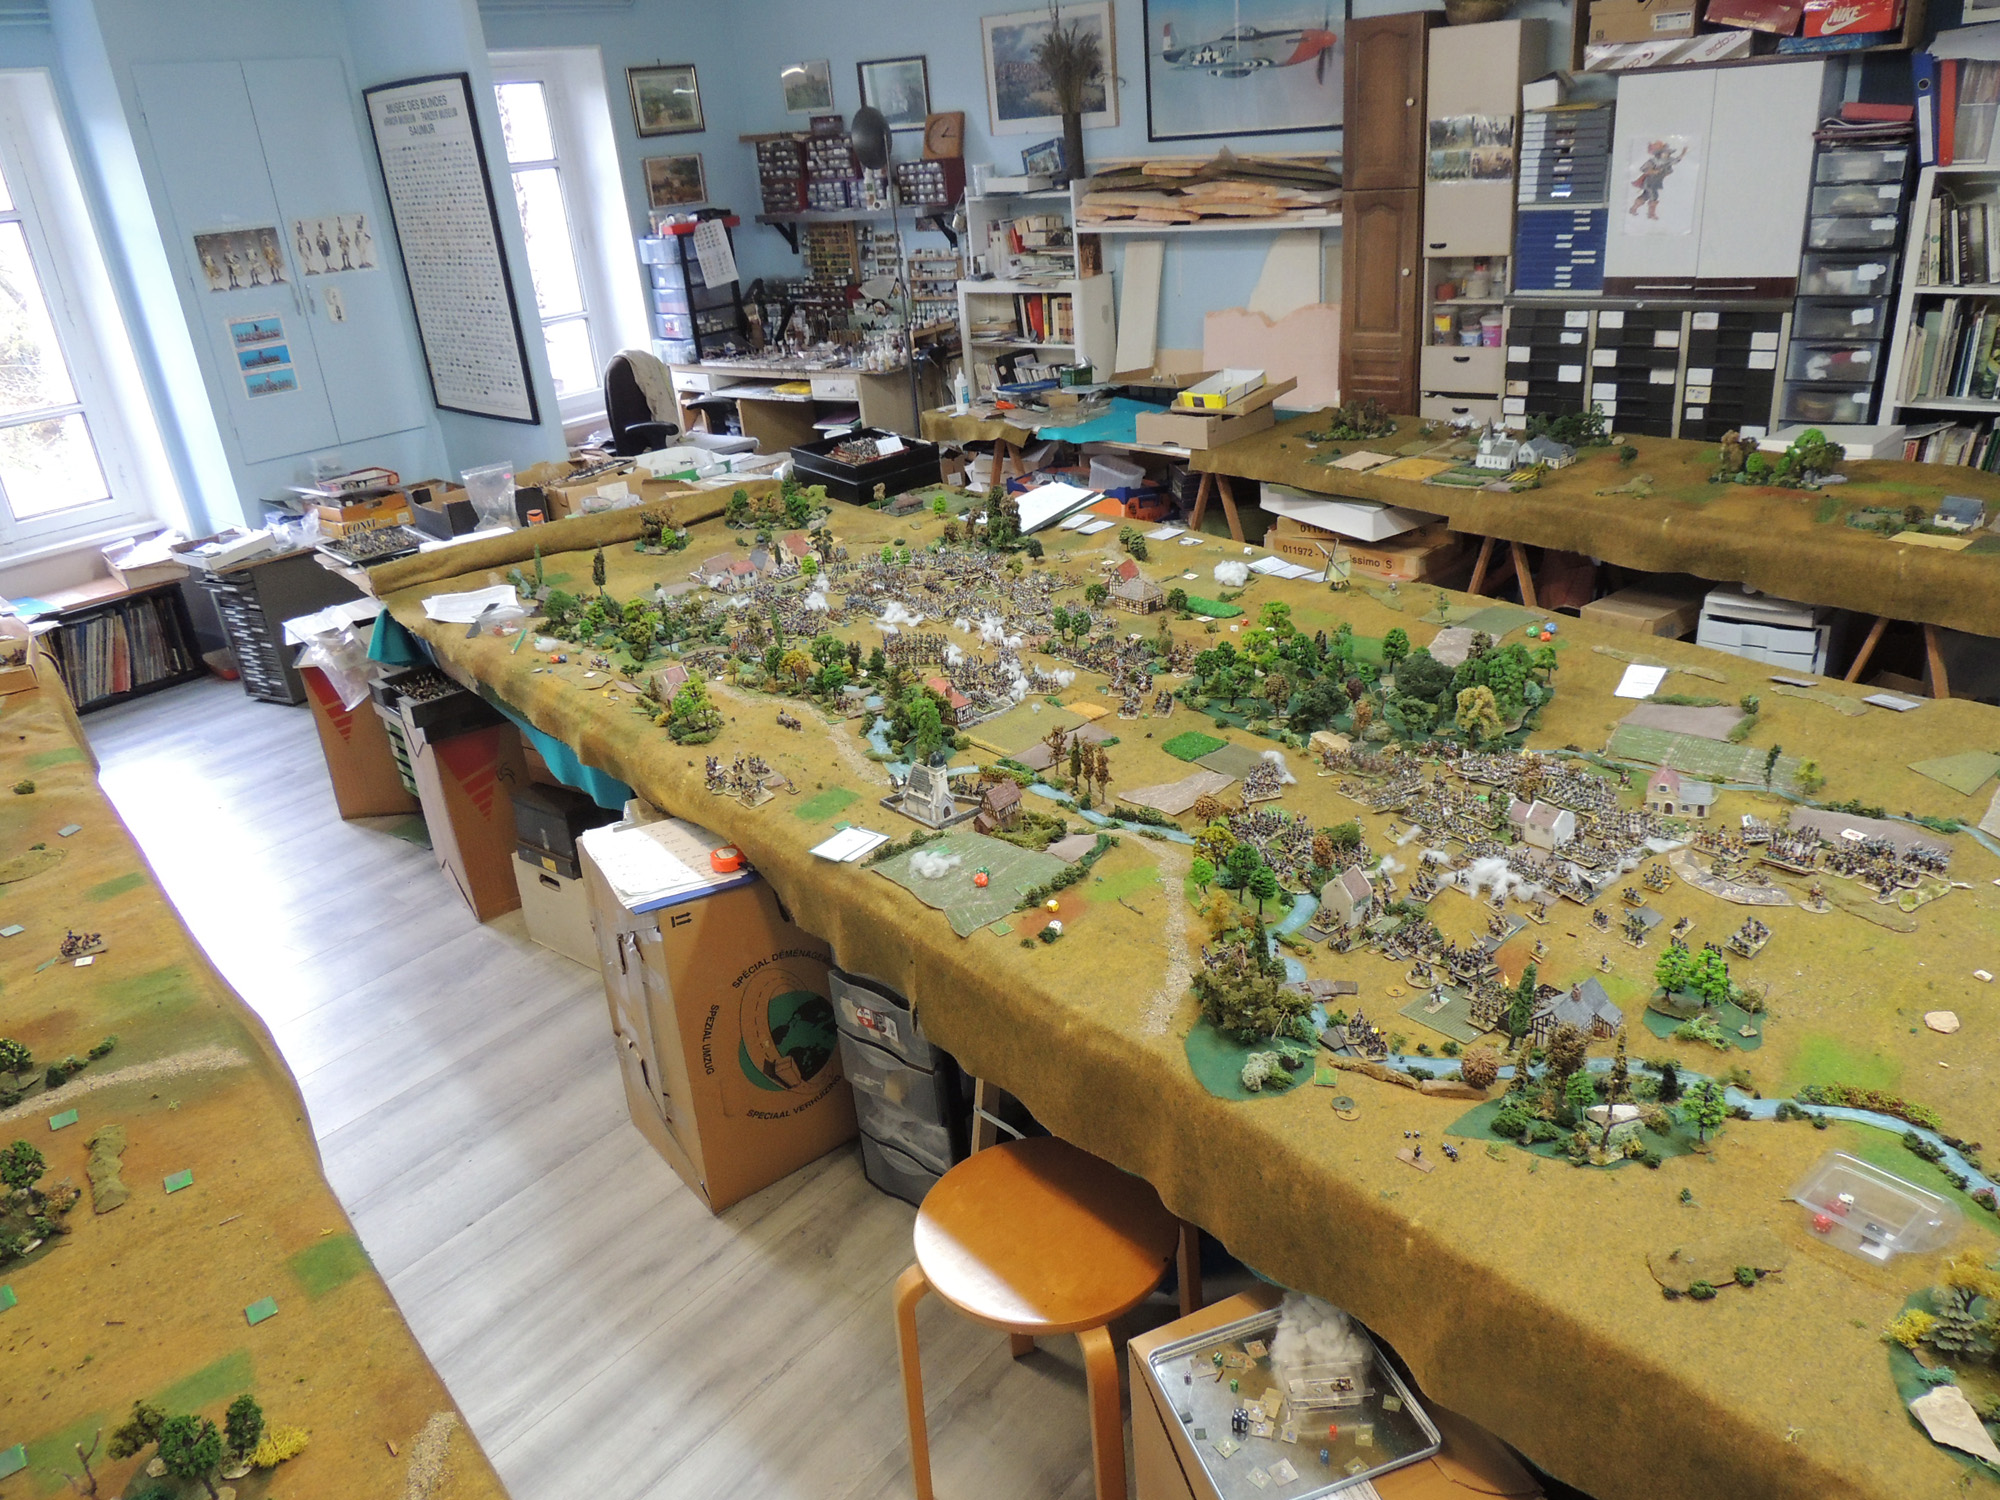
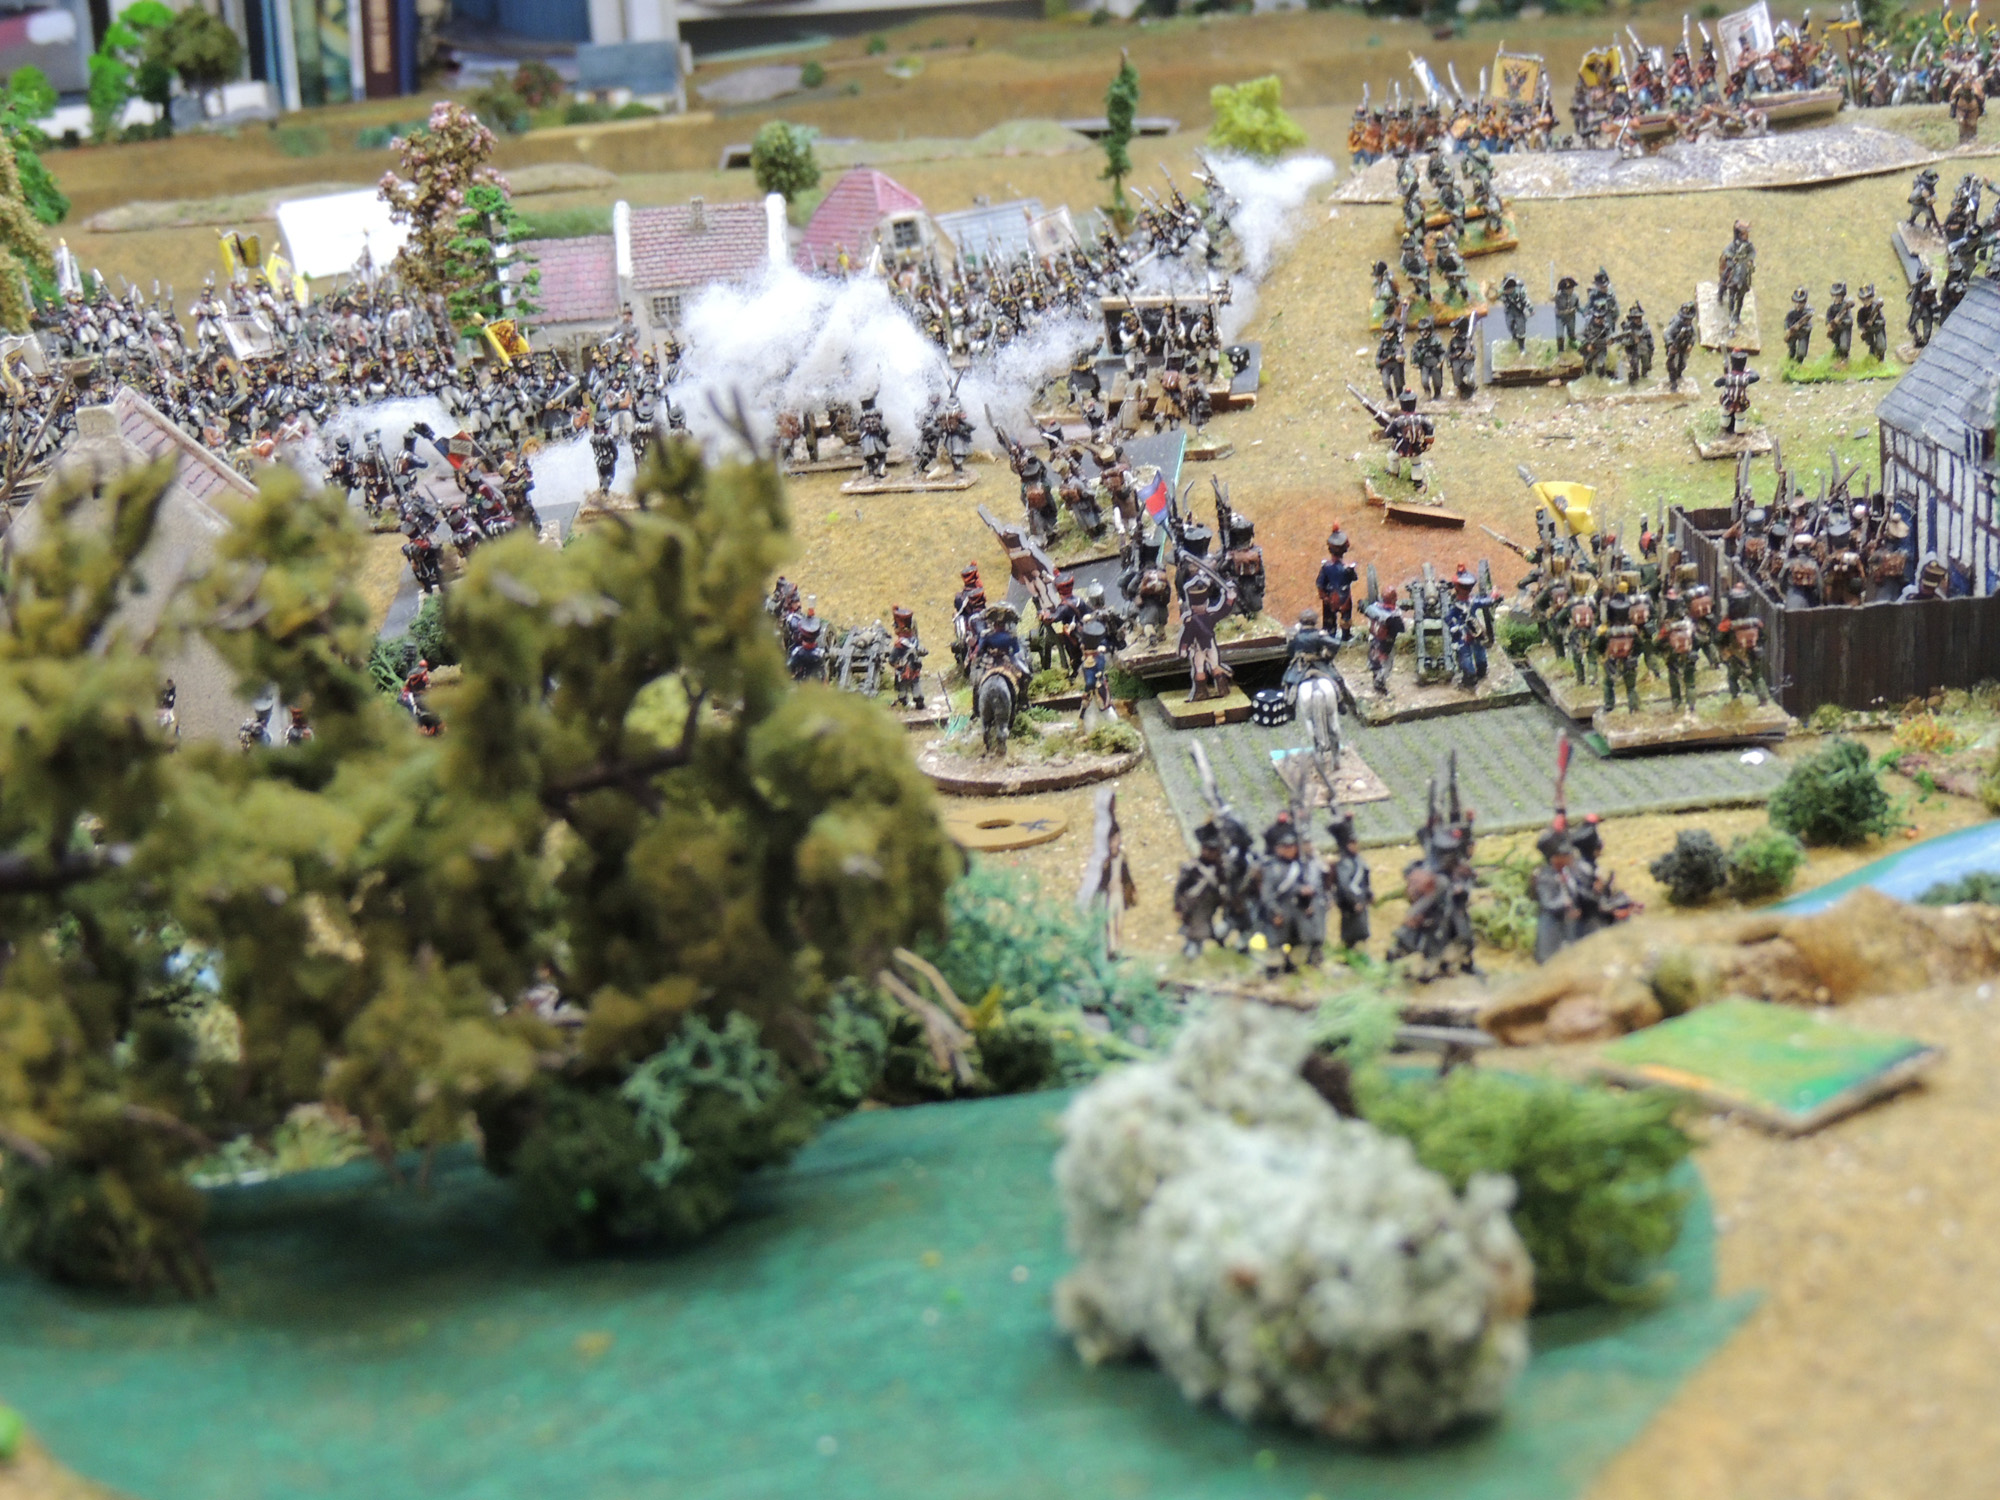
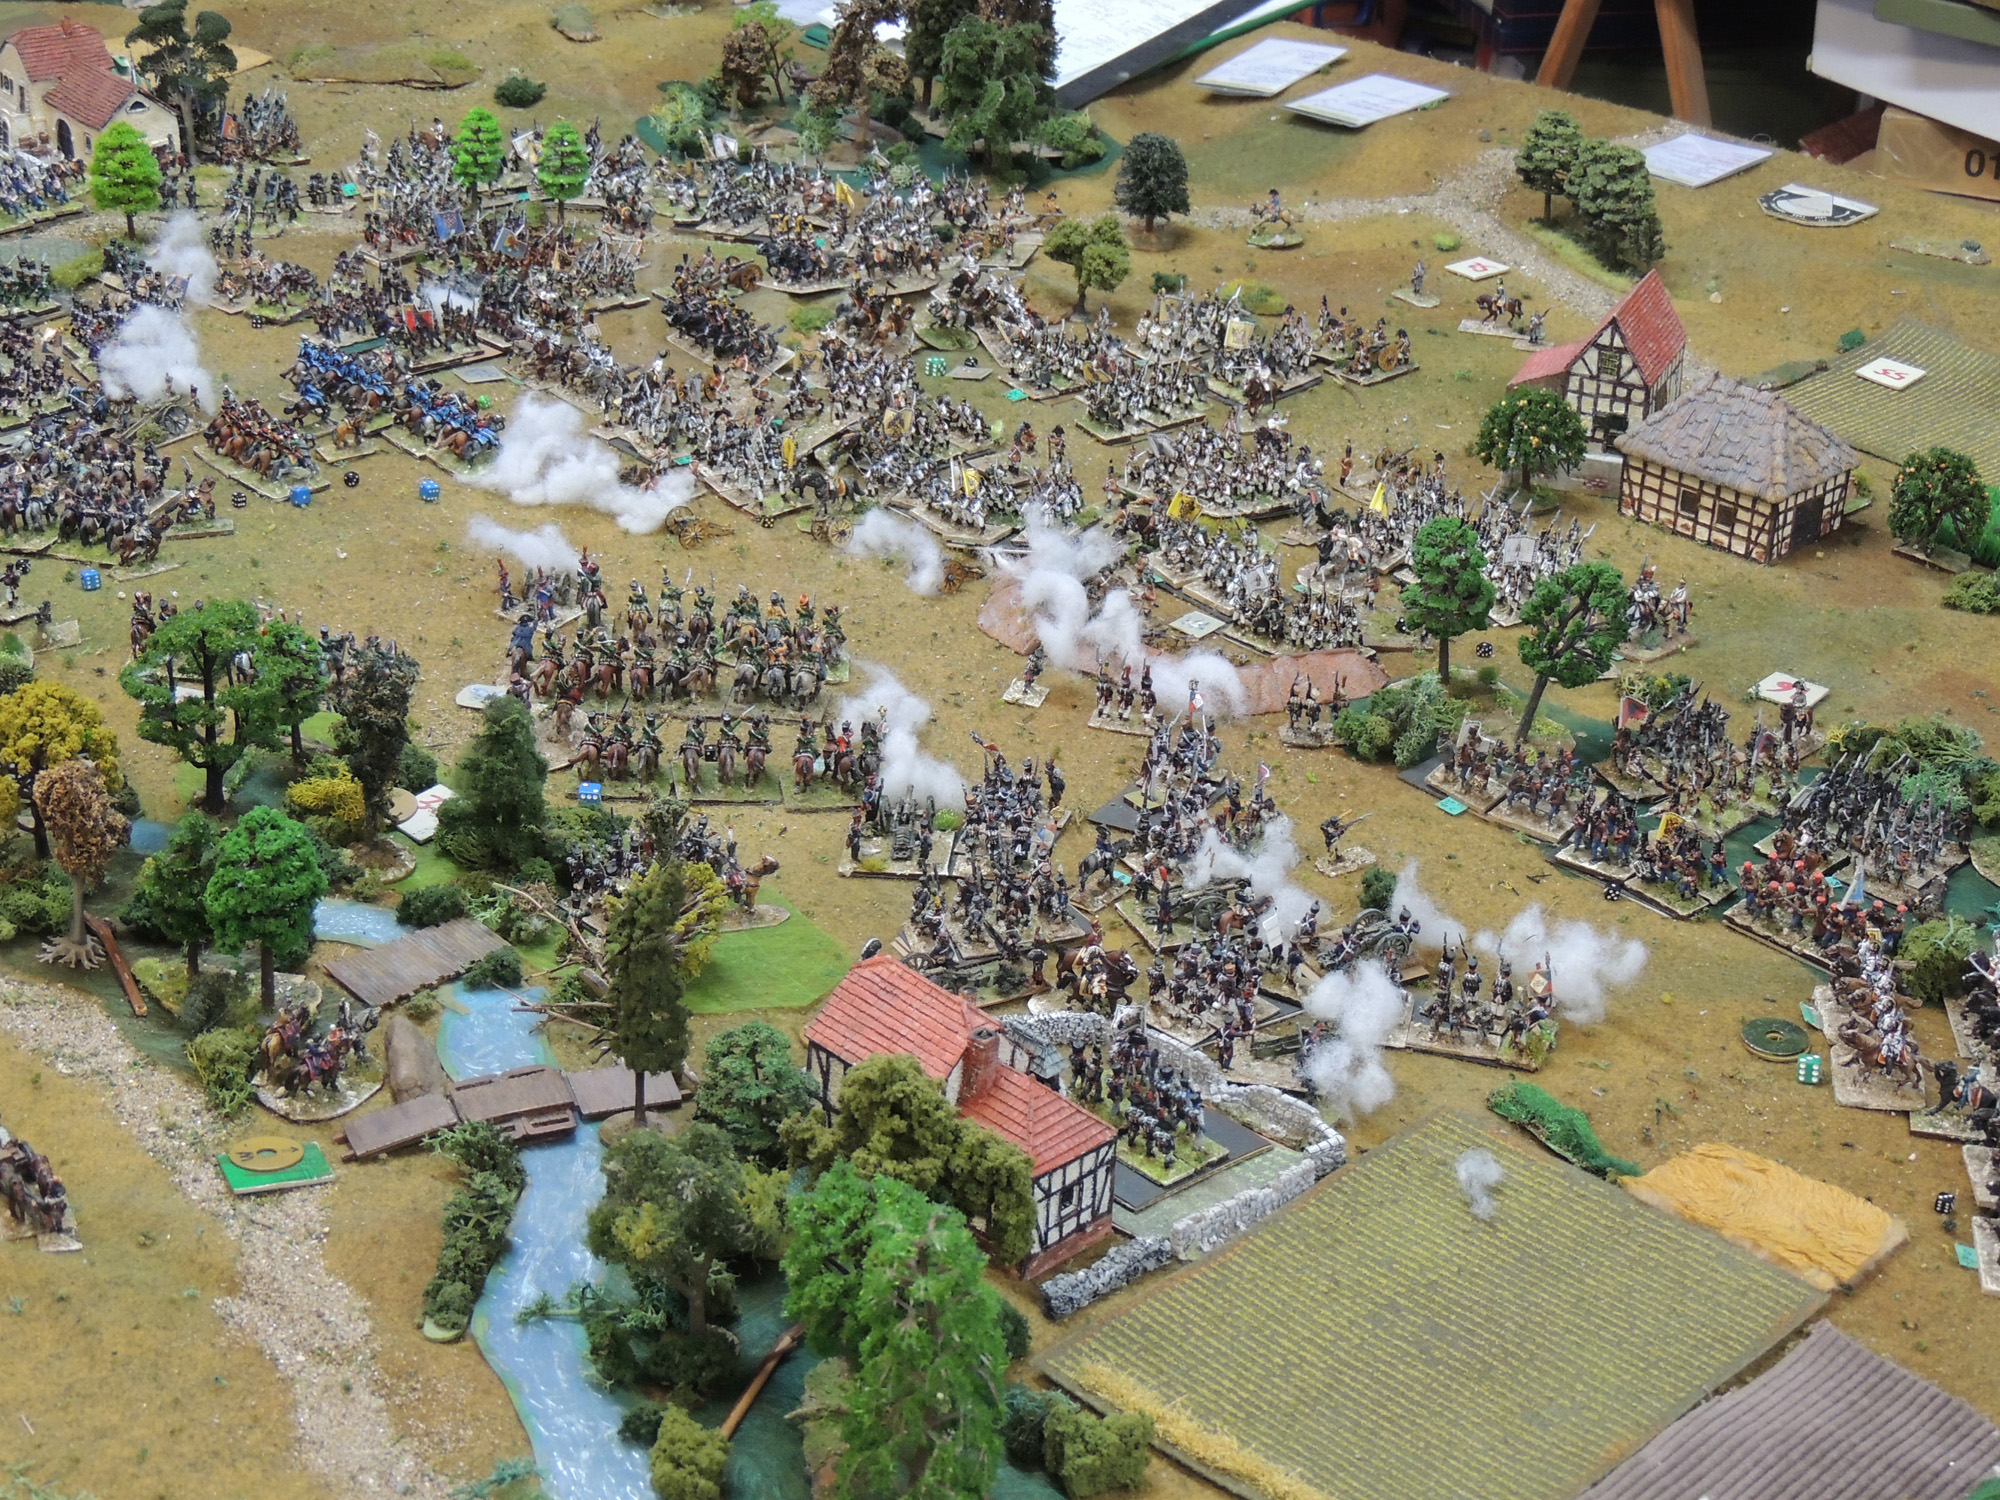
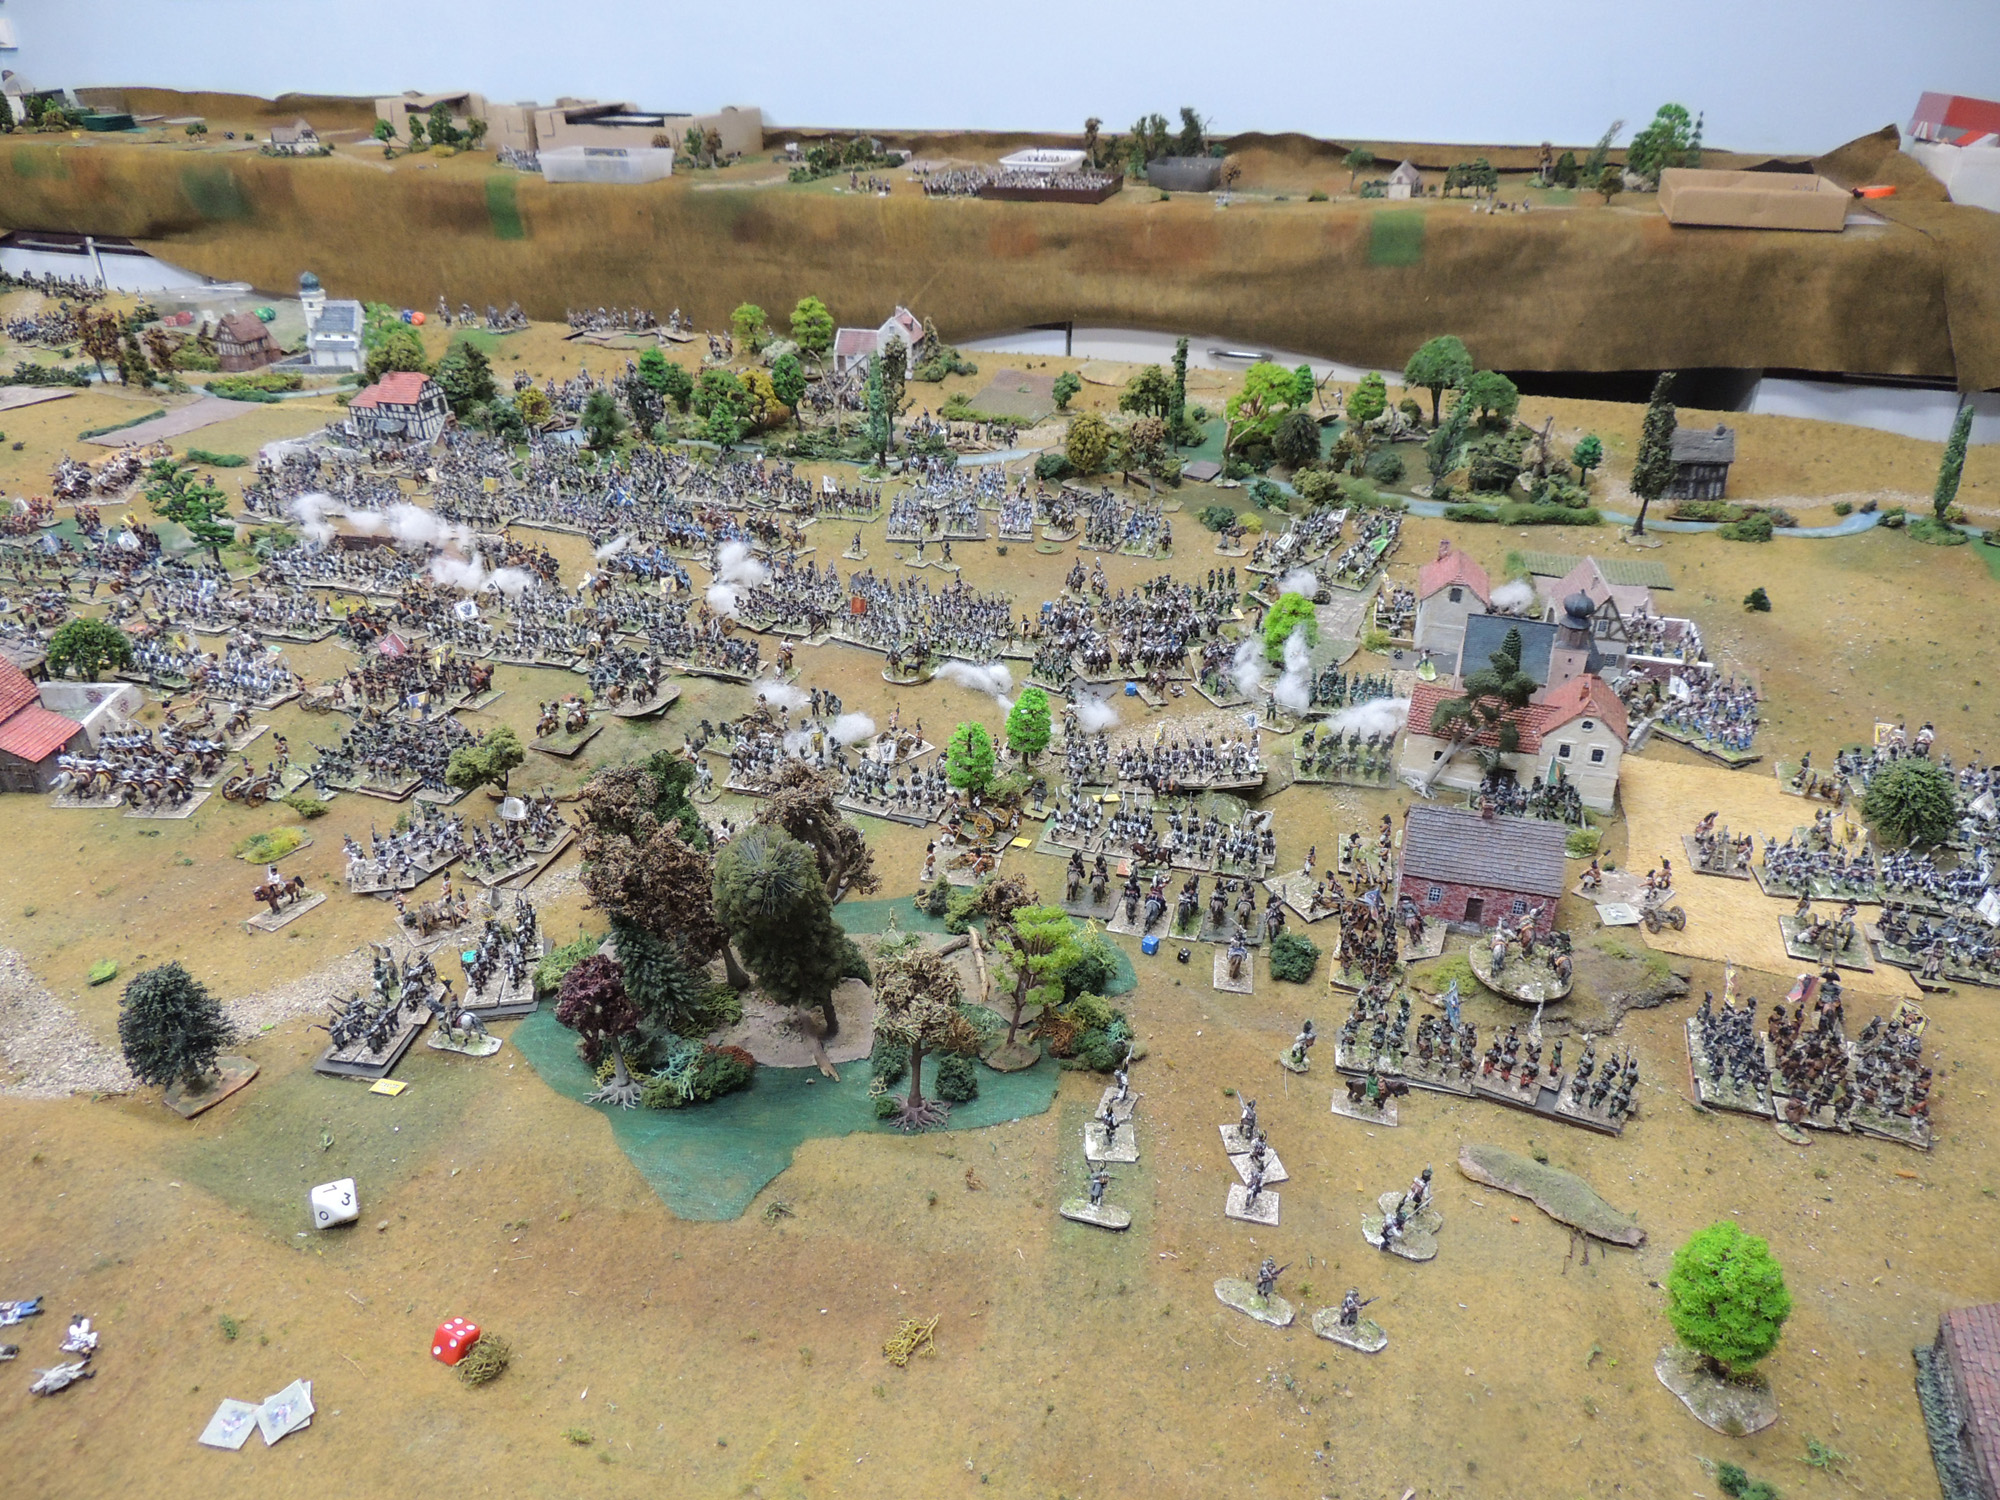
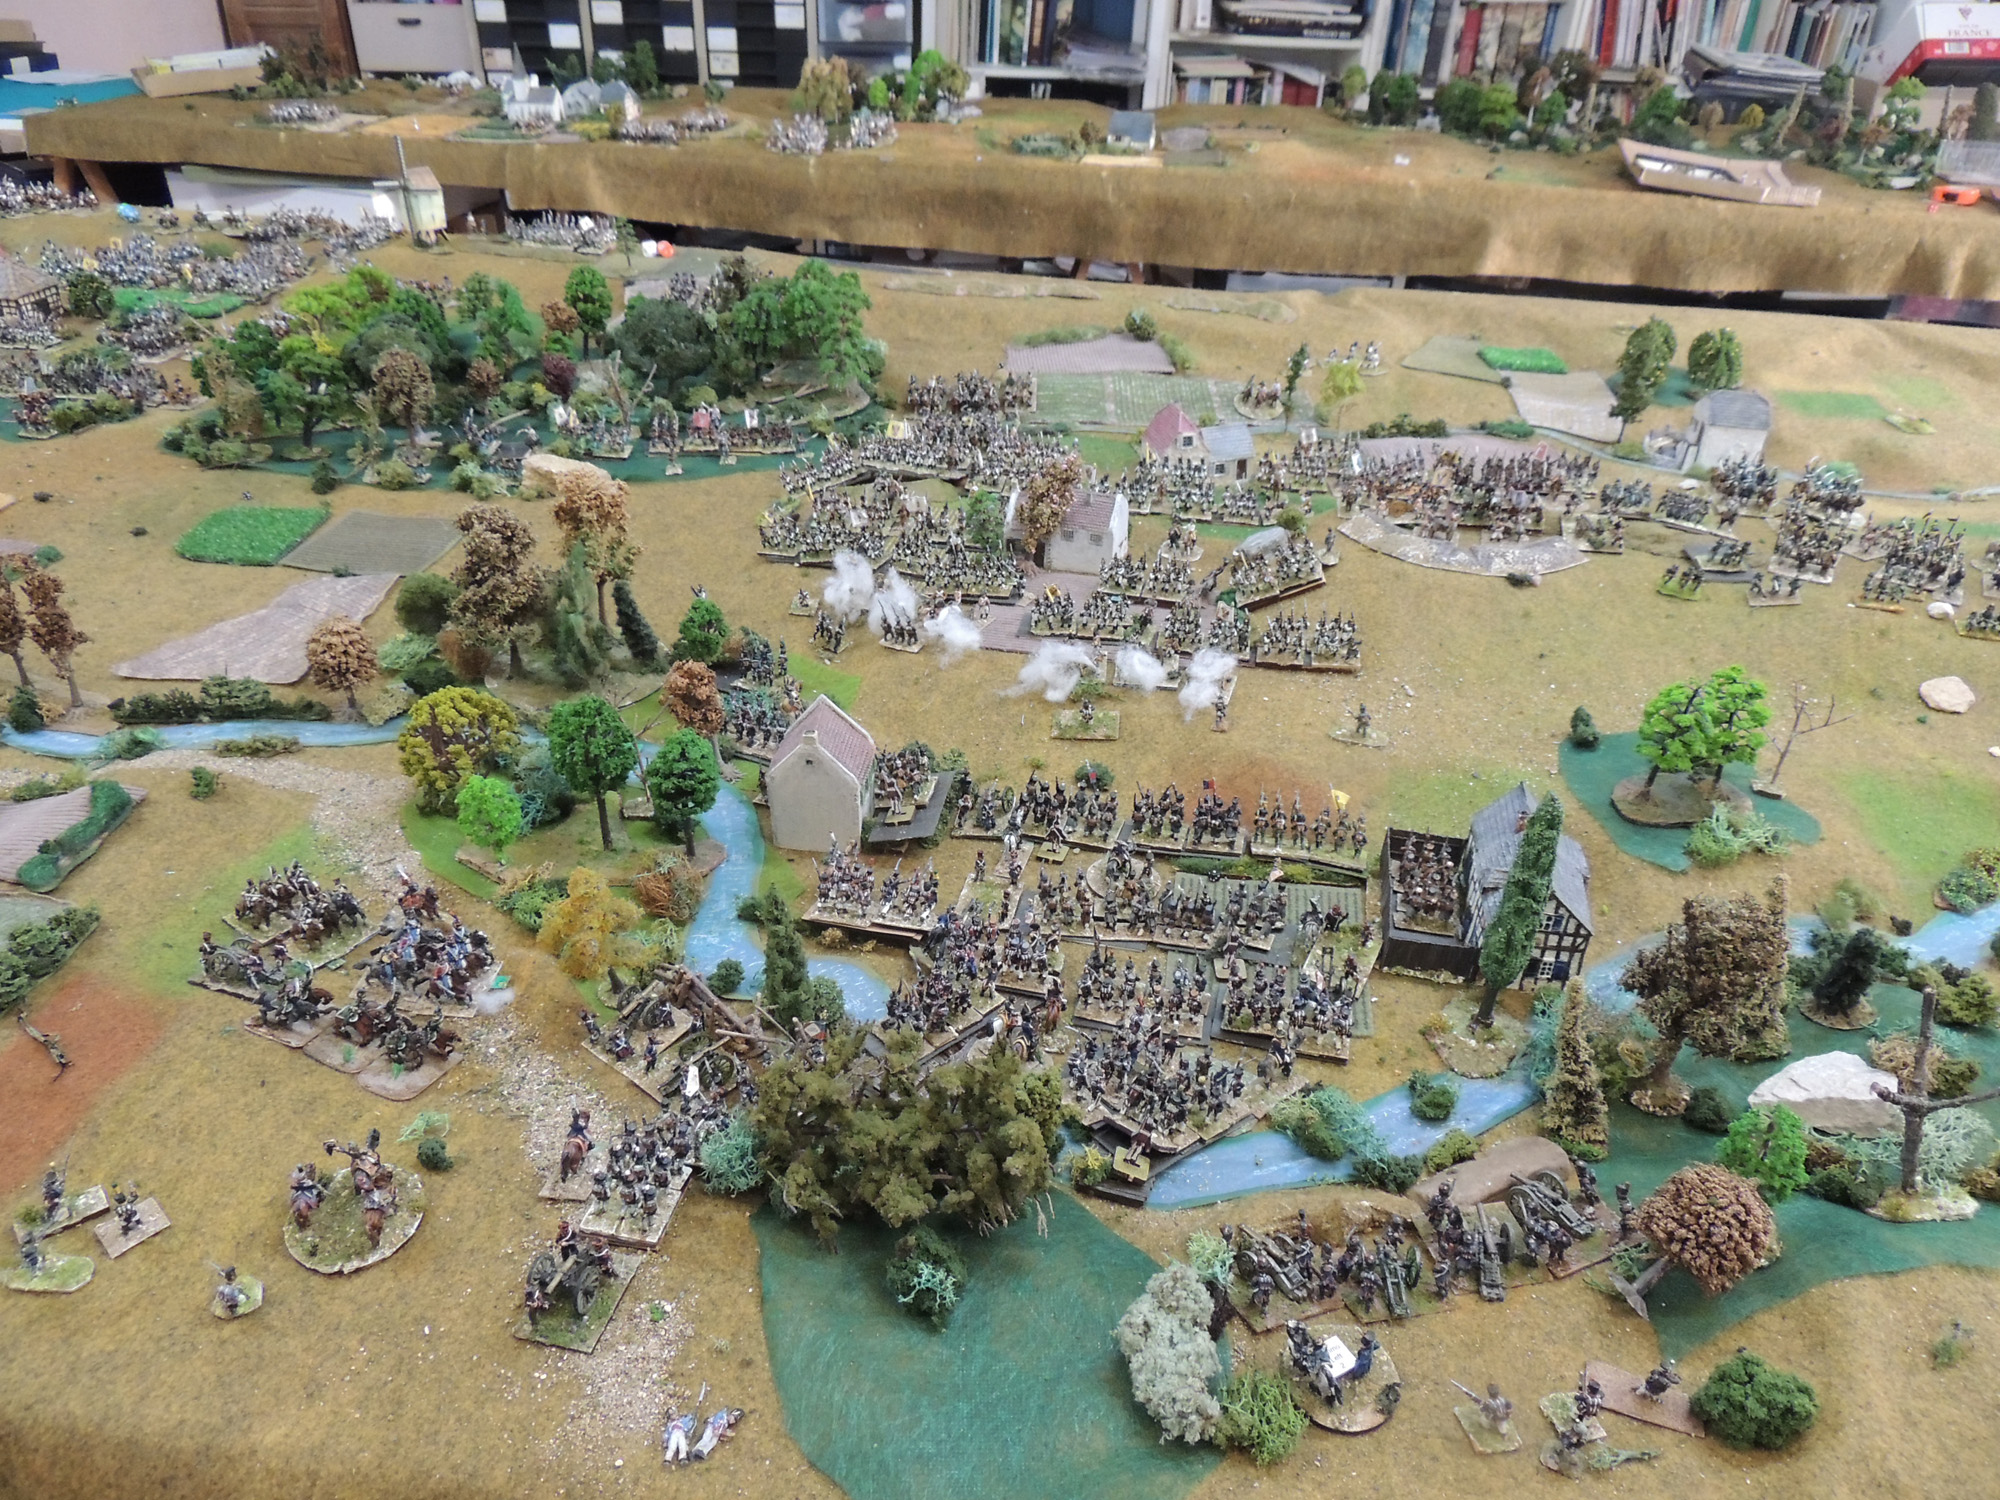
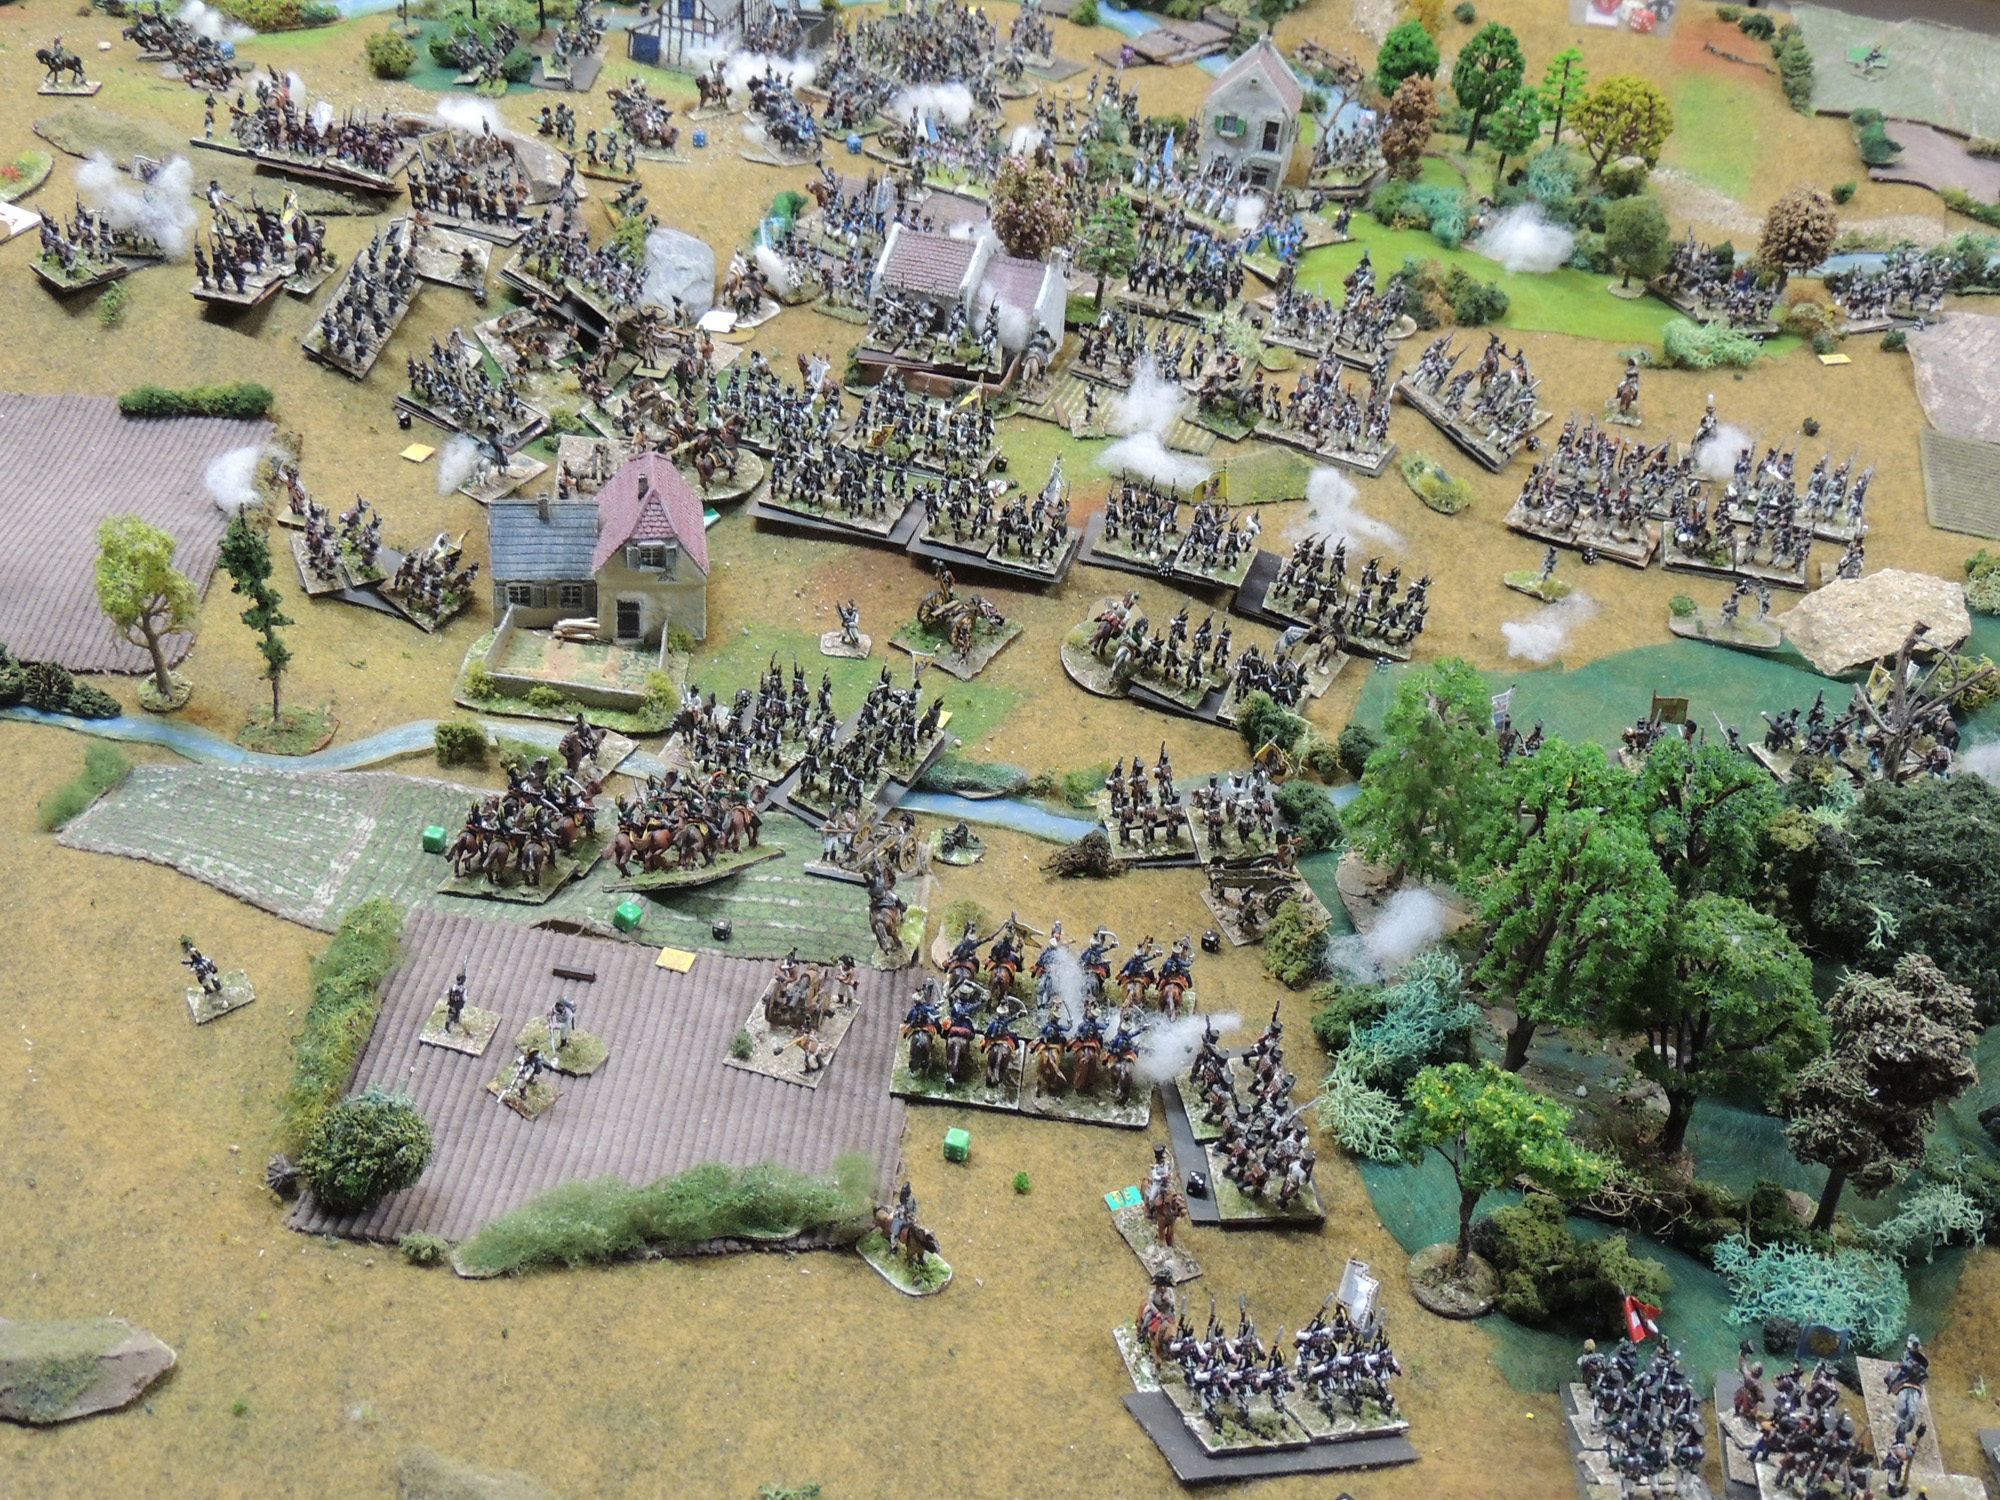
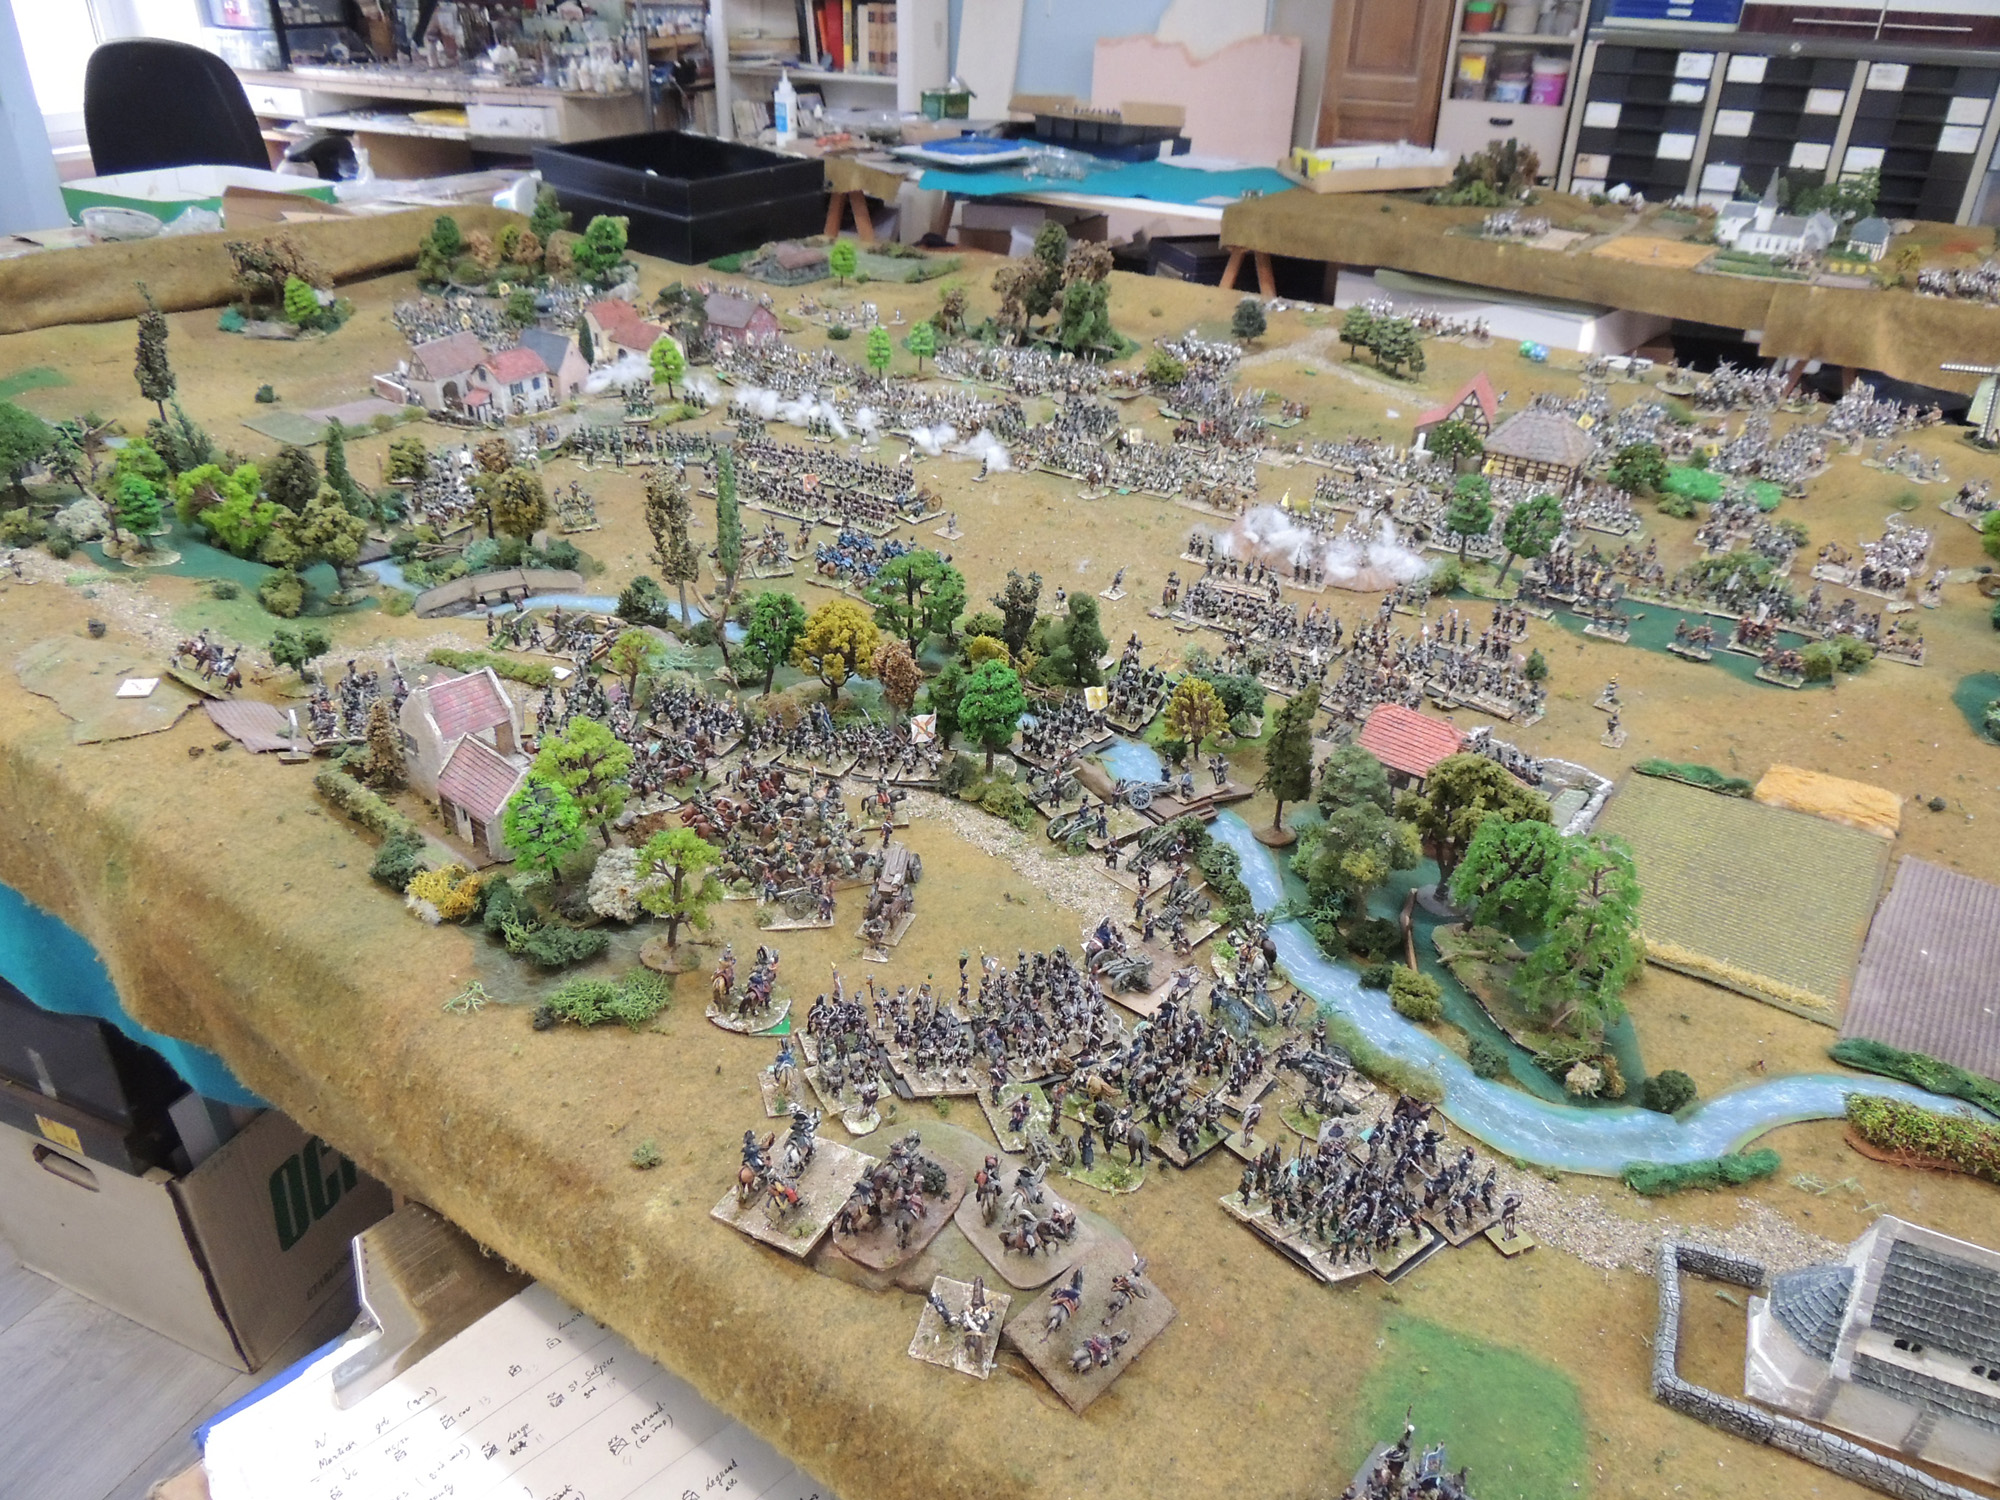
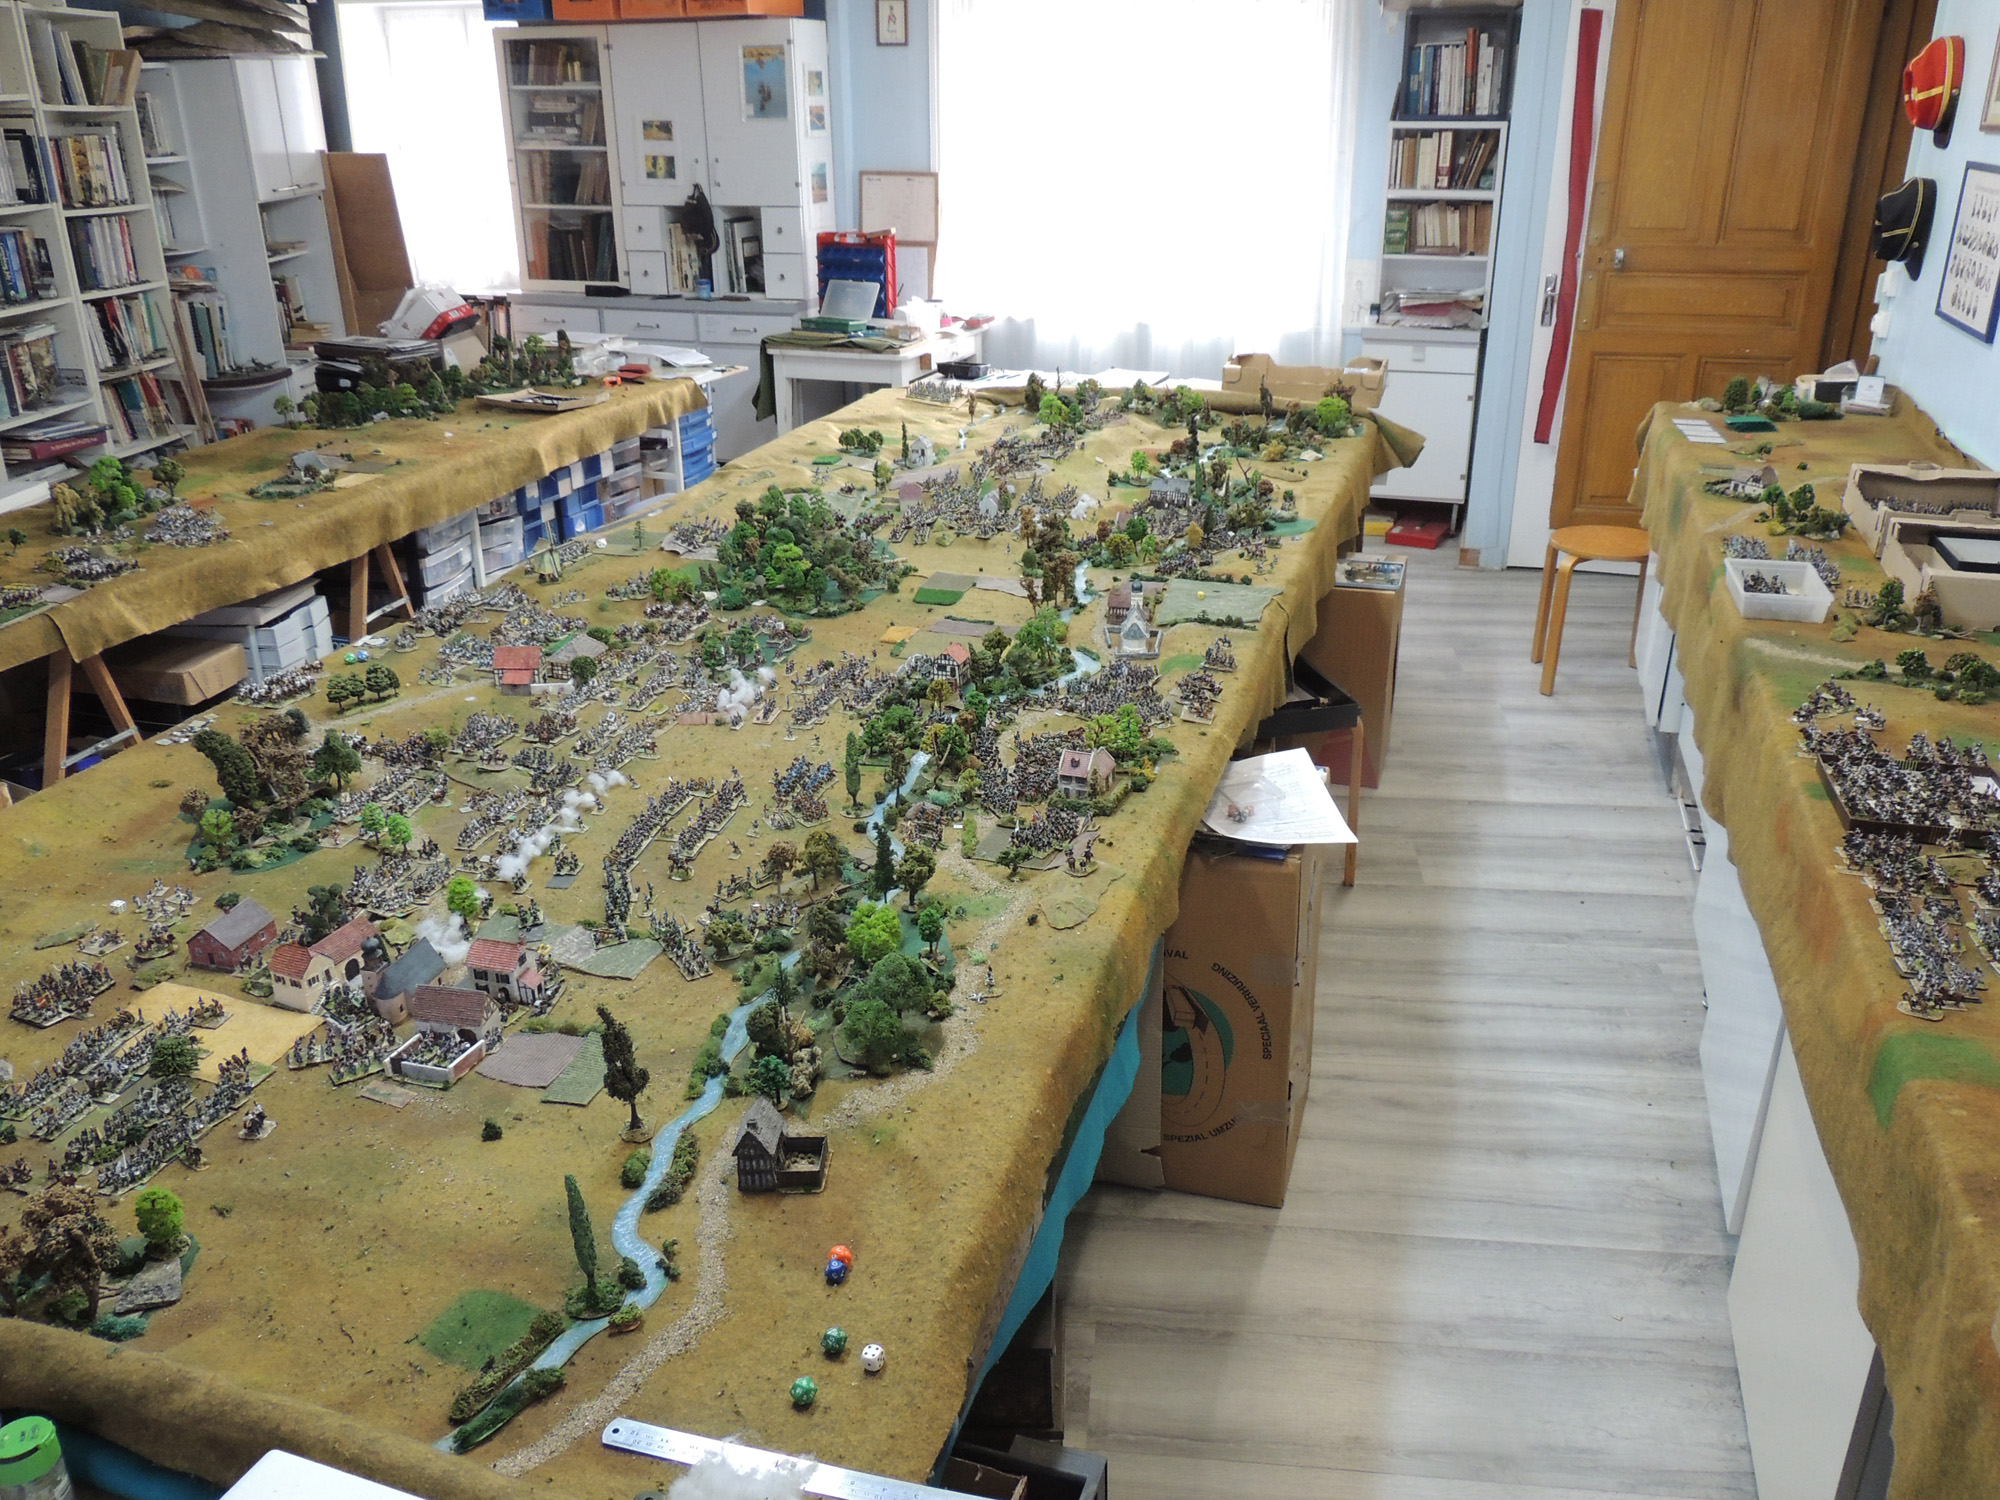
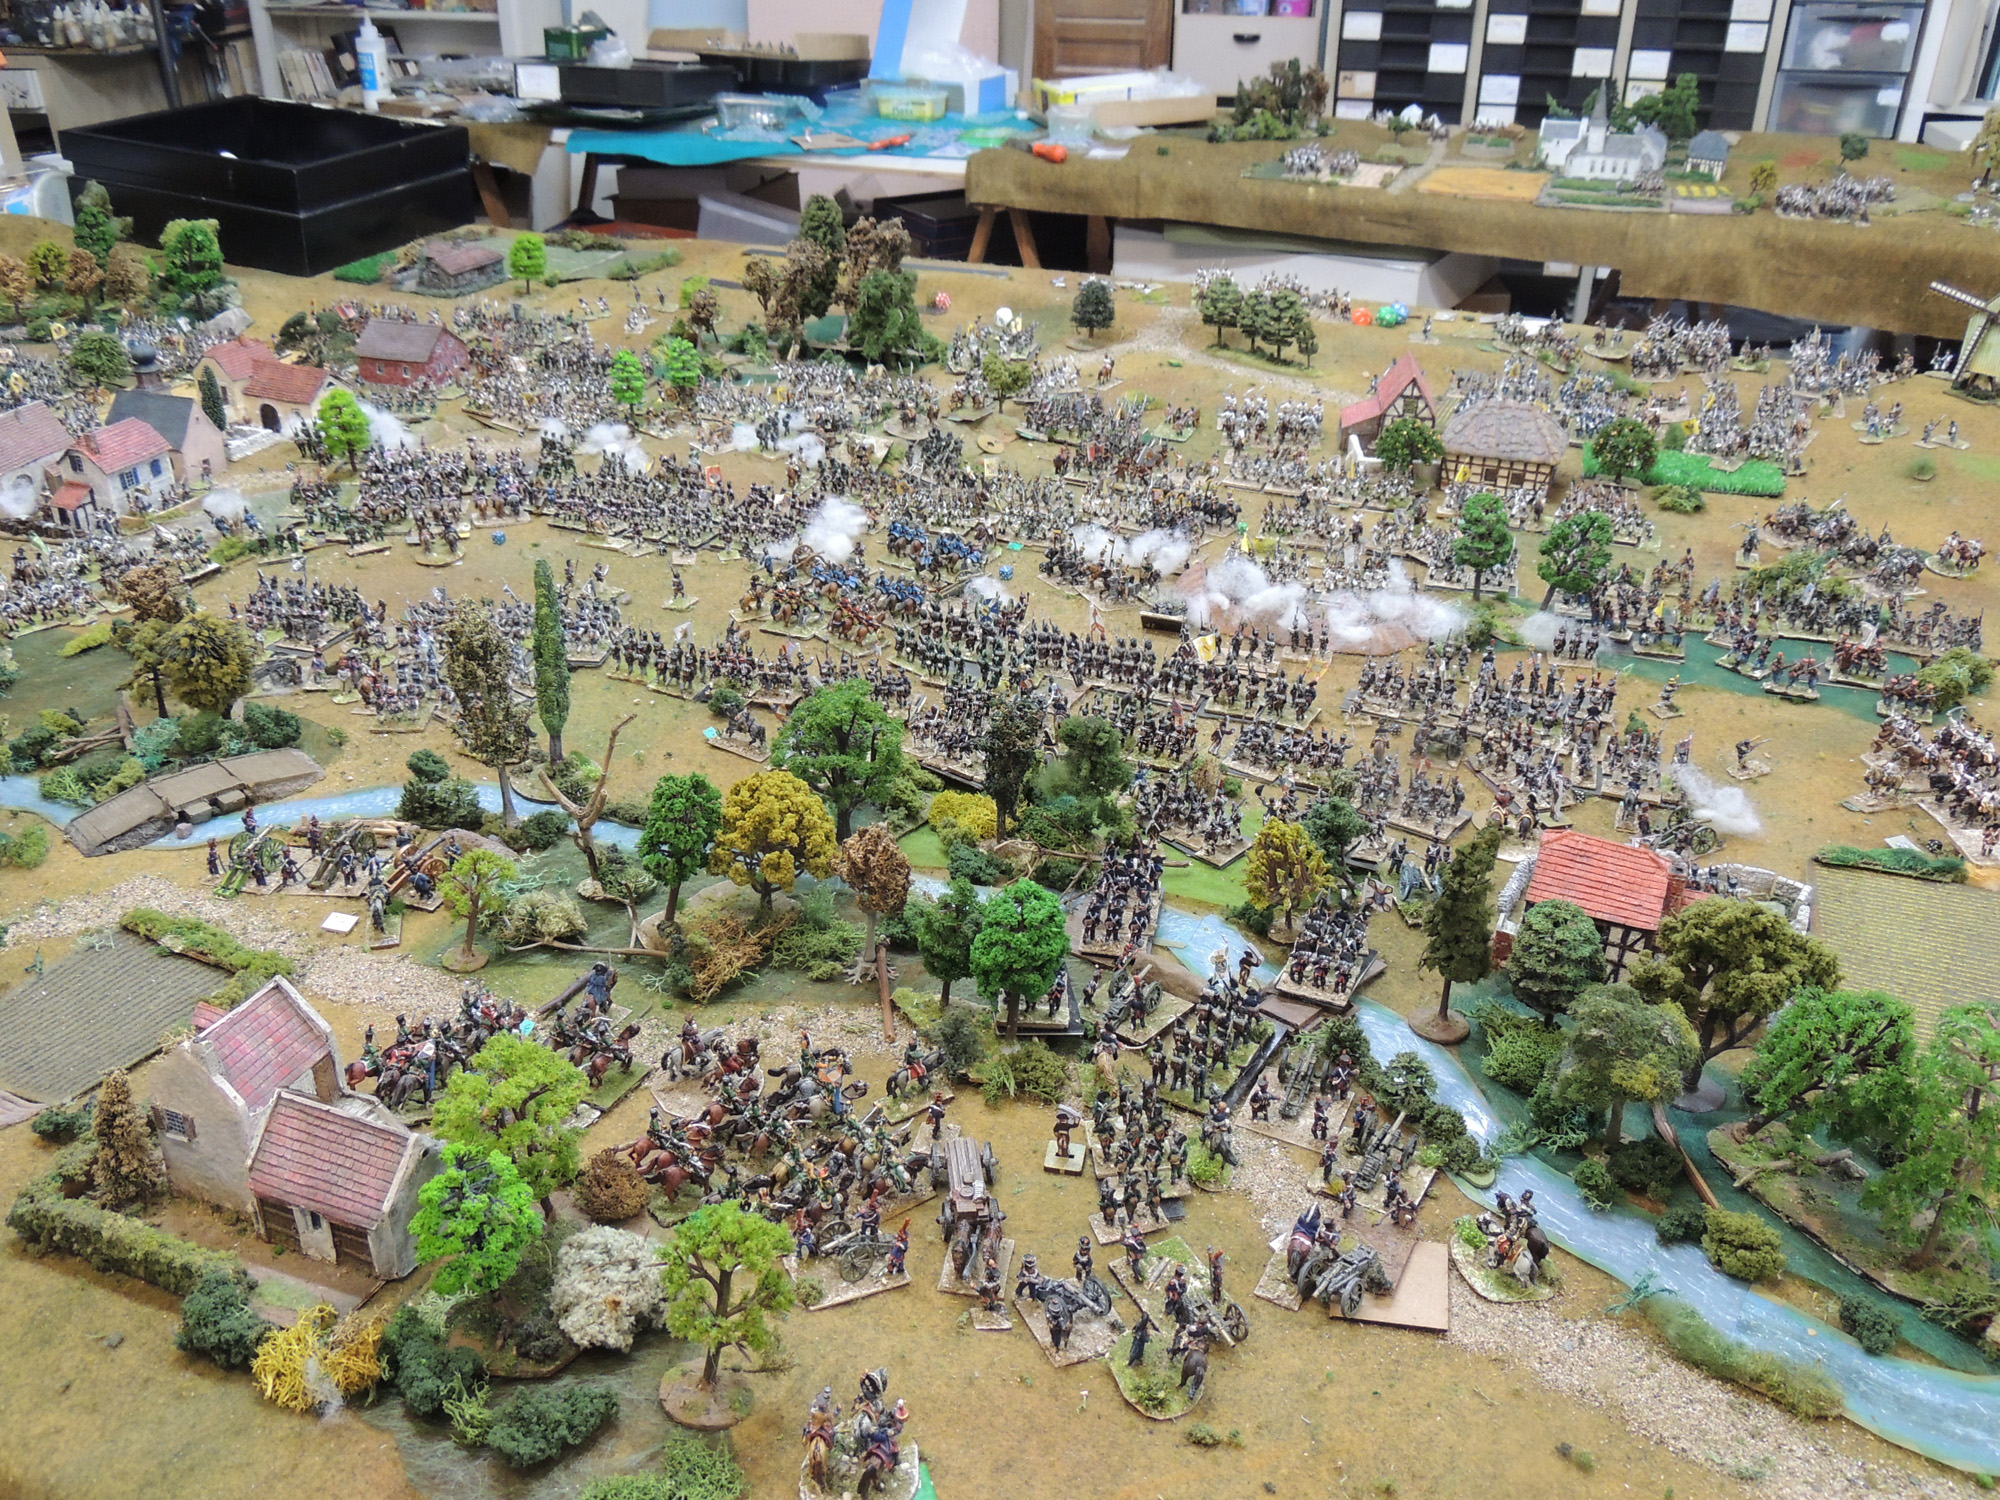
The Attack on the right by Lannes (seen from French POV)went half well. It did pin down a lot of Austrians but was severely counterattacked. The main power there was Saint Hilaire elite division who got stuck after initial gains around GT 11 as confronted by 2.5 divisions. Demont's conscripts had a hard time being engaged by numerous excellent Jäger seconded by Uhlans and artillery. The arrival of the Bavarian division plus the local grand battery then the cavalry brigade unstuck the fight for a while. I assumed the Austrian, after his initial counter attack was repulsed wanted to be able to free troops (from the arriving 3rd division of III. Korps from outside of the table) to go help the center. Combination of difficulties facing Lannes, delays and distances did not allow for it.
On the left, Vandamme did his job, engaging and damaging parts of two Austrain Korps. Got lucky when the D class little Saxon division manged to repulse the big divisional attack from V. Korps with the help of the Württemberg cavalry. The Wüttemberg infantry suffered , as did the supporting D class Westphalians, but then a second Cuirassier division decided yhe outcome (the first got exhausted trying combined arms attacks and countering Austrian horse then some of the cavalry reserve. Massena grinded down the Austrian VI corps, the best one. Long see saw fight with not enough space (note for future scenarios) to deploy all the French, especially the cavalry. The decisive factor was then around turn 15 when Davout corps was starting to get in position on the center right to fully exploit the split in the Austrian line with this big center wood, opened by Massena plus the hammering of two grand batteries (total 86 guns).
When he saw this coming, Charles decided to disengage while he still had time and use his heavy cavalry to keep the french infantry quiet while most of the French cavalry had no time nor space to deploy. The limits of the bridges were quite strong. Twice routing French troops even jammed one.
Again I got a bit overwhelmed and tired of the battle after days of doing a few hours, beside it was more or less set by turn 15, but I did not go to the very end as I should have done for a campaign. .It would have been interesting with two players and the full fog of war. This frontal crossing with a more or less prepared enemy in front is a bit preposterous. I might have had the Austrians too defensive, but when I rolled dice for decisions for Charles, he went a couple of time to "sleep", then the extended battlefield did not help him coordinating. I went to the simple way (from earlier version which attempted to consider the situation but proved to be too much)for rolling local initiative. Most Austrians , not surprisingly having low chances for it, ans the simple deterrent, is a badly missed attempt gets the enemy to give a new order/attitude. I think I might simplify things on this campaign , now and go directly to a Wagram as I have the proper mat for it, which I never used. Not sure the fidgeting game along the crossings, bluff and decoys will be interesting in a solo game.
Losses 9000 infantry 24 guns and 1400 horse for the Austrians
6000, 6, and 1600 for the French. Nearly half of the troops were not engaged or very late.

HTML Builder